How To Harden Wood: Your Ultimate Guide to Stronger, More Durable Projects
To harden wood, you generally use chemical impregnation (like epoxy resins, CA glue, or wood stabilizers) or thermal treatment. Chemical methods fill wood pores, making it denser and more resistant to scratches and moisture. Thermal treatment, like heat curing, alters wood’s cell structure for increased stability and durability. Always prioritize safety and follow product-specific instructions for best results.
Ever wondered how to make your woodworking projects stand up to more wear and tear? Many beginners and DIY enthusiasts find the idea of making wood stronger a bit mysterious, and figuring out where to start can feel overwhelming. You’re not alone! It’s a common challenge, but I’m here to tell you that hardening wood is a very achievable skill that can significantly boost the durability and longevity of your creations. With the right techniques and a little patience, you can transform ordinary wood into something remarkably robust. Let’s dive into how you can make your wood tougher and more resilient, opening up a world of possibilities for your next project!
As woodworkers, we often seek ways to enhance our materials. Making wood harder isn’t just about resisting dents; it’s about extending the life of your projects, improving their stability, and even making them more suitable for high-traffic areas. Whether you’re crafting a cutting board, a sturdy tabletop, or a unique piece of furniture, understanding how to harden wood can elevate your work from good to exceptional.
Why Would You Want To Harden Wood? Understanding the Benefits
You might be thinking, “Isn’t wood already hard enough?” While many wood species boast impressive natural strength, there are compelling reasons why you might want to give your wood an extra boost in hardness and durability.
- Increased Durability: Hardened wood resists scratches, dents, and general wear much better, making it ideal for items that see a lot of use, like countertops, flooring, or tool handles.
- Enhanced Stability: Many hardening processes also stabilize the wood, reducing its tendency to warp, crack, or expand/contract with changes in humidity. This is crucial for precise projects.
- Moisture Resistance: By filling the wood’s pores, some hardening methods create a barrier against moisture, which can prevent rot and decay, especially in outdoor or humid environments.
- Improved Longevity: Simply put, harder wood lasts longer. Your cherished projects will withstand the test of time and everyday life with greater resilience.
- Better Finish Acceptance: A denser, more stable surface can sometimes lead to a smoother, more lustrous final finish, whether you’re painting, staining, or clear-coating.
Imagine a kitchen cutting board that resists knife marks for years, or a workbench that stands up to heavy use without showing its age. That’s the power of learning how to harden wood.
Essential Methods for How To Harden Wood
There are several effective ways to harden wood, ranging from simple topical applications to more advanced treatments. Each method has its ideal uses, advantages, and considerations. Let’s explore the most common techniques.
| Method | Principle | Best For | Difficulty |
|---|---|---|---|
| Chemical Impregnation (Epoxy/CA Glue) | Fills wood pores with resin, increasing density. | Small to medium projects, stabilizing spalted/punky wood, turning blanks. | Beginner to Intermediate |
| Wood Stabilizers (Resins) | Vacuum/pressure forces resin deep into wood, curing it. | Turning blanks, knife scales, high-end crafts, highly porous wood. | Intermediate to Advanced (requires specialized equipment) |
| Thermal Treatment (Heat Curing) | Alters wood’s cellular structure through controlled heat. | Flooring, decking, outdoor furniture, structural components. | Intermediate to Advanced (requires specialized equipment) |
Method 1: Using Chemical Hardeners (Epoxy, Cyanoacrylate, Wood Stabilizers)
Chemical hardening is one of the most accessible and popular methods for hobbyists. It involves introducing a liquid resin into the wood, which then cures and hardens, making the wood denser and more stable.
Step-by-Step Guide: Applying a Chemical Hardener
This guide focuses on epoxy or CA glue for smaller projects, as full wood stabilization often requires specialized vacuum chambers.
- Prepare the Wood:
- Ensure your wood piece is clean, dry, and free of dust or debris.
- Sand the surface to your desired grit, as any imperfections will be sealed in.
- For softer or punky wood, you might want to rough sand to allow better penetration.
- Choose Your Hardener:
- Epoxy Resin: A two-part system that offers excellent penetration and durability. Thin epoxies are best for penetrating deeper.
- Cyanoacrylate (CA) Glue: “Super glue” can be very effective for smaller areas, filling small cracks, or spot hardening. Thin CA glue penetrates best.
- Commercial Wood Hardeners/Stabilizers: These are often water-thin resins designed specifically for wood. Some can be applied by brushing, others require soaking or vacuum.
- Safety First!
- Always work in a well-ventilated area.
- Wear appropriate Personal Protective Equipment (PPE):
- Gloves: Nitrile gloves are essential to protect your skin from resins.
- Eye Protection: Safety glasses or goggles are a must.
- Respirator: Especially when working with CA glue or in less-than-ideal ventilation, a respirator with organic vapor cartridges is highly recommended.
- Protect your work surface with a drop cloth or silicone mat.
- Application Techniques:
- For Epoxy: Mix the two parts according to the manufacturer’s instructions. Apply thin coats with a brush, roller, or plastic spreader. For deeper penetration, you can warm the epoxy slightly (never overheat!) to reduce its viscosity. Allow each coat to soak in before applying the next, or before it fully cures.
- For CA Glue: Apply directly to the wood surface, allowing it to soak in. For faster curing, you can use a CA accelerator spray, but be aware this can sometimes cause a slight white haze.
- For Wood Stabilizers (Brush/Soak Type): Follow specific product instructions. Some are brushed on, others require soaking the wood for hours or days.
- For Vacuum Stabilization (Advanced): This involves placing wood blanks and liquid stabilizer in a vacuum chamber. The vacuum pulls air out of the wood, and when released, atmospheric pressure forces the stabilizer deep into the wood’s cells. This is highly effective but requires specialized equipment.
- Curing Time:
- Allow ample time for the hardener to fully cure. This can range from minutes (for CA glue) to several hours or even days (for epoxy and stabilizers).
- Rushing this step can lead to a sticky finish or incomplete hardening.
- Check the product’s technical data sheet for precise curing times and conditions (temperature, humidity).
- Finishing:
- Once fully cured, the hardened wood can be sanded, shaped, and finished just like regular wood.
- Start with a coarser grit sandpaper (e.g., 120-180) to remove any excess hardener, then progress through finer grits to achieve a smooth surface.
- You can then apply your chosen topcoat, stain, or paint.
Tools & Materials for Chemical Hardening:
- Chemical hardener (epoxy resin, CA glue, or specific wood stabilizer)
- Applicators (disposable brushes, plastic spreaders, syringes, pipettes)
- Mixing cups and stir sticks (for epoxy)
- Safety gear (nitrile gloves, safety glasses, respirator)
- Sandpaper (various grits)
- Clean rags
- Optional: Vacuum chamber and pump (for advanced stabilization)
- Optional: Heat gun or hairdryer (to thin epoxy slightly)
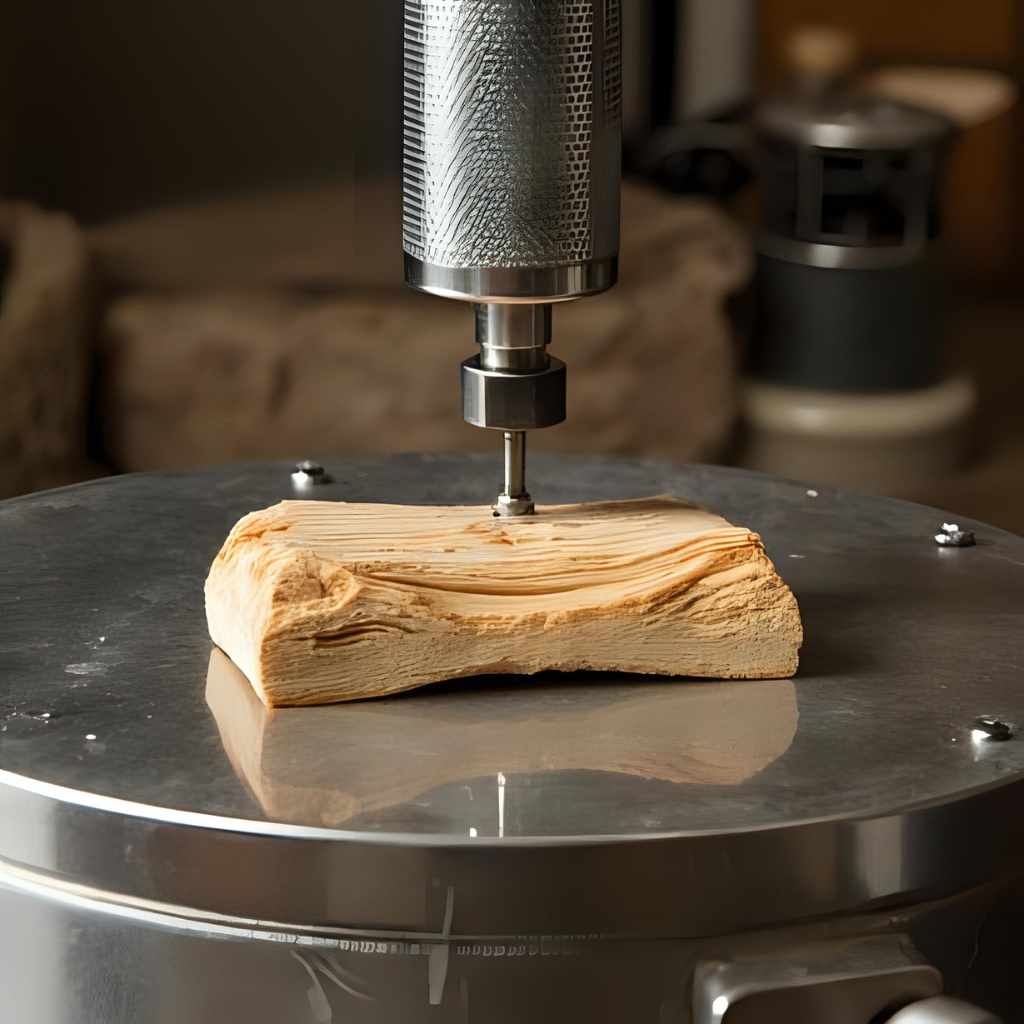
Method 2: Thermal Treatment (Heat Curing)
Thermal treatment, or heat curing, is a method that physically alters the wood’s cell structure through controlled exposure to heat. This process, often called “torrefaction” or “thermally modified wood,” increases the wood’s stability, durability, and resistance to decay and moisture. It’s often used for outdoor applications or flooring.
Step-by-Step Guide: Heat Treating Wood
This process is generally done in specialized kilns or ovens under controlled conditions. While not typically a DIY garage project for large pieces, understanding the principles is valuable.
- Prepare the Wood:
- The wood must be thoroughly dry before treatment. Any residual moisture can cause damage during heating.
- Ensure the wood is free of any finishes or coatings.
- For home experimentation with small pieces, a well-ventilated, temperature-controlled oven can be used.
- Controlled Environment:
- Wood is placed in a specialized kiln or oven where temperature and humidity can be precisely controlled.
- For small-scale DIY, a conventional oven can work, but monitoring is critical.
- Temperature and Time:
- The wood is slowly heated to high temperatures (typically between 180°C and 230°C or 350°F and 450°F) in a low-oxygen environment to prevent combustion.
- The duration of heating depends on the wood species, thickness, and desired level of modification, often ranging from several hours to a few days.
- This process breaks down hemicellulose in the wood, making it less hydrophilic (water-absorbing) and more stable.
- Cooling Slowly:
- After the heat treatment, the wood is slowly cooled to prevent cracking or internal stresses.
- Often, steam or water is introduced during the cooling phase to reintroduce a small amount of moisture content for stability.
Tools & Materials for Thermal Treatment:
- Specialized wood kiln or a conventional oven (for small pieces)
- Accurate temperature controller and thermometer
- Wood moisture meter
- Heat-resistant gloves and safety glasses
- Good ventilation (crucial, as the process can release fumes)
This method significantly reduces the wood’s equilibrium moisture content, making it incredibly stable and resistant to rot, fungi, and insects. It’s how you harden wood for outdoor decking and siding that lasts for decades.
Method 3: Pressure Impregnation (For Advanced Users/Specific Applications)
While less common for the average DIYer, pressure impregnation is a highly effective industrial method to harden and preserve wood. It involves forcing chemicals (like preservatives or resins) deep into the wood fibers under high pressure.
This is how most “pressure-treated” lumber is made, though the goal there is typically rot and insect resistance, not necessarily increased hardness. However, specialized processes can use resins to harden wood for specific applications, often resulting in incredibly dense and durable material. For beginners, this method is usually out of reach due to the specialized equipment required, but it’s good to know it exists for specific industrial or high-performance applications.
Choosing the Right Method for Your Project
Deciding which method to use depends on several factors related to your project and resources. Think about these questions:
- What is the size and type of wood? Small, porous blanks are great for chemical stabilization. Large timbers might benefit more from thermal treatment.
- What is the intended use of the project? Is it for a high-wear surface, outdoor exposure, or purely decorative?
- What is your budget? Chemical hardeners are relatively inexpensive for small projects, while specialized equipment for thermal or vacuum treatment can be costly.
- What is your skill level and access to equipment? Starting with epoxy is much easier than setting up a controlled heat-treating kiln.
- What kind of final appearance do you want? Some hardening methods can slightly alter the wood’s color or grain.
| Project Type | Recommended Method(s) | Why |
|---|---|---|
| Cutting Boards, Knife Handles | Chemical Impregnation (Epoxy, CA Glue, Food-safe Stabilizers) | Increases density, water resistance, and durability against knives/impact. Food-safe options are critical. |
| Small Turning Blanks (Pens, Bowls) | Chemical Impregnation (Epoxy, Wood Stabilizers with Vacuum) | Stabilizes soft spots, enhances figure, makes turning easier and final product more robust. |
| High-Wear Tabletops, Countertops | Epoxy Resin (as a finish and hardener), or Thermally Modified Wood (if starting from raw lumber) | Provides exceptional scratch and impact resistance, seals against spills. |
| Outdoor Furniture, Decking, Siding | Thermal Treatment, Pressure Impregnation (industrial) | Significantly improves weather resistance, dimensional stability, and resistance to rot and insects. |
| Stabilizing Spalted or Punky Wood | Thin Epoxy Resin, CA Glue, or Wood Stabilizers (with/without vacuum) | Fills voids, consolidates weak areas, makes otherwise unusable wood workable. |
Tips for Achieving the Best Results When You Harden Wood
To ensure your efforts pay off and your hardened wood truly shines, keep these practical tips in mind:
- Start with Dry Wood: Moisture in the wood can hinder the penetration and curing of chemical hardeners and can cause problems during thermal treatment. Always ensure your wood is properly seasoned and dry. A wood moisture meter can be a valuable tool.
- Test on Scrap Pieces: Before committing to your main project, always test your chosen hardening method on a scrap piece of the same wood species. This allows you to fine-tune your application, observe penetration, and understand curing times without risking your main piece.
- Apply Thin, Even Coats: When using liquid hardeners like epoxy or CA glue, multiple thin coats are almost always better than one thick coat. Thin coats penetrate deeper, cure more evenly, and reduce the chance of bubbles or surface imperfections.
- Allow Proper Curing Time: Patience is a virtue in woodworking, especially when hardening wood. Do not rush the curing process. Refer to the manufacturer’s instructions for exact times and optimal conditions (temperature, humidity). Premature handling can lead to soft spots or an incomplete cure.
- Ventilation is Key: Many chemical hardeners emit fumes during application and curing. Always work in a well-ventilated area, ideally with open windows and a fan, or outdoors if possible. Your lungs will thank you.
- Consider the Final Finish: Think about how the hardening process might affect your final finish. Some hardeners can slightly darken the wood or leave a subtle sheen. Plan your staining or top-coating steps accordingly.
- Research Wood Properties: Different wood species react differently to hardening. Understanding the density and porosity of your chosen wood can help you select the most effective method. For in-depth information on wood properties, resources like the USDA Forest Products Laboratory are excellent.
Common Mistakes to Avoid When Hardening Wood
Even seasoned woodworkers make mistakes, but as a beginner, knowing what to watch out for can save you time, money, and frustration. Here are some common pitfalls when you harden wood:
- Not Preparing the Wood Properly: Trying to harden wood that is dirty, oily, or still wet is a recipe for failure. The hardener won’t penetrate effectively or bond correctly, leading to a weak or uneven result. Always clean and thoroughly dry your wood first.
- Ignoring Safety Precautions: Chemical hardeners can be irritants or harmful if inhaled or absorbed through the skin. Neglecting gloves, eye protection, and proper ventilation is a dangerous mistake. Always prioritize your safety!
- Applying Too Much Hardener at Once: Especially with epoxy or CA glue, a thick application can lead to poor penetration, uneven curing, excessive heat generation (exothermic reaction with epoxy), or a sticky, uncured mess. Stick to thin, controlled coats.
- Not Allowing Adequate Curing Time: Pulling a piece out of the curing stage too soon can result in a soft, tacky surface or a hardener that hasn’t fully achieved its maximum strength. Always follow the manufacturer’s recommended cure times.
- Working in Poor Ventilation: The fumes from many hardeners are not pleasant and can be harmful. Working in a closed garage or basement without proper airflow is a common mistake that can lead to headaches, dizziness, or worse.
- Using the Wrong Hardener for the Wood/Project: Not all hardeners are created equal. Using a thick, gap-filling epoxy when you need deep penetration for stabilization, or a non-food-safe product on a cutting board, are examples of using the wrong tool for the job. Research your options carefully.
- Skipping the Test Piece: It’s tempting to jump straight into your project, but skipping a test on a scrap piece means you won’t know how the wood will react or how the hardener will perform until it’s too late. Always test first!

Frequently Asked Questions About How To Harden Wood
Is hardening wood permanent?
Yes, once chemical hardeners or thermal treatments have fully cured or modified the wood, the changes are generally permanent. The wood’s structure is altered, providing lasting benefits in terms of density, stability, and durability.
Can I harden any type of wood?
Most wood species can be hardened, but the effectiveness varies. Softer, more porous woods (like basswood, poplar, or spalted maple) tend to absorb chemical hardeners more readily and show a more dramatic improvement. Denser woods may still benefit, but penetration might be less deep. Thermal treatment works well across many species but is often optimized for specific types.
How long does it take to harden wood?
The time frame varies significantly. For small applications of CA glue, it can be minutes. For epoxy, it might be several hours to a few days for a full cure. Wood stabilization using vacuum chambers can take hours. Thermal modification processes in kilns can take days. Always check the specific product or process instructions.
Is it expensive to harden wood?
For small projects, chemical hardeners like epoxy or CA glue are relatively inexpensive. However, if you’re looking into professional wood stabilization services or investing in equipment like a vacuum chamber or a specialized kiln, the cost can increase substantially. For most DIYers, it’s an affordable enhancement.
What are the safety concerns when I harden wood?
The primary concerns are exposure to chemical fumes and skin contact. Always wear nitrile gloves, safety glasses, and a respirator rated for organic vapors. Ensure your workspace is extremely well-ventilated. Thermal treatment involves high temperatures, requiring heat-resistant gloves and careful handling.
Does hardening wood change its appearance?
Yes, hardening can sometimes subtly change the wood’s appearance. Chemical hardeners might slightly darken the wood or enhance the grain, giving it a “wet look.” Epoxy can also add a slight sheen. Thermal treatment often darkens the wood, giving it a rich, often reddish-brown hue. Always test on a scrap piece to see the exact effect.
Can I paint or stain hardened wood?
Yes, in most cases, you can paint or stain hardened wood. Once the hardener is fully cured and the surface is properly sanded, it behaves much like very dense wood. However, some very dense, epoxy-saturated wood might absorb stain differently, so always perform a test on a scrap piece first.
Your Journey to Stronger Wood: A Confident Conclusion
You’ve now got a solid understanding of how to harden wood, transforming your projects from ordinary to extraordinary. Whether you choose the accessible path of chemical impregnation with epoxy or delve into the advanced world of thermal treatment, the goal is the same: creating woodworking pieces that are not only beautiful but also incredibly durable and long-lasting.
Remember, the key to success lies in careful preparation, understanding your materials, and always prioritizing safety. Don’t be afraid to experiment on scrap pieces and take your time with each step. With these techniques in your woodworking arsenal, you’re now equipped to tackle projects with newfound confidence, knowing your creations will stand the test of time and everyday use. Go ahead, build something strong and proud!