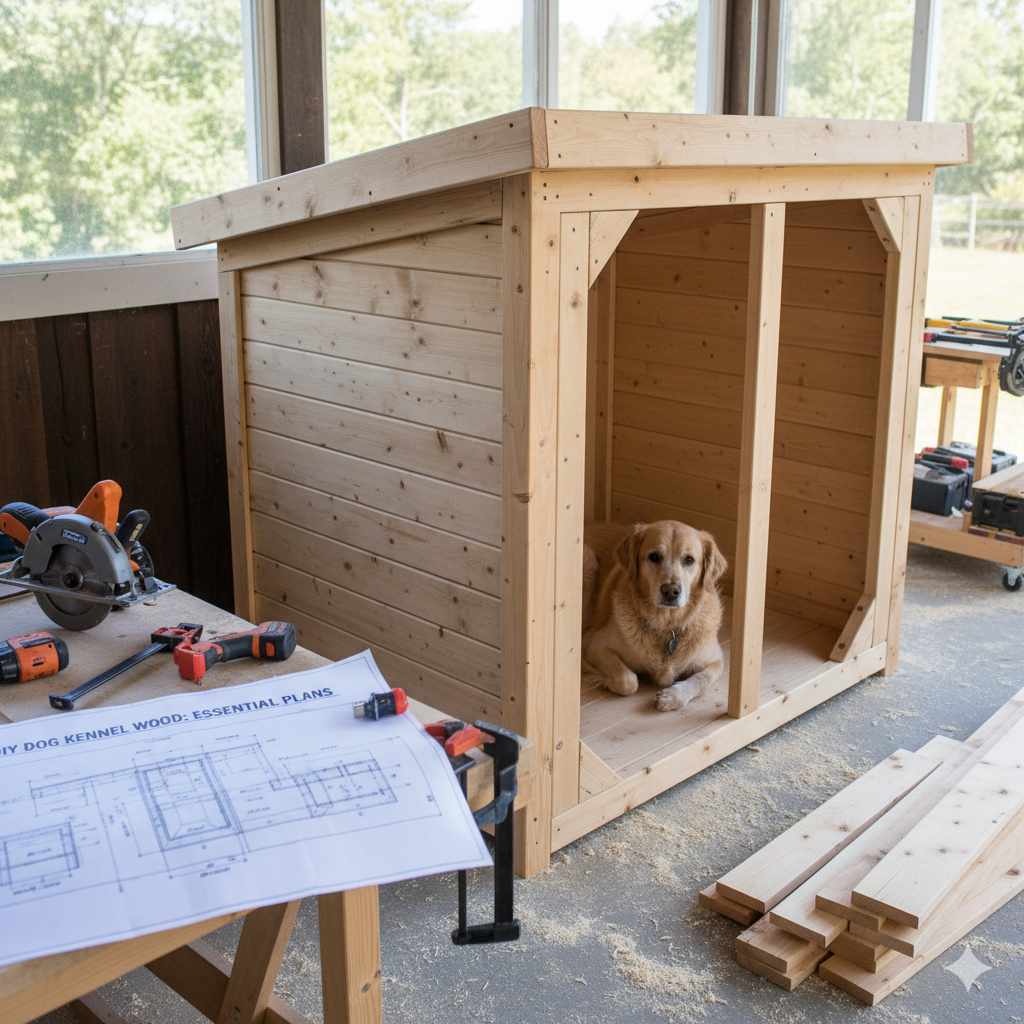
DIY Dog Kennel Wood: Essential Plans
Build a sturdy, safe, and affordable DIY dog kennel with these essential wood plans. This guide breaks down simple steps, necessary tools, and material lists for beginners. Create a comfortable space for your furry friend with confidence.
Finding the right space for your dog can be tricky. Sometimes, commercial kennels just don’t fit your needs or budget. Maybe you want something bigger, or perhaps a specific style that matches your home. It’s okay to feel a bit lost when thinking about building one yourself! Woodworking can seem complicated, but it doesn’t have to be. With clear guidance and simple steps, you can absolutely create a fantastic DIY dog kennel. This guide will walk you through everything, from choosing wood to putting the last screw in place. Get ready to build a cozy haven your dog will love!
Why Build Your Own Dog Kennel?
There are many great reasons to consider a DIY dog kennel. For starters, it’s often much more budget-friendly than buying a pre-made unit. You get to control the size and design, ensuring it perfectly fits your dog’s breed and your available space. Plus, you choose the materials, which means you can opt for durable, non-toxic wood for a healthier environment for your pet. Building it yourself also gives you a sense of accomplishment and a custom piece that truly belongs to your home. It’s a rewarding project that benefits both you and your canine companion.
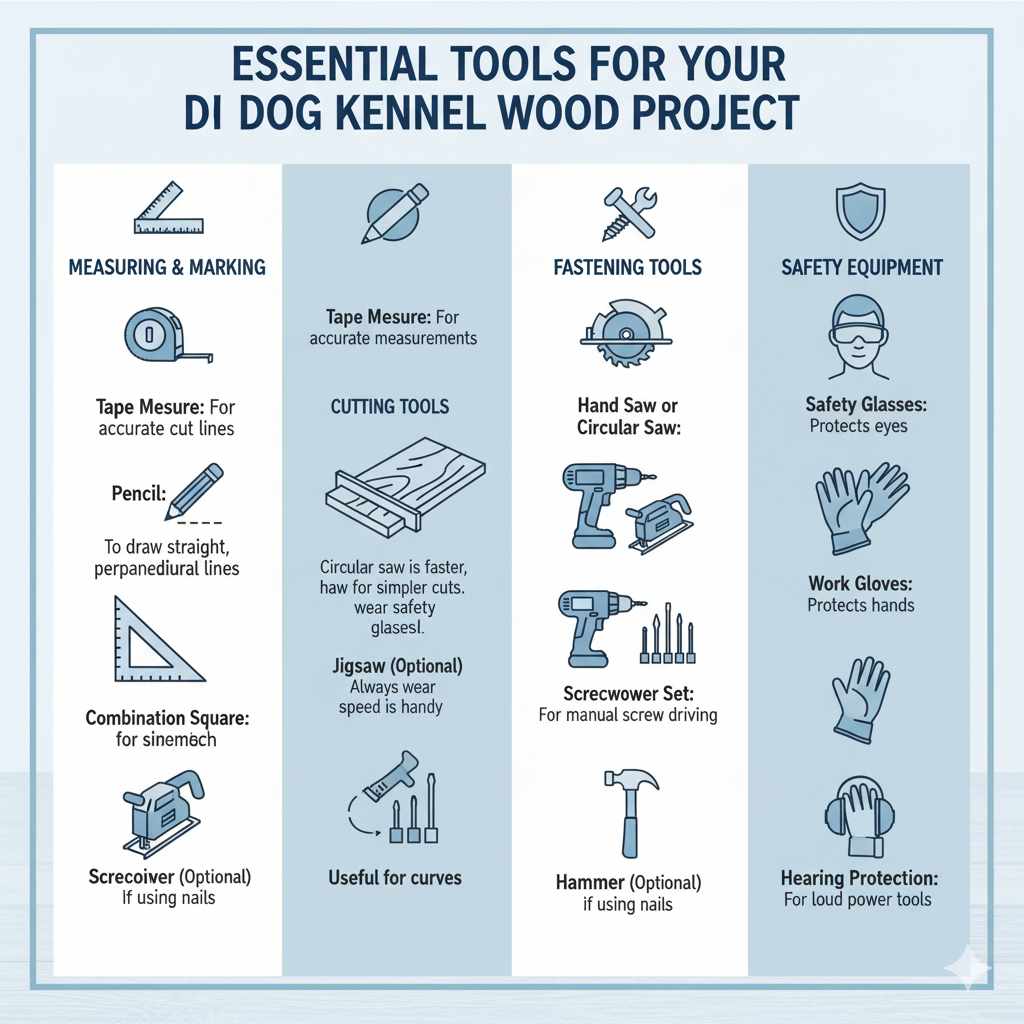
Essential Tools You’ll Need
Don’t worry if you’re new to tools! We’ll stick to the basics that most DIYers have or can easily borrow. Safety first is always my motto, so make sure you understand how each tool works before you start.
Measuring and Marking Tools
- Tape Measure: For accurate measurements.
- Pencil: For marking cut lines.
- Combination Square: To draw straight, perpendicular lines.
Cutting Tools
- Hand Saw or Circular Saw: A circular saw is faster, but a hand saw works fine for simpler cuts. Always wear safety glasses! If using a power saw, read the manual carefully.
- Jigsaw (Optional): Useful for curves or precise cuts, but not essential for a basic kennel.
Fastening Tools
- Drill/Driver: Essential for drilling pilot holes and driving screws. Cordless drills are very handy. Consider one with variable speed and torque.
- Screwdriver Set: For any manual screw driving.
- Hammer (Optional): If you decide to use nails for any part of the construction.
Safety Equipment
- Safety Glasses: Absolutely critical to protect your eyes from sawdust and debris.
- Work Gloves: To protect your hands.
- Hearing Protection: If using loud power tools.
Choosing the Right Wood
The type of wood you choose impacts durability, safety, and cost. For dog kennels, it’s important to select wood that is free from toxic resins and splinters. Untreated, natural woods are usually the best bet.
Recommended Wood Types:
- Pine: A common and affordable choice. It’s easy to work with and readily available. Opt for untreated pine to ensure it’s safe for your dog.
- Cedar: This wood is naturally resistant to insects and rot, making it a durable option. It also has a pleasant scent.
- Fir: Similar to pine, fir is strong, relatively inexpensive, and easy to find.
- Plywood (for walls/flooring): Use exterior-grade plywood. Ensure it’s sanded smooth and consider sealing it to protect against moisture and make cleaning easier. Avoid treated plywood indoors.
Woods to Avoid: Treated lumber, especially older types (like CCA-treated), can contain harmful chemicals. Woods with strong natural toxins or very rough grains that might splinter easily should also be avoided.
Simple DIY Dog Kennel Plans for Beginners
This plan is for a basic, sturdy, single-door kennel. You can adjust the dimensions based on your dog’s size. A good rule of thumb is that your dog should be able to stand up, turn around, and lie down comfortably inside.
Step 1: Determine Your Kennel Dimensions
Measure your dog! Here’s a quick guide:
- Height: Measure from the floor to the top of your dog’s head or ears (whichever is taller). Add at least 4-6 inches for headroom.
- Length: Measure your dog from nose to tail base while standing. Add at least 6-12 inches.
- Width: Measure your dog from shoulder to opposite shoulder. Add at least 6-12 inches.
Let’s use an example size for a medium-sized dog: 3 feet wide x 4 feet long x 3 feet high.
Step 2: Create a Cut List
Based on our example dimensions (3’W x 4’L x 3’H), and assuming a frame construction with solid or slatted sides and a plywood floor/roof. You’ll need wood for the frame (like 2x2s or 2x4s if you want it super strong) and for the panels/roof.
Frame (using 2x2s for simplicity and weight):
- Vertical Posts: 4 pieces @ 36 inches (for the corners, height of the kennel)
- Top Plates: 2 pieces @ 48 inches (for the long sides)
- Top Plates: 2 pieces @ 36 inches (for the short sides)
- Bottom Plates: 2 pieces @ 48 inches (for the long sides)
- Bottom Plates: 2 pieces @ 36 inches (for the short sides)
- Door Frame Supports: 2 pieces @ 36 inches (for door sides)
- Door Frame Top/Bottom: 2 pieces @ ~18-24 inches (adjust for desired door width)
- Support Beams (optional, for roof): 2 pieces @ 36 inches
Plywood Panels & Floor:
- Floor: 1 piece @ 36 inches x 48 inches (cut from plywood)
- Back Panel: 1 piece @ 36 inches x 48 inches (cut from plywood, or use slats)
- Side Panels: 2 pieces @ 36 inches x 36 inches (cut from plywood, or use slats)
- Front Panel (Frame Only before door): Will be constructed from the frame pieces.
Slats (if not using solid plywood for sides/back):
- Calculate the number of slats needed for the sides and back. For a 3ft (36 inch) tall side, you might space slats about 2-3 inches apart. You’ll need roughly 15-20 slats per side, cut to 48 inches long. Use 1×4 or 1×6 lumber.
| Part | Quantity | Dimensions | Material Type |
|---|---|---|---|
| Corner Posts | 4 | 36 inches | 2×2 Lumber |
| Long Top/Bottom Plates | 4 | 48 inches | 2×2 Lumber |
| Short Top/Bottom Plates | 4 | 36 inches | 2×2 Lumber |
| Door Frame Sides | 2 | 36 inches | 2×2 Lumber |
| Door Frame Top/Bottom | 2 | ~20 inches (adjustable) | 2×2 Lumber |
| Roof Supports (Optional) | 2 | 36 inches | 2×2 Lumber |
| Floor Panel | 1 | 36″ x 48″ | 3/4″ Exterior Plywood |
| Back Panel | 1 | 36″ x 48″ | 1/2″ Exterior Plywood (or slats) |
| Side Panels | 2 | 36″ x 36″ | 1/2″ Exterior Plywood (or slats) |
| Door Panel | 1 | ~30″ x 30″ (approximate, will be framed) | 1×4 or 1×6 Lumber for frame & slats |
Step 3: Assemble the Base Frame
You’ll start by building the rectangular base. Lay out your four bottom plates: two 48-inch pieces and two 36-inch pieces, forming a 36″ x 48″ rectangle. Pre-drill pilot holes to prevent the wood from splitting. Use 2.5-inch wood screws to attach the pieces. Ensure the corners are square using your combination square.
Next, attach the four corner posts to the inside of this base frame. These posts will be 36 inches tall. Again, pre-drill and use 2.5-inch screws. Make sure the posts are plumb (perfectly vertical) using your square.
Step 4: Add the Top Frame
Now, attach the top plates to the tops of the corner posts. Use the remaining two 48-inch plates and two 36-inch plates to mirror the base. This will form the top frame of your kennel. Pre-drill and screw. You should now have a sturdy, rectangular prism frame.
Step 5: Install the Floor
Cut your 3/4″ plywood to 36 inches x 48 inches. Place it inside the base frame, resting on the bottom plates. Secure it by screwing through the plywood into the bottom frame pieces every 6-8 inches. Make sure the floor is flush with the top of the bottom plates.
Step 6: Build and Attach the Back and Side Panels
Option A: Plywood Panels
- Cut your 1/2″ plywood pieces for the back (36″ x 48″) and sides (two pieces at 36″ x 36″).
- Position the back panel against the back frame and screw it into the posts and top/bottom plates.
- Position the side panels and screw them into the side posts and top/bottom plates.
Option B: Slatted Walls
- Cut your 1×4 or 1×6 lumber into slats. For a 48-inch long side, you’ll need slats cut to 48 inches. For the back panel (36 inches wide, use the 36-inch side pieces of the frame), slats should be cut to 36 inches.
- Start at one end of the frame (e.g., the back panel). Attach the first slat flush with the edge. Pre-drill and screw.
- Place the next slat, leaving a gap of about 2-3 inches for ventilation. Screw it in place. Continue this for the entire panel. Repeat for the side panels. Aim for consistent spacing. You can use a scrap piece of wood as a spacer to ensure uniformity.
For the front, you’ll frame out the door opening. Cut two more pieces of 2×2 lumber to the desired width of your door opening (e.g., 18-24 inches). Attach these horizontally between the front corner posts, positioned where you want the top and bottom of your door to be. Then, frame the actual door separately.
Step 7: Construct the Door
Measure the opening you’ve created for the door. Build a rectangular frame using 2×2 lumber (or 1x4s) that is slightly smaller than the opening (about 1/2 inch less all around) to allow for easy opening and closing. Screw these pieces together. You can then add vertical or horizontal slats to this door frame to match the sides, or leave it as a frame.
Attach the door to one of the front posts using sturdy hinges. Add a simple latch mechanism suitable for a dog kennel.
Step 8: Add the Roof
Cut a piece of 1/2″ plywood to 38 inches x 50 inches. This allows for a slight overhang on all sides to help shed water.
If you opted for roof supports, install them now across the top of the kennel, centered on the long sides. These will give the roof extra stability.
Place the plywood roof panel on top of the frame. Ensure it’s centered with overhang. Screw it down securely into the top plates and any roof supports. You can slightly angle the roof for better water runoff by making one side slightly shorter.
Step 9: Finishing Touches
- Sanding: Sand down any rough edges or splinters, especially around the door and inside the kennel.
- Sealing (Optional but Recommended): For durability and easier cleaning, you can seal the wood. Use a water-based, pet-safe sealant or paint. Ensure it’s completely dry and aired out before letting your dog in. You can find some excellent pet-safe sealants from reputable sources dedicated to pet supplies or safe building materials.
- Bedding: Add comfortable, washable bedding for your dog.

Alternatives and Customizations
This basic plan is just a starting point! Here are some ways to customize:
- Elevated Floor: Build legs to keep the kennel off the ground, improving airflow and preventing moisture issues. Consult resources like FEMA’s pet preparedness guidelines for general animal welfare considerations during setup.
- Multiple Doors: For larger kennels or specific setups, you might need more than one entrance.
- Roof Styles: Opt for a pitched roof for better rain and snow runoff. This involves cutting rafters and a more complex assembly.
- Storage: Add a small shelf or bin on the outside for leashes, toys, or treats.
- Wheels: Attach heavy-duty casters to the base for mobility.
Safety Considerations for Your Dog’s Kennel
The wellbeing of your pet is paramount. Always keep these safety points in mind:
- Ventilation: Adequate airflow is crucial. Slatted walls or well-placed openings help prevent overheating.
- No Toxic Materials: As mentioned, use untreated wood and pet-safe finishes. Avoid treated lumber, potentially toxic glues, or paints with strong fumes.
- Smooth Surfaces: Ensure there are no sharp edges, protruding nails, or splinters that could injure your dog. Sand everything thoroughly.
- Secure Latches: The door latch should keep your dog safely inside but be easy for you to open.
- Size Matters: Make sure the kennel is large enough for your dog to be comfortable. A kennel that is too small can cause stress and behavioral issues, which are discussed in training resources like those found at the ASPCA’s Behavior Section.
- Supervision: Even the best kennel isn’t a substitute for supervision. Don’t leave your dog crated for excessively long periods.
Frequently Asked Questions About DIY Dog Kennels
Is it cheaper to build a dog kennel yourself?
Yes, in most cases, building a DIY dog kennel is significantly cheaper than buying a comparable pre-made one. You save on labor costs and can often find better deals on lumber.