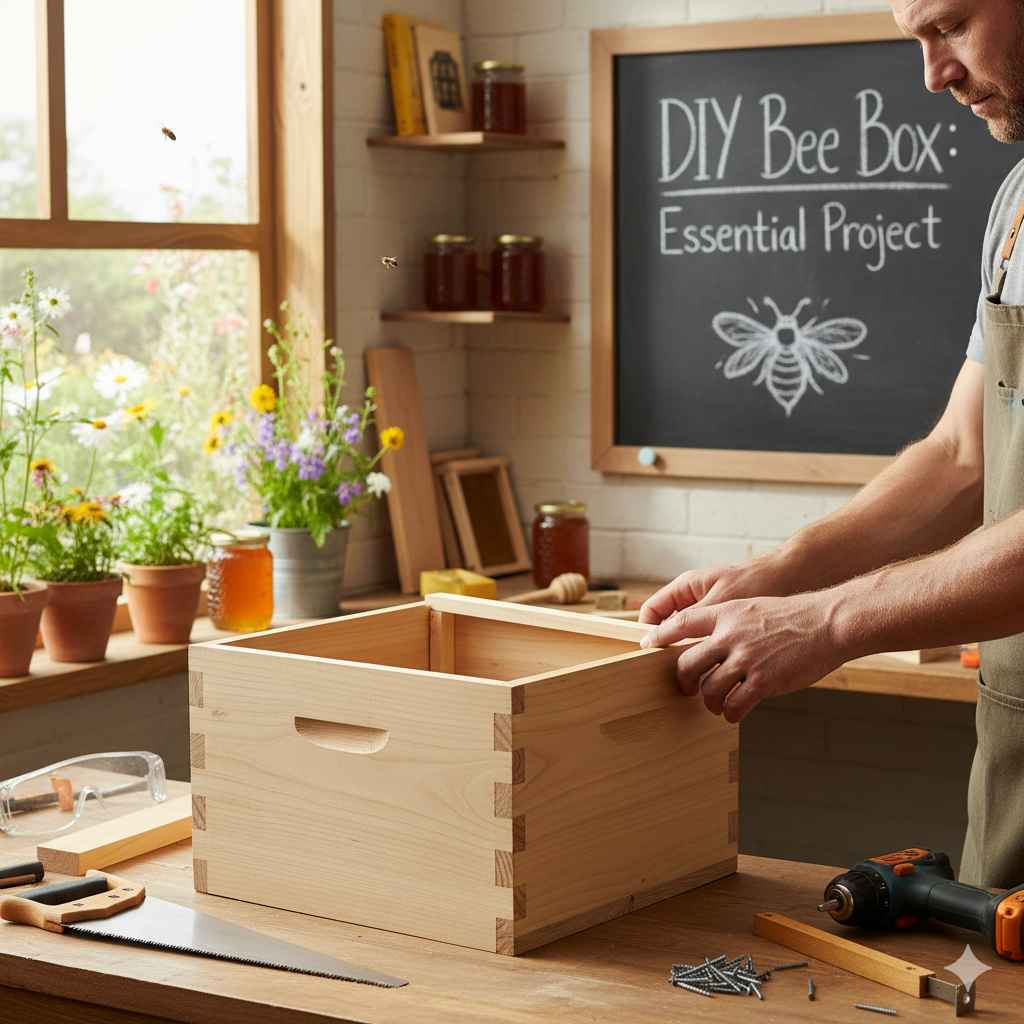
DIY Fractal Wood Burner: Create Stunning Art with Ease
Have you ever wanted to create stunning, intricate designs on wood with your own hands? A DIY fractal wood burner lets you do just that—turning ordinary pieces of wood into mesmerizing works of art.
Imagine the satisfaction of crafting unique patterns that catch the eye and spark conversation. In this guide, you’ll discover simple steps to start your own fractal wood burning project, even if you’re a beginner. Ready to transform your woodwork and impress everyone with your creativity?
Keep reading to unlock the secrets behind this captivating craft.
Choosing The Right Wood
Choosing the right wood is key to a successful fractal wood burning project. The wood’s texture and grain affect the design’s look. Some woods burn better and safer than others. Picking the right type helps you get clear, sharp patterns. It also makes the process easier and more enjoyable.
Wood quality matters. Avoid wood with chemicals or paint. Natural wood gives the best results and is safer to burn.
Best Wood Types For Burning
Hardwoods are the best for fractal burning. Maple, birch, and cherry have tight grains. They burn evenly and show patterns well. Softwoods like pine or cedar have resin. Resin can cause uneven burning and more smoke. Avoid treated or painted wood. It can release harmful fumes. Use dry wood for cleaner burns. Wet wood makes the process slow and messy.
Preparing Wood Surface
Start by sanding the wood surface smooth. Use fine-grit sandpaper for best results. Smooth surfaces help the burn marks stand out. Clean the wood with a dry cloth. Remove dust and dirt that block the burn. Avoid using water or chemicals. They can harm the wood and affect burning. Make sure the wood is dry before starting. Moisture can stop the electrical current needed for fractal patterns.
Essential Tools And Materials
Starting a DIY fractal wood burner project needs the right tools and materials. These essentials make the work easier and safer. Having the proper kit and safety gear helps create clean and precise designs on wood. Preparing well sets the stage for success and enjoyment.
Selecting A Wood Burner Kit
Choose a wood burner kit with adjustable temperature controls. This feature allows better handling of different wood types. Look for kits that include various tips for different patterns. A lightweight tool reduces hand fatigue during long sessions. Check for kits with a stable stand to keep the burner safe when not in use.
Safety Gear To Use
Wear heat-resistant gloves to protect your hands from burns. Use safety goggles to guard your eyes from smoke and wood particles. Work in a well-ventilated area to avoid inhaling smoke. Keep a fire extinguisher nearby for emergencies. Wear a mask to reduce inhaling fine wood dust during burning.
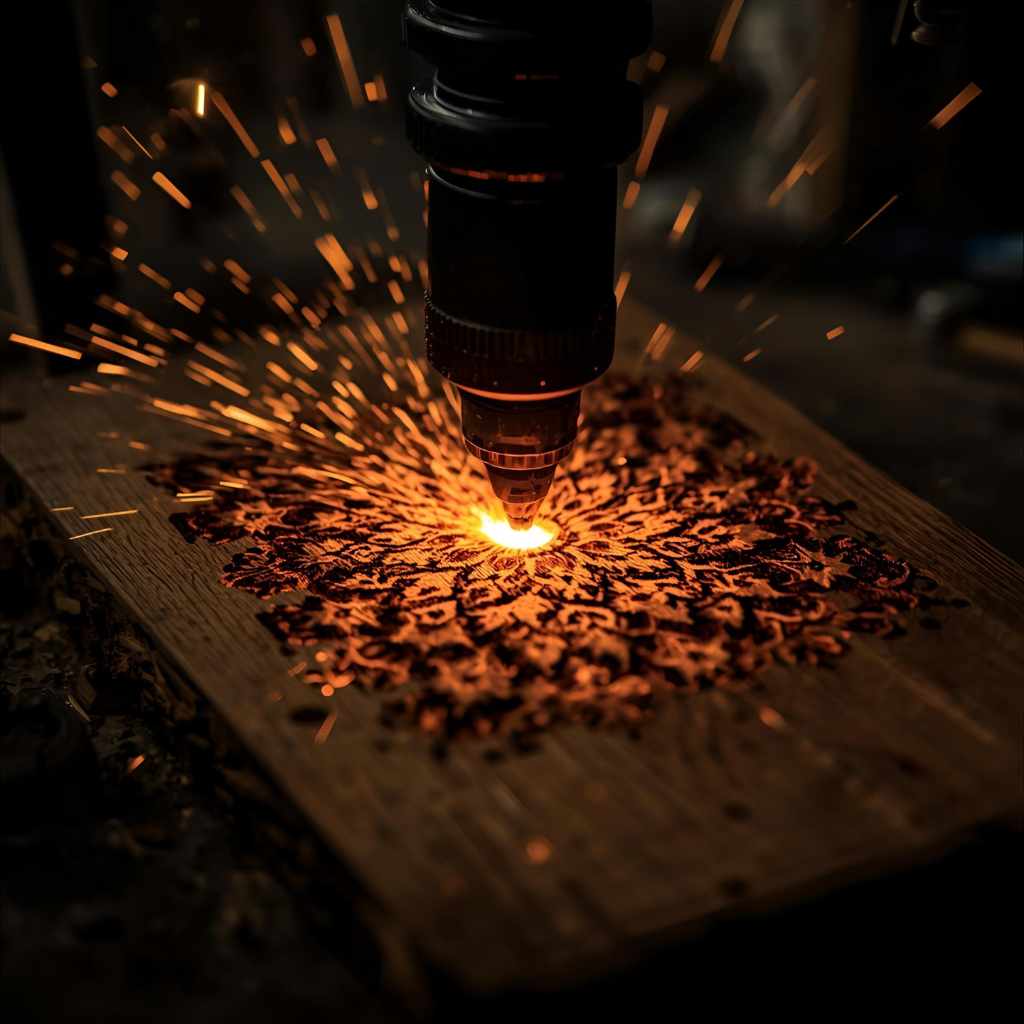
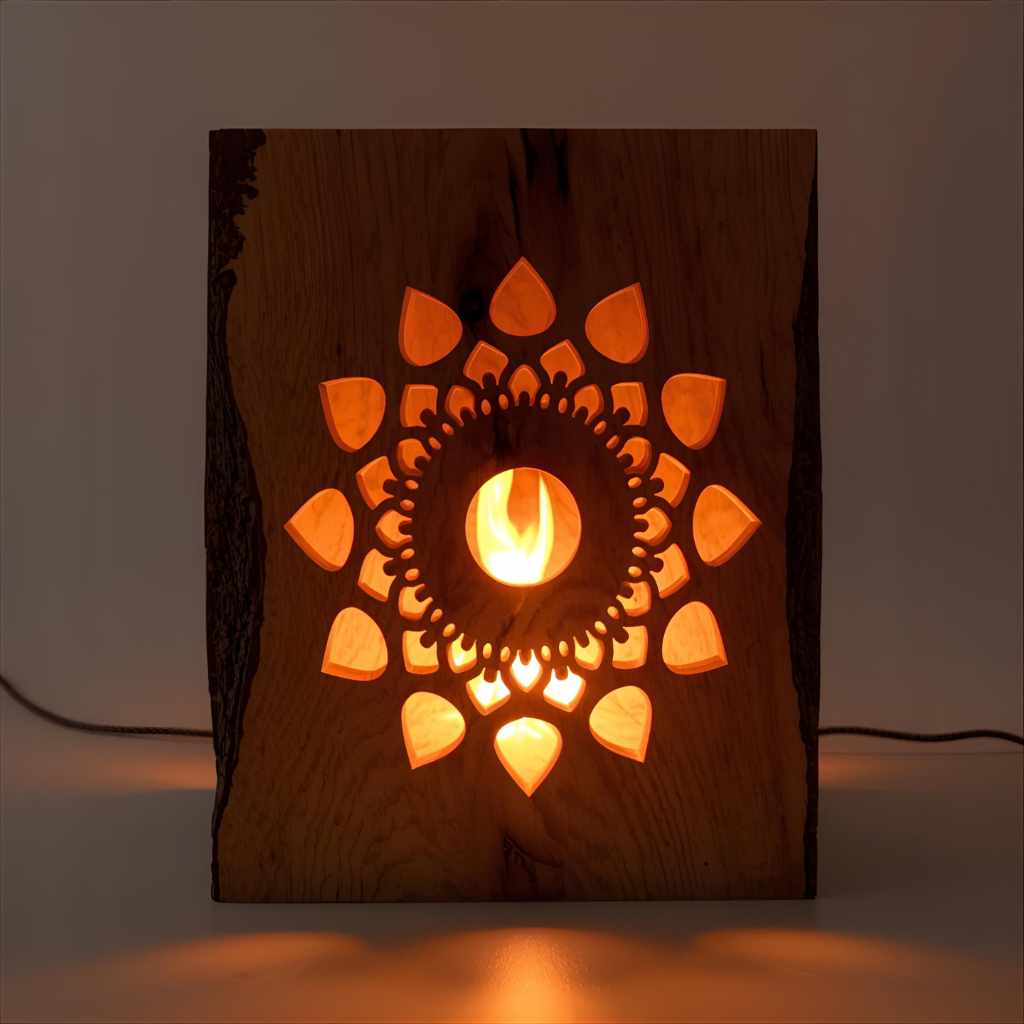
Creating Fractal Patterns
Fractal patterns bring a unique, natural beauty to wood burning projects. These patterns repeat simple shapes in smaller sizes, creating a complex look. They add depth and style to your wood art.
Understanding fractal patterns helps you create better designs. Start with simple shapes and build detail step by step. This method makes your work clear and neat.
Basic Fractal Design Concepts
Fractals use shapes that repeat at smaller scales. Each part looks like the whole pattern but smaller. This creates a sense of balance and harmony.
Common fractal shapes include triangles, squares, and circles. You can also use natural forms like leaves or branches. Keep the design simple for easier burning.
Repeat patterns three to five times for best results. Too many repeats can make the design look messy. Keep your lines clear and sharp.
Sketching Your Pattern
Start by drawing a simple shape on paper. Use a pencil so you can erase mistakes easily. Draw the main shape first, then add smaller repeats inside it.
Focus on symmetry and even spacing. These make the pattern look neat and balanced. Use a ruler or compass for straight lines and perfect circles.
Practice your sketch several times before burning. This helps you feel confident and reduces errors. Once happy, transfer the sketch to your wood piece carefully.
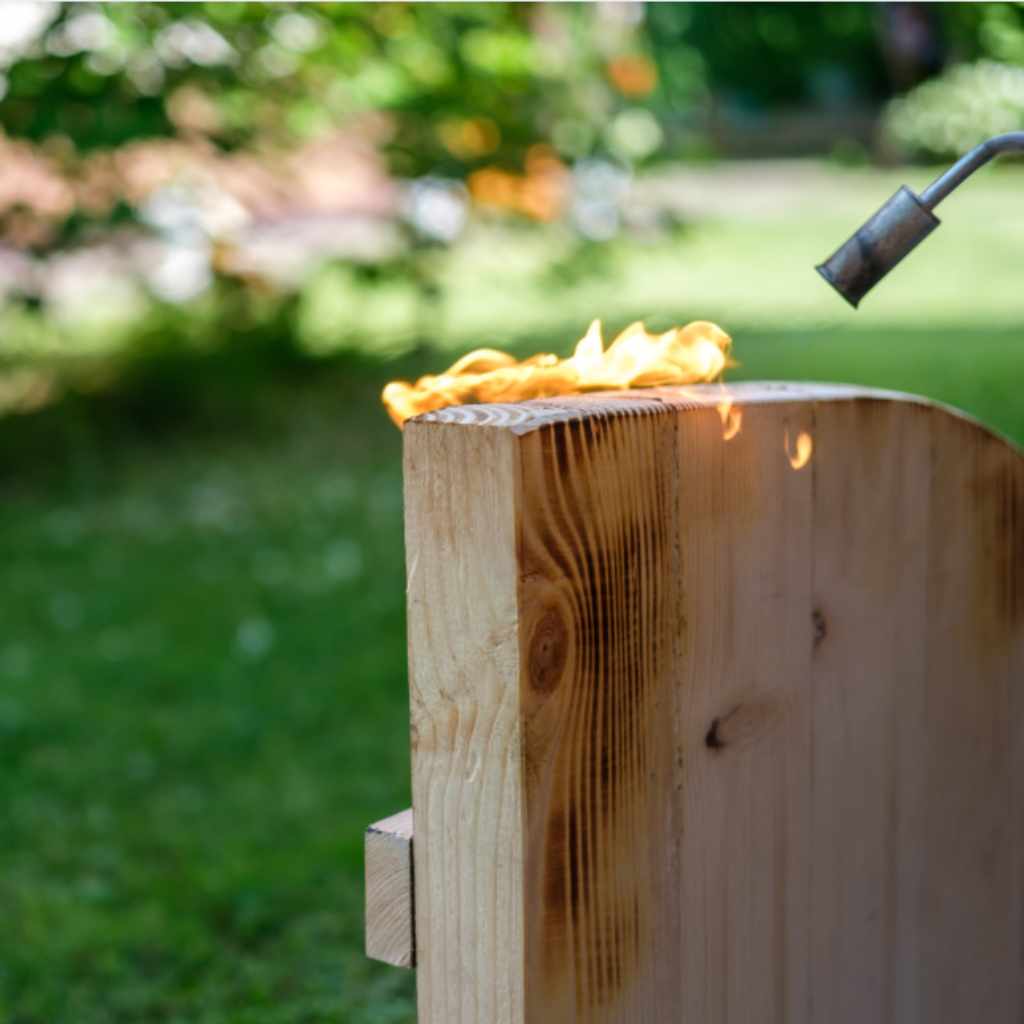
Step-by-step Burning Process
The step-by-step burning process guides you through creating beautiful fractal designs on wood. This process breaks down the task into simple parts. It helps you avoid mistakes and achieve clean results. Follow each step carefully for the best effect.
Setting Up Your Workspace
Choose a well-lit, ventilated area for your wood burning. Clear your table of any clutter. Use a heat-resistant mat to protect the surface. Keep your tools organized and within reach. Wear gloves and safety glasses for protection. Have a small fan or window open to move smoke away.
Techniques For Smooth Lines
Hold the burner like a pen for better control. Move your hand slowly and steadily. Avoid pressing too hard on the wood. Start with light pressure to outline your design. Practice on scrap wood to gain confidence. Use a fine tip for thin lines and a wider tip for bold lines.
Layering And Shading
Build your design by adding layers of burning. Apply light burns first to create soft shades. Darken areas gradually by going over them again. Use different tip shapes to vary shading effects. Let the wood cool between layers to prevent burning too deep. Layering adds depth and makes the fractal design stand out.
Adding Color And Finishing Touches
Adding color and finishing touches brings your fractal wood burner to life. It highlights the detailed patterns and adds depth to your artwork. This step makes your piece unique and visually striking. The right colors and protective coating enhance both beauty and durability.
Using Paints And Stains
Choose paints or stains that suit your wood type. Water-based paints work well for bright colors without hiding details. Stains add a natural look and emphasize wood grain. Apply color carefully with a small brush to avoid covering fine lines. Let each layer dry fully before adding another. Test colors on scrap wood first to see the final effect.
Sealing And Protecting Your Art
Seal your art with clear varnish or polyurethane. This protects the surface from moisture and dirt. Use a brush or spray for even coverage. Apply two or three thin coats, allowing drying time between each. A sealed finish keeps colors vibrant and prevents damage over time. Your fractal wood burner stays beautiful for years.
Troubleshooting Common Issues
Troubleshooting common issues in DIY fractal wood burning helps improve your work. Small problems can cause big frustrations. Fixing them early saves time and wood. Understanding how to avoid and fix mistakes makes your project smoother.
Avoiding Burn Marks
Burn marks happen when the wood gets too hot. Keep the burner moving steadily. Do not stay too long on one spot. Use light pressure to avoid deep burns. Test on scrap wood before starting your design. Adjust heat settings to suit the wood type. Cooler wood needs less heat. Hardwoods may need a bit more heat.
Fixing Mistakes
Mistakes happen. Light burn marks can be sanded lightly. Use fine-grit sandpaper to remove surface burns. Avoid sanding too much to keep the design clear. For deep burns, fill gaps with wood filler. Let the filler dry, then sand smooth. Use a thin wood stain to match color. Practice on scrap wood to improve your skill. Slow and steady helps reduce errors.
Inspiring Project Ideas
Fractal wood burning opens many doors for creative projects. It transforms plain wood into stunning artwork. These projects inspire both beginners and skilled creators to try new ideas. The unique patterns add beauty and charm to everyday items. Explore ideas that bring warmth and style to your home or gifts.
Wall Art And Decor
Create eye-catching wall art with fractal wood burning. Large wooden panels become focal points in any room. Simple shapes turn into detailed designs with natural patterns. Frame your art for a polished look. Use different wood types to add texture and color. Small pieces can decorate shelves or tables. They bring a cozy and artistic feel to your space.
Gifts And Personalized Items
Fractal wood burning makes perfect personalized gifts. Custom designs show thought and care for the receiver. Burn names, dates, or special symbols into wood. Make keychains, coasters, or small boxes with unique patterns. These gifts stand out with their natural beauty. They suit birthdays, holidays, or special occasions. Personal touches make every gift one of a kind.
Frequently Asked Questions
What Tools Are Needed For A Diy Fractal Wood Burner?
You need a wood burner with temperature control, safety gloves, and a stencil for fractal patterns. Good ventilation is essential. Optional tools include fine sandpaper and a pencil for sketching designs before burning.
How Do I Create Fractal Patterns On Wood?
Start by sketching a basic fractal design on wood. Use a wood burner to carefully trace and darken the pattern. Work slowly to maintain precision and achieve detailed fractal effects.
Is Fractal Wood Burning Safe For Beginners?
Yes, if you follow safety precautions like wearing gloves and working in a ventilated space. Beginners should practice on scrap wood first. Always keep the burner away from flammable materials and never leave it unattended.
What Type Of Wood Works Best For Fractal Burning?
Soft woods like basswood, pine, or birch are ideal. They burn evenly and show fractal patterns clearly. Avoid treated or painted wood as they release harmful fumes when burned.
Conclusion
Creating a fractal wood burner is fun and rewarding. You can make unique designs with simple tools. The process helps improve your skills step by step. Safety matters—always wear gloves and work carefully. Try different patterns to find what you like best.
This project fits well for hobbyists and beginners alike. Enjoy the calm and focus it brings to your day. Start small, and watch your art grow over time. Keep practicing, and your wood burning will look better each time.