DIY Firewood Holder Outdoor: Essential & Genius
Build a sturdy, easy DIY outdoor firewood holder to keep your wood dry and accessible! This guide offers simple plans, tool lists, and expert tips for a functional and attractive solution you can complete this weekend.
Having a cozy fire is one of life’s simple pleasures, but keeping your firewood organized and dry outdoors can be a real challenge. Piles of wood can look messy, attract pests, and become waterlogged, making them difficult to light. A well-built DIY outdoor firewood holder solves all these problems, providing a neat, elevated space that allows for proper air circulation. Don’t worry if you’re new to woodworking; I’m here to guide you through creating a durable and useful firewood rack that will make your outdoor living space much more enjoyable. Let’s get started on a project that’s both practical and rewarding!
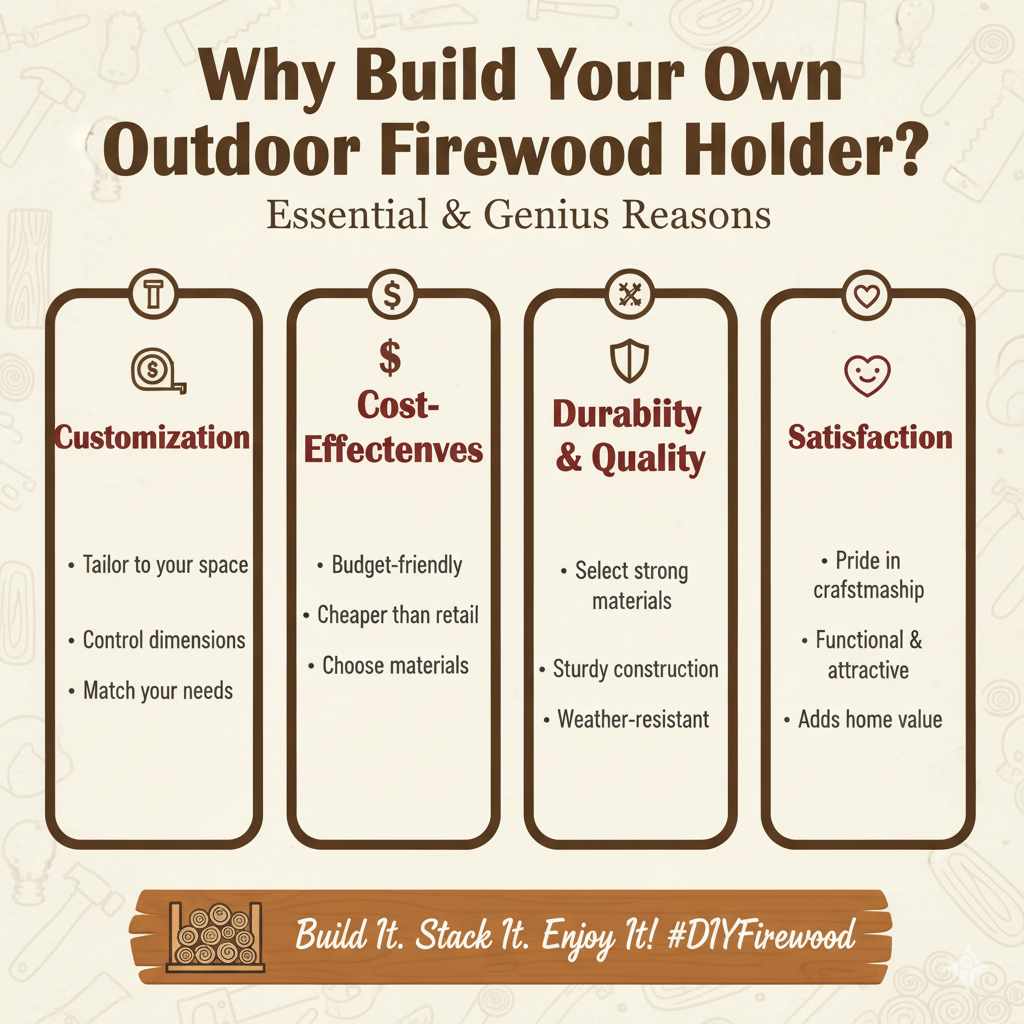
Why Build Your Own Outdoor Firewood Holder?
You might be wondering why you should bother building a firewood holder when you can buy one. The answer is simple: customization, cost, and craftsmanship.
Customization: Store-bought racks often come in fixed sizes. Building your own lets you create a holder that perfectly fits your available space and your anticipated firewood needs. You control the dimensions.
Cost-Effectiveness: While initial material costs exist, a DIY project is often significantly cheaper than buying a pre-made, durable outdoor rack. You can choose materials that fit your budget.
Durability & Quality: You know exactly what materials and construction methods you’re using. This allows you to build a sturdier, more weather-resistant rack that lasts for years, unlike some flimsier store-bought options.
Satisfaction: There’s a unique pride in building something functional and attractive with your own hands. It’s a rewarding experience that adds value to your home and your leisure time.
Choosing Your DIY Firewood Holder Design
There are many ways to build an outdoor firewood holder, ranging from super simple to more complex. For beginners, I recommend designs that prioritize stability and ease of construction. Here are a few popular options:
Simple Stacked Design
This is the most basic and often the most effective design. It essentially involves creating a sturdy frame that holds logs off the ground and allows air to circulate.
Wall-Mounted Design
If you have a suitable wall (like a shed or house exterior), you can build a bracket-style holder to save ground space. This is excellent for smaller areas.
Decorative Lattice Design
For those who want a bit more aesthetic appeal, a design incorporating decorative lattice panels can look very attractive while still providing excellent ventilation.
For this guide, we’ll focus on a classic, standalone, stacked design. It’s incredibly versatile, easy to build, and works well in most outdoor settings.
Essential Tools and Materials for Your DIY Firewood Holder
Before you start building, gather your tools and materials. Having everything ready makes the process smooth and enjoyable. Safety first! Always wear safety glasses and work gloves.
Tools You’ll Need:
Measuring Tape: For accurate measurements.
Pencil: For marking cuts and assembly points.
Saw: A hand saw is perfectly fine for beginners. A circular saw or miter saw will make cuts faster and more precise. Ensure you know how to use your saw safely.
Drill/Driver: For pre-drilling holes and driving screws. Cordless drills are very convenient.
Drill Bits: For pilot holes and countersinking.
Screwdriver Bits: To match your screws.
Level: To ensure your structure is plumb and level.
Wrench or Socket Set: If you opt for bolts.
Optional but Recommended: Speed Square: For marking straight lines and checking angles.
Optional: Clamps: To hold pieces together while you assemble.
Materials List (For a Basic 4ft Wide x 4ft High x 2ft Deep Holder):
The type of wood you choose is crucial for outdoor durability. Pressure-treated lumber is the most resistant to rot and insects, making it ideal for ground contact and exterior projects. Cedar and redwood are naturally resistant but can be more expensive.
Lumber:
(4) 4×4 posts (pressure-treated, 8ft length – cut to desired height, e.g., 4ft)
(4) 2×4 boards (pressure-treated or cedar/redwood, 8ft length – for horizontal supports)
(2) 2×4 boards (pressure-treated or cedar/redwood, 8ft length – for top or base support, depending on design)
(Optional: For back support) Some 1×4 or 2×4 boards cut to fit the depth.
Fasteners:
3-inch exterior-grade wood screws (deck screws are excellent)
2.5-inch exterior-grade wood screws
Optional: Hardware Cloth/Wire Mesh: If you want to create a more enclosed bin to prevent smaller pieces from falling out.
Wood Considerations:
Pressure-Treated Lumber: This is treated with chemicals to resist rot and insects. It’s a cost-effective and durable choice for outdoor projects. Ensure it’s rated for ground contact if any part will touch the soil.
Cedar/Redwood: These woods are naturally resistant to decay and insects. They offer a beautiful look but are generally more expensive.
Avoid Untreated Pine: Unless you plan to seal and paint it extensively, untreated pine will rot very quickly outdoors.
Step-by-Step Guide: Building a Simple DIY Outdoor Firewood Holder
This design focuses on creating a sturdy frame with robust supports. We’ll build it in sections for easier assembly.
Planning Your Dimensions
First, decide on the size of your holder. Consider:
How much wood do you typically need to store?
How much space do you have available?
Standard firewood lengths: Typically 16 inches, but can vary.
A common and practical size is around 4 feet wide, 4 feet high, and 1.5 to 2 feet deep. This allows for good air circulation and accommodates a decent amount of wood.
Step 1: Cut Your Lumber
Measure and cut all your lumber to the correct lengths. Accuracy here will make assembly much easier.
Posts: Cut four pieces from your 4x4s to your desired height (e.g., 4 feet).
Horizontal Supports: Cut eight pieces from your 2x4s. These will be your width supports. If your holder is 4 feet wide, you’ll need four pieces at 4 feet long. You’ll attach these at the top and bottom on the front and back.
Depth Supports: You’ll need pieces to connect the front posts to the back posts at the desired depth. If your depth is 2 feet (24 inches), cut four pieces from 2x4s at 24 inches. These will likely need to be adjusted based on the actual width of your 4×4 posts. A simpler approach might be to use the 2x4s for top and bottom, and then have vertical 2x4s for the back as well.
Let’s refine the material list for a common design:
(4) 4×4 posts, cut to 4ft tall.
(4) 2×4 boards, cut to 4ft long (for front top/bottom and back top/bottom supports).
(4) 1×4 boards, cut to 2ft long (for side supports at top and bottom). This is simpler than using 2x4s for depth. This will create an overall depth of about 21.5 inches using 4×4 posts and 1x4s.
Step 2: Assemble the Side Frames (Optional, but Recommended for Stability)
For a super sturdy build, you can create two side “H” or “A” frames first.
1. Take two 4×4 posts and lay them parallel on the ground, 2ft apart (outside edge to outside edge).
2. Measure and cut two 1×4 boards to fit the distance between the inside edges of the 4x4s.
3. Attach these 1x4s to the front and back of the 4x4s, flush to the top and bottom. You’re essentially making a tall, narrow ladder.
4. Use at least two 2.5-inch exterior screws for each connection point. Pre-drill pilot holes to prevent splitting your 4x4s.
5. Repeat this process for the other two 4×4 posts to create a second identical side frame.
Step 3: Connect the Side Frames
Now, stand both side frames up, parallel to each other.
1. Position them the desired width apart (e.g., 4 feet, measured from the outside edge of one 4×4 to the outside edge of the other).
2. Take your four 4ft-long 2×4 boards. These will be your front and back horizontal supports.
3. Align one 4ft 2×4 board flush with the top of the front posts. Ensure it’s centered.
4. Secure it to each 4×4 post with at least two 2.5-inch or 3-inch exterior screws. Pre-drill pilot holes.
5. Repeat this process for the bottom front 2×4. Make sure it’s level.
6. Do the same for the top and bottom back 2x4s.
You should now have a sturdy, box-like frame.
Tip: If you didn’t build side frames, you’ll attach your 4ft 2x4s directly to your single 4×4 posts at the top and bottom corners.
Step 4: Add Back Support (Crucial for Stability)
To prevent the rack from racking or tipping, you need to add some support at the back.
1. You can run 2×4 boards horizontally across the back between the posts, similar to the front. You’d need about two or three per side depending on height.
2. Alternatively, and often simpler for a beginner, you can use 1×4 or 2×4 braces that run diagonally from a top back corner down to a bottom front corner on each side. This forms a strong triangle. Cut your 1x4s to measure the distance and attach them with screws.
3. Another easy and strong method is to run longer 2x4s horizontally across the entire back, connecting all posts. For our 4ft wide, 2ft deep example, you’d attach two 2ft long 2x4s horizontally at the top and bottom of the back. You’d attach them to the inside of the 4×4 posts.
Let’s go with the continuous horizontal back support for simplicity and strength:
Take two 2×4 boards and cut them to the exact depth of your holder, accounting for the width of the 4×4 posts. If your 4x4s are 3.5 inches wide and your inside depth is 24 inches, you’d cut your 2x4s to 24 inches.
Attach one 2×4 flush with the top of the back of the two rear 4×4 posts.
Attach the second 2×4 flush with the bottom of the back of the two rear 4×4 posts. Use 3-inch screws.
Step 5: Add Racking Supports (Optional, but Great for Airflow)
To create the “shelves” where firewood will rest, you’ll attach more 2x4s.
1. Decide how many levels of firewood you want. Two or three levels are common.
2. Measure and cut 2×4 boards to fit the width between the front and back posts on each side. For a 4ft opening, these would be around 4ft long. You’ll need one for each side of each level.
3. Attach these 2×4 “racks” to the inside of the 4×4 posts. To allow for air flow, you can stagger them slightly or leave gaps.
4. Attach them at your desired heights. For example, one about 6 inches off the ground, another about 18 inches off the ground. Use 3-inch screws.
5. Ensure these are level across each pair.
Step 6: Consider a Base or Elevated Feet
To keep your firewood as dry as possible, it’s essential to get it off the ground.
Elevated Feet: You can attach short blocks of 4×4 or 2×4 to the bottom of your main posts. This lifts the entire structure.
Pallet Base: Cut up an old pallet and lay the thickest pieces across the bottom of your holder, attaching them to the lower horizontal supports.
Concrete Pavers: Simply set your completed holder on a few concrete paving stones. This is the easiest method for elevation.
Step 7: Finishing Touches & Protection
Sand any rough edges: This makes the holder safer to handle and more pleasant to look at.
Sealant: While pressure-treated wood is resistant, applying an exterior-grade wood sealant or stain can further protect it from UV rays and moisture, extending its life and improving its appearance. Follow product instructions. Look for products designed for outdoor decks and fences. For a natural look, a clear sealant works well.
Hardware Cloth (Optional): If you want to prevent smaller pieces of wood and debris from falling through the gaps, you can staple heavy-duty hardware cloth or wire mesh to the inside of the frame.
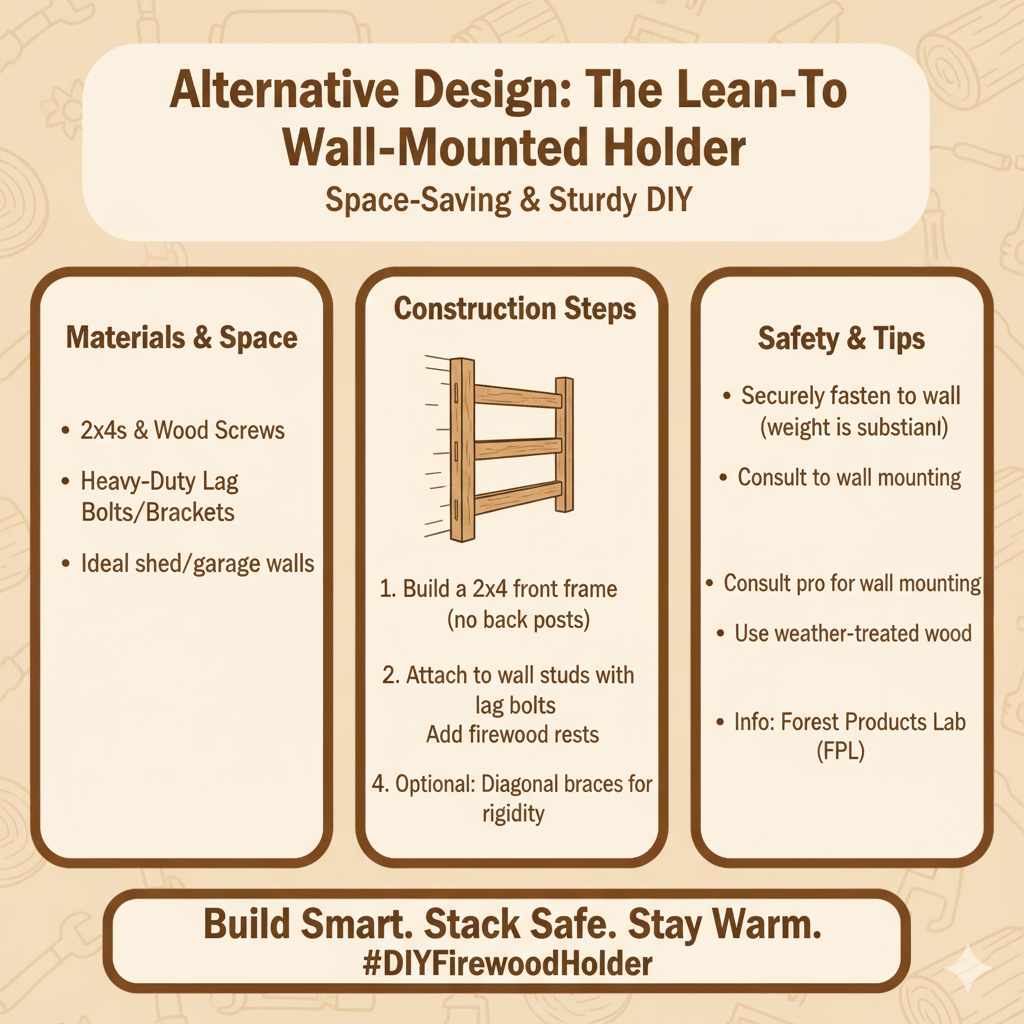
Alternative Design: The Lean-To Wall-Mounted Holder
If you have a shed or garage wall you can build against, this saves space.
Materials: Primarily 2x4s and screws. You will need strong mounting brackets or lag bolts to attach to your wall.
Construction:
1. Build a frame essentially like the front of the box design, but with no back posts. Two vertical 2x4s and two horizontal 2x4s (top and bottom).
2. Instead of back posts, attach this frame directly to your wall using heavy-duty lag bolts. Ensure you’re screwing into studs or solid framing. Consult installation guides for appropriate hardware for your wall type.
3. Add horizontal 2×4 “racks” to the inside of the frame to hold the firewood.
4. Optionally, add diagonal braces from the top of the frame down to the wall for extra rigidity.
Safety Note: Always ensure your wall-mounted rack is securely fastened. The weight of firewood can be substantial. Consult a professional if you’re unsure about wall mounting. For guidance on proper outdoor wood treatment, check out resources from the Forest Products Laboratory (FPL) on wood durability and protection.
Frequently Asked Questions (FAQ)
Q1: What’s the best type of wood for an outdoor firewood holder?
Pressure-treated lumber is highly recommended because it’s treated to resist rot and insects, making it ideal for outdoor use and longevity. Cedar and redwood are also excellent choices due to their natural resistance, though they are typically more expensive.
Q2: How high off the ground should my firewood holder be?
It’s best to keep your firewood at least 4-6 inches off the ground. This allows air to circulate underneath and prevents moisture from wicking up from the soil, significantly reducing the risk of rot and mold.
Q3: Can I build a firewood holder without using pressure-treated wood?
Yes, but you’ll need to take extra steps for protection. Use naturally rot-resistant woods like cedar or redwood, and plan to apply multiple coats of a good quality exterior wood sealant or stain. Regular untreated lumber will likely rot within a couple of years.
Q4: How do I ensure my firewood holder is stable and won’t tip over?
Proper construction is key. Ensure your posts are securely attached to horizontal supports. Adding diagonal braces at the back or using a wider base design will greatly increase stability. For taller holders, consider anchoring them to the ground if you live in a windy area.
Q5: What’s the easiest way to keep firewood dry during rain?
A good design with ample airflow is the first step. Elevating the wood off the ground and ensuring it’s not directly against a wall is also crucial. Some people add a simple slanted roof or cover the top of the stack with a tarp on particularly wet days, but avoid fully enclosing it, as this traps moisture.
Q6: How much weight can my DIY firewood holder hold?
A well-built holder using 4×4 posts and 2×4 supports can hold a very substantial amount of firewood. A cord of wood weighs roughly 2,500 pounds! The strength depends on the lumber size, fastener quality, and joint construction. Our recommended design, using solid lumber and good screws, should easily hold several weeks’ worth of firewood for a typical household.
Q7: Do I need to seal or paint the pressure-treated wood used for the holder?
Pressure-treated wood is already protected against rot and insects. However, sealing or staining it with an exterior-grade product can provide an additional layer of protection against UV damage and moisture, helping it retain its appearance and last even longer. It’s not strictly necessary for function, but it’s good for aesthetics and enhanced durability.