Mastering the Art: How To Join Two Boards Lengthwise Seamlessly
Joining two boards lengthwise creates wider panels for tabletops, shelves, or cabinet sides, opening up many project possibilities. The key is choosing the right joint (like a butt joint with biscuits or dowels, or a tongue and groove) and ensuring perfectly flat, square edges for a strong, seamless bond. Careful clamping and proper glue application are crucial for success.
Ever found yourself needing a wider piece of wood than you can easily buy? Or perhaps you have several narrower boards and a brilliant idea for a larger project, like a beautiful dining table or a sturdy workbench top. This is where learning how to join two boards lengthwise becomes an essential skill for any woodworker, especially beginners.
Many new woodworkers feel a bit intimidated by this task. It seems complex, and you might worry about gaps, strength, or getting a crooked result. But don’t fret! I’m here to show you that with the right approach, a few basic tools, and a little patience, you can achieve beautiful, strong, and seamless board joints. We’ll explore the best methods, essential tools, and practical tips to build your confidence and help you craft stunning projects.
Joining boards lengthwise is a fundamental woodworking technique that allows you to create wider panels from narrower stock. This skill is invaluable for everything from furniture building to custom shelving. Let’s break down the process into clear, manageable steps, focusing on methods that are beginner-friendly yet yield professional results.
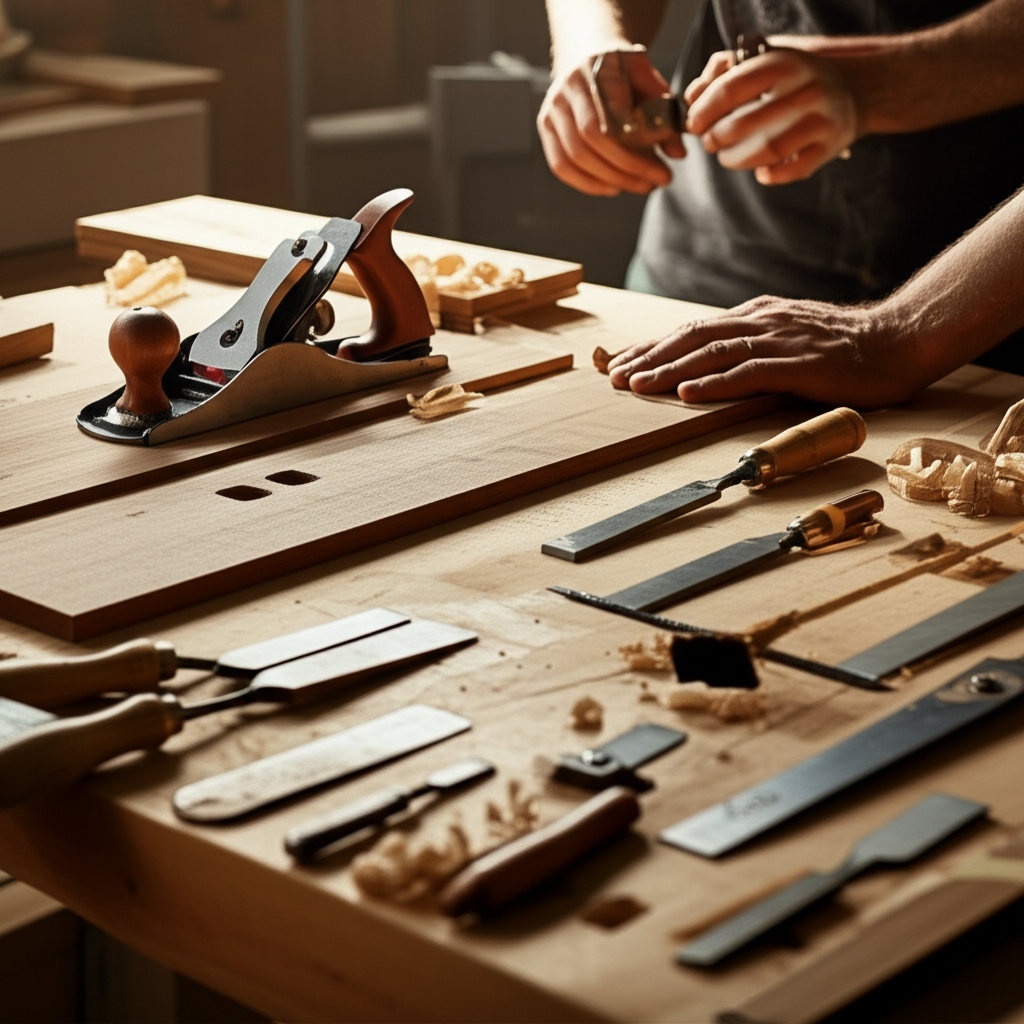
Essential Tools and Materials for Joining Boards Lengthwise
Before we dive into the “how-to,” let’s gather our workshop essentials. Having the right tools makes all the difference in achieving a strong and visually appealing joint.
Basic Tools You’ll Need:
- Measuring Tape & Pencil: For accurate marking.
- Straightedge or Speed Square: To ensure square cuts and marks.
- Clamps: Bar clamps or pipe clamps are critical for holding boards together while the glue dries. Aim for enough clamps to place one every 6-12 inches along the joint.
- Wood Glue: A high-quality PVA wood glue is standard.
- Safety Glasses & Hearing Protection: Always protect your eyes and ears when working with power tools.
- Sanding Blocks or Random Orbital Sander: For preparing edges and finishing the joint.
Optional Tools for Enhanced Joints:
- Table Saw or Jointer: For creating perfectly straight and square edges. This is perhaps the most crucial step for a strong joint.
- Router or Biscuit Joiner: For adding strength and alignment to butt joints (more on this below).
- Drill: If using dowels for alignment and strength.
- Hand Planes: For fine-tuning edges or leveling the finished panel.
Materials:
- Your Wood Boards: Ensure they are flat and free from major warps or twists.
- Biscuits, Dowels, or Tongue & Groove Router Bits: Depending on your chosen joint method.
- Sandpaper: Various grits (e.g., 80, 120, 180, 220) for preparation and finishing.

Step-by-Step Guide: How To Join Two Boards Lengthwise with Confidence
Let’s walk through the process using one of the most common and reliable methods for joining boards lengthwise: the biscuit joint. This method offers excellent alignment and good strength, making it perfect for beginners.
Method 1: The Biscuit Joint (Recommended for Beginners)
Biscuit joints use small, oval-shaped pieces of compressed wood (biscuits) inserted into slots cut into the mating edges of your boards. When glue is applied, the biscuits swell, creating a very strong mechanical bond and excellent alignment.
- Prepare Your Boards and Edges This is arguably the most critical step for any lengthwise joint. Your board edges must be perfectly straight and square. Use a table saw with a sharp blade or a jointer to achieve this. If you don’t have these tools, a perfectly straight edge clamped to the board and a circular saw can work, but it requires extra care. Even a slight gap will weaken the joint and make it visible.
- Safety Tip: Always use push sticks and keep your hands clear of the blade when using a table saw. Ensure your jointer fence is square to the bed.
- Layout and Mark Biscuit Slots Lay your two boards side-by-side on a flat surface, as they will be joined. Mark reference lines across both boards every 6-12 inches along the joint length. These marks will indicate where you’ll cut your biscuit slots. Aim for at least two biscuits per foot of joint length, and never place them too close to the ends (leave about 2-3 inches). Alternate the grain direction of the boards if possible to minimize warping.
- Cut Biscuit Slots Using your biscuit joiner, align the fence with your reference marks and cut a slot into the edge of each board at every mark. Ensure the biscuit joiner’s fence is set correctly to cut slots centered on the thickness of your boards. A common biscuit size is #20, but choose one appropriate for your wood thickness.
- Safety Tip: Hold the biscuit joiner firmly with both hands. Wait for the blade to reach full speed before plunging. Keep your fingers away from the cutting area.
- Dry Fit the Joint Insert the biscuits into the slots on one board. Then, carefully align and push the second board onto the biscuits. This “dry fit” allows you to check for any gaps or alignment issues before applying glue. The boards should meet snugly with no visible gaps. If there are issues, you might need to re-cut edges or adjust slots.
- Apply Glue and Assemble Disassemble the dry-fitted joint. Apply a generous, even layer of wood glue to both mating edges. Also, apply a small amount of glue into each biscuit slot and onto the biscuits themselves. Insert the biscuits into the slots on one board, then bring the two boards together, pressing firmly to ensure good contact.
- Clamp the Boards Place your clamps across the width of the joined boards, perpendicular to the joint line. Use cauls (sacrificial pieces of wood covered in wax paper or packing tape) above and below the joint to distribute clamp pressure evenly and prevent denting your project wood. Tighten the clamps firmly, but don’t overtighten, as this can squeeze out too much glue and starve the joint. You should see a small bead of glue squeeze out along the entire joint line – this is called “squeeze-out” and indicates good glue coverage. Use a damp cloth to wipe away excess squeeze-out immediately.
- Safety Tip: Wear gloves if you want to avoid sticky hands.
- Allow to Dry and Finish Let the glue cure completely according to the manufacturer’s instructions (usually 24 hours, though clamping time might be shorter). Once dry, remove the clamps. Scrape off any remaining dried glue squeeze-out with a chisel or scraper, then sand the joint flush. Start with a coarser grit (e.g., 80 or 100) to level the joint, then progress through finer grits (120, 180, 220) for a smooth finish.
Other Common Methods for How To Join Two Boards Lengthwise:
Method 2: Dowel Joints
Similar to biscuit joints, dowel joints use round wooden pins (dowels) for alignment and strength. You’ll need a drill and a doweling jig to ensure accurate, perpendicular holes.
- Prepare Edges: Same as step 1 for biscuit joints – perfectly straight and square.
- Mark Dowel Locations: Mark every 6-12 inches.
- Drill Dowel Holes: Use a doweling jig to drill precisely aligned holes into the edges of both boards. The depth should be half the dowel length.
- Dry Fit: Insert dowels into one board, then join the second board to check alignment.
- Glue and Clamp: Apply glue to edges and into dowel holes. Insert dowels, assemble, and clamp firmly.
- Dry and Finish: Allow to dry, then scrape and sand.
Method 3: Tongue and Groove Joints
This method creates a strong mechanical lock using a router table and specialized bits. One board has a “tongue” (a protruding ridge), and the other has a matching “groove” (a recessed channel).
- Prepare Edges: Crucial for a tight fit.
- Route the Tongue and Groove: Use a router table with a tongue and groove bit set. One board gets the tongue, the other the groove. Ensure consistent depth and alignment.
- Dry Fit: Test the fit. It should be snug but not require excessive force.
- Glue and Clamp: Apply glue within the groove and on the tongue. Assemble and clamp.
- Dry and Finish: Allow to dry, then scrape and sand.
Method 4: Simple Butt Joint (Least Recommended for Width)
A butt joint is just two perfectly prepared edges glued together. While simple, it relies entirely on the glue for strength and provides no mechanical alignment. It’s generally not recommended for panels that will experience stress or movement unless reinforced with splines or cleats.
- Prepare Edges: Absolutely paramount for success.
- Glue and Clamp: Apply glue to both edges and clamp firmly.
- Dry and Finish: Allow to dry, then scrape and sand.
Comparison of Common Board Joining Methods Lengthwise
Choosing the right method for how to join two boards lengthwise depends on your tools, experience, and the project’s demands.
| Joint Type | Strength | Alignment | Tools Needed | Beginner Friendliness |
|---|---|---|---|---|
| Butt Joint (Glue Only) | Good (if edges are perfect) | Poor (relies on clamping) | Clamps, glue, edge prep | High (but tricky to get right) |
| Biscuit Joint | Very Good | Excellent | Biscuit joiner, clamps, glue, edge prep | High |
| Dowel Joint | Very Good | Excellent | Drill, doweling jig, clamps, glue, edge prep | Medium (jig takes practice) |
| Tongue & Groove | Excellent | Excellent | Router table, T&G bits, clamps, glue, edge prep | Medium-High (router safety) |
| Spline Joint | Excellent | Excellent | Table saw/router, spline stock, clamps, glue, edge prep | Medium-High |
For most beginners looking to join two boards lengthwise, the **biscuit joint** offers the best balance of ease, strength, and alignment. Dowel joints are a close second if you have a reliable doweling jig.
Tips for Better Results When You Join Two Boards Lengthwise
Achieving a seamless, strong joint takes practice, but these tips will help you get there faster.
- Perfectly Prepared Edges are Paramount: I can’t stress this enough. If your edges aren’t dead straight and square, you’ll get gaps, a weak joint, and a frustrating outcome. A jointer or a carefully set up table saw are your best friends here. For more on proper edge preparation, you can check out resources like this guide from Wood Magazine on jointing lumber.
- Grain Direction Matters: When joining multiple boards, alternate the grain direction (end grain pattern) of adjacent boards. This helps to counteract potential cupping or warping as the wood expands and contracts with humidity changes, leading to a flatter panel.
- Generous, Even Glue Application: Don’t skimp on the glue, but don’t drown the joint either. You want full coverage on both mating surfaces. A small bead of squeeze-out after clamping indicates good coverage.
- Use Cauls for Flatness: When clamping, place cauls (straight pieces of wood, often waxed or taped to prevent sticking) across the panel, perpendicular to the joint, above and below. Clamp these cauls down to ensure the panel stays flat and doesn’t buckle as you tighten the main clamps.
- Check for Flatness During Clamping: As you tighten your clamps, stand back and look down the length of the joint. Sometimes boards can bow slightly. Use extra clamps or cauls to correct any bowing before the glue sets.
- Clean Squeeze-Out Promptly: Wipe away excess glue with a damp cloth immediately after clamping. Dried glue can be hard to remove and can interfere with staining or finishing.
- Allow Adequate Drying Time: Resist the urge to remove clamps too early. While glue might feel dry to the touch in an hour or two, it needs much longer to reach its full strength. Follow the manufacturer’s recommendations, usually 24 hours for full cure.
- Acclimate Your Wood: Allow your wood to sit in your workshop for a few days or weeks before starting your project. This lets the wood adjust to the local humidity, reducing the chances of movement after assembly. The USDA Forest Products Laboratory has excellent resources on wood properties and moisture content.
Essential Tools and Materials for Joining Boards Lengthwise
Even experienced woodworkers make mistakes, but knowing what to watch out for can save you a lot of frustration and wasted material.
- Not Preparing Edges Properly: This is the number one culprit for weak, gappy joints. If your edges aren’t perfectly straight and square, no amount of glue or clamping will fix it. Take your time with this step!
- Insufficient Clamping Pressure or Too Few Clamps: Too little pressure, or clamps spaced too far apart, can lead to gaps or a weak bond. You need even, firm pressure along the entire joint.
- Overtightening Clamps: While firm pressure is good, overtightening can squeeze out too much glue, creating a “starved joint” where there isn’t enough adhesive to bond the wood fibers. It can also dent your wood.
- Not Dry Fitting: Always, always dry fit your joint before applying glue. This is your last chance to catch alignment issues, gaps, or problems with your biscuits/dowels without making a sticky mess.
- Using Too Little Glue: A thin, uneven bead of glue won’t provide the necessary bond strength. Aim for full coverage.
- Not Wiping Away Squeeze-Out: Dried glue is a pain to remove and can create a barrier that prevents stains or finishes from penetrating the wood evenly, leaving unsightly light spots.
- Removing Clamps Too Soon: Patience is a virtue in woodworking. Giving the glue ample time to cure ensures maximum joint strength.
- Ignoring Grain Direction: As mentioned, alternating grain helps prevent future warping and cupping of your panel. Overlooking this can lead to an uneven surface down the line.
- Not Using Cauls: Without cauls, especially on wider panels, the clamping pressure can cause the boards to bow upwards or downwards, resulting in an uneven surface that requires extensive sanding to flatten.

FAQ: How To Join Two Boards Lengthwise
Q1: How strong are these lengthwise joints?
When done correctly with proper edge preparation, glue, and clamping, biscuit, dowel, or tongue and groove joints can be incredibly strong, often stronger than the wood itself. The glue bond is designed to be very durable.
Q2: Can I join boards without a biscuit joiner or doweling jig?
Yes, you can use a simple butt joint with only glue and clamps. However, it requires exceptionally precise edge preparation and is generally less strong and harder to align than joints with mechanical fasteners. For better strength, you could route a spline slot into both edges using a router, then insert a thin strip of wood (a spline) with glue.
Q3: What’s the best type of wood glue for joining boards lengthwise?
For most indoor projects, a standard PVA (polyvinyl acetate) wood glue like Titebond Original or Titebond II (which offers some water resistance) is excellent. For outdoor projects or high-moisture environments, use a waterproof glue like Titebond III or a polyurethane glue.
Q4: How many clamps do I need to join two boards lengthwise?
A good rule of thumb is one clamp every 6 to 12 inches along the length of the joint. For wider panels or boards prone to bowing, use more clamps and definitely use cauls to maintain flatness.
Q5: How long should I leave the clamps on?
While many wood glues achieve initial grab in 30 minutes to an hour, it’s best to leave clamps on for at least 3-4 hours, and ideally, let the joint cure for 24 hours before putting any stress on it. Always check the glue manufacturer’s specific recommendations.
Q6: What if my boards aren’t perfectly flat or straight to begin with?
It’s crucial to start with flat, straight boards. If your boards have significant cups, twists, or bows, you’ll need to flatten and straighten them first using a jointer and planer, or by hand-planing. Trying to force curved boards together will result in a weak, gappy joint that will likely fail or look poor.
Q7: Is it expensive to get started with tools for joining boards lengthwise?
You can start affordably with just clamps, glue, and good edge preparation (which might involve a simple straightedge and circular saw). A biscuit joiner is a relatively inexpensive power tool that greatly improves results. A router and bits are a bigger investment but open up many possibilities. You don’t need every tool at once; build your collection as your skills and projects grow!
Conclusion: Your Journey to Wider Wood Panels
Learning how to join two boards lengthwise is a truly rewarding skill that unlocks a world of woodworking possibilities. From crafting custom tabletops to building robust shelves, the ability to create wider, stronger panels from individual boards is a cornerstone of many successful projects.
Remember, the core principles are simple: perfectly prepared edges, appropriate mechanical fasteners (like biscuits or dowels), generous glue application, and firm, even clamping. Don’t be afraid to start with a practice piece, take your time, and always prioritize safety. With each joint you make, your confidence will grow, and you’ll find yourself creating beautiful, durable pieces that you’ll be proud to show off.
So, grab your tools, prepare your wood, and get ready to transform those individual boards into something bigger and better. Happy woodworking!