Adjustable Wooden Table: Essential Tips
Learn essential tips for building your own adjustable wooden table. This guide simplifies the process, ensuring you create a sturdy and versatile piece of furniture that perfectly fits your needs. Get ready to build!
Creating a versatile workspace or a dining table that can adapt to different situations is a common dream for many homeowners and DIY enthusiasts. We envision a table that can shrink for intimate meals or expand for gatherings, or perhaps one that can switch between sitting and standing heights. The challenge often lies in figuring out how to achieve this adjustability without complicated mechanisms or needing advanced woodworking skills. It can feel overwhelming, leaving many wondering where to even start. But don’t worry! This guide is here to break down the essential tips for building your very own adjustable wooden table. We’ll focus on simplicity, practicality, and achieving beautiful results. Get ready to discover how achievable this project truly is!
Why Choose an Adjustable Wooden Table?
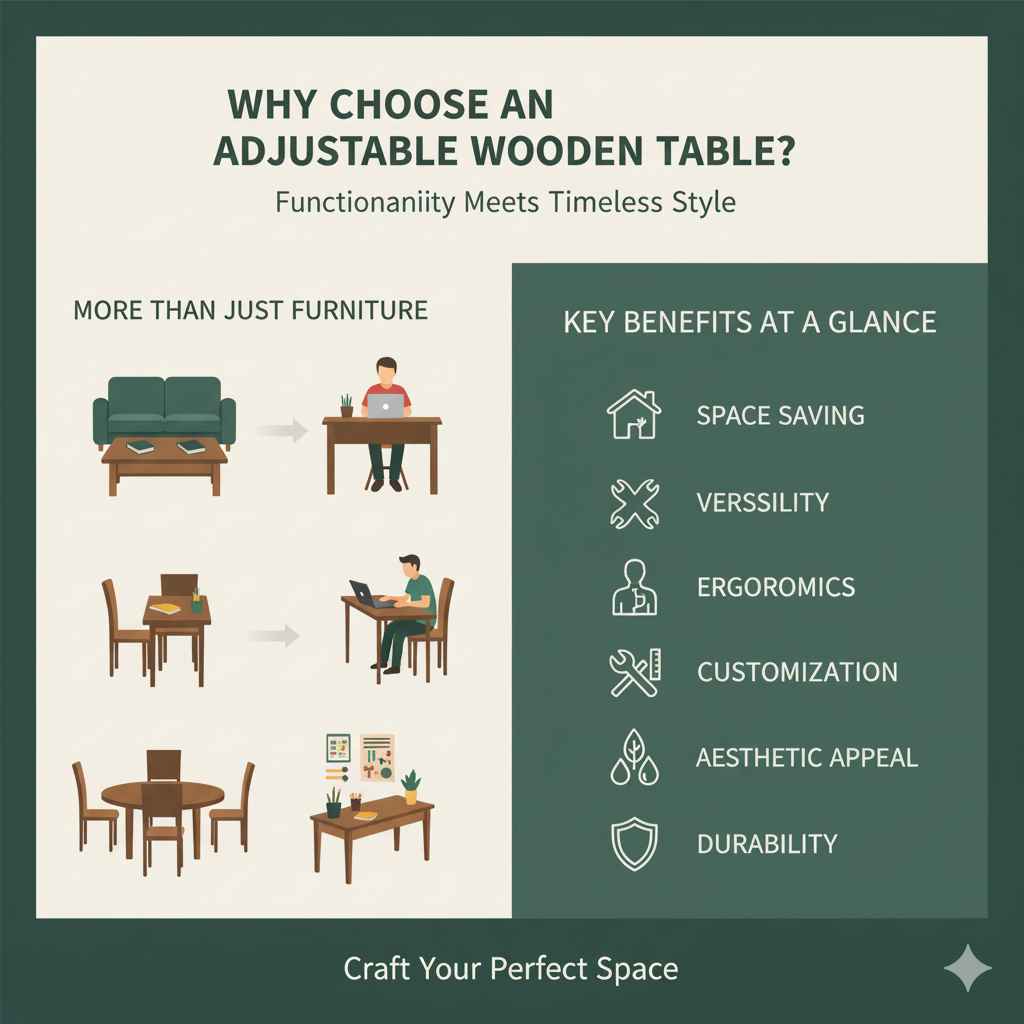
An adjustable wooden table is more than just furniture; it’s a game-changer for functionality and space optimization. Imagine a coffee table that can lift to become a desk for working from home, or a dining table that expands to comfortably seat more guests. For crafters and hobbyists, an adjustable height can mean the difference between comfortable, pain-free work and awkward straining. Wood offers a timeless aesthetic, warmth, and incredible durability, making it a perfect material for a piece of furniture you’ll want to use and admire for years.
The beauty of an adjustable wooden table lies in its adaptability. You’re not just building a table; you’re building a solution to everyday needs. Whether it’s maximizing a small apartment, creating a multi-functional craft station, or simply adding a touch of personalized elegance to your home, the adjustable wooden table is a project that delivers immense satisfaction and practical benefits.
Key Benefits at a Glance:
- Space Saving: Ideal for smaller homes or multi-purpose rooms.
- Versatility: Adapts to different activities – from dining to working to crafting.
- Ergonomics: Allows for comfortable use at various heights, promoting better posture.
- Customization: Can be tailored to specific dimensions, styles, and wood types.
- Aesthetic Appeal: Wooden tables add warmth, character, and timeless beauty to any space.
- Durability: Well-built wooden tables can last for generations.
Understanding the Mechanisms for Adjustability
The heart of any adjustable table is its mechanism. For beginners, the goal is to find robust, straightforward systems that offer reliable height or length changes without excessive complexity. We’ll explore a few popular and beginner-friendly options.
1. Lift Mechanisms (for Height Adjustment)
These mechanisms allow you to raise or lower the tabletop. They are often the most visually striking and functionally impressive aspect of an adjustable table.
Table Lifts:
These are typically gas-powered or spring-loaded mechanisms that allow you to smoothly lift the tabletop. Many are pre-assembled units that you can simply attach to your table base and top. They often have a locking feature to keep the table at your desired height.
- Pros: Easy to install, smooth operation, readily available.
- Cons: Can be the most expensive component, requires precise alignment during installation.
When selecting a table lift, always check the weight capacity to ensure it can support your tabletop and any items you plan to place on it. Reputable hardware suppliers often provide detailed specifications and installation guides. For instance, lift mechanisms are commonly found on lift systems designed for furniture, offering a good starting point for your research.
Manual Crank Systems:
These use a hand crank to extend or retract legs or support structures, thereby changing the table’s height. They are mechanically simple and reliable.
- Pros: Very durable, no power required, generally more affordable than powered lifts.
- Cons: Slower to adjust, requires physical effort.
2. Extendable Mechanisms (for Length/Width Adjustment)
If your goal is a table that can grow in size, these mechanisms are key.
Drawer Slides / Extension Slides:
Similar to those found in drawers, heavy-duty extension slides can form the basis of a table that extends. You might have two sections of the tabletop that pull apart, revealing an extension leaf stored underneath or in the middle.
- Pros: Relatively simple to integrate, can support significant weight.
- Cons: Requires careful alignment, the mechanism can sometimes be visible.
Look for ‘heavy-duty’ or ‘appliance grade’ drawer slides for best results, as they are designed for more strenuous use. Understanding how to mount these securely is crucial.
Plunger / Pin Systems:
These are often used in conjunction with removable leaves or folding sections. A simple pin or plunger locks a section of the table in place. When you want to extend, you release the pin, fold or slide the section, and then re-pin it.
- Pros: Very simple, inexpensive, minimal moving parts.
- Cons: Might involve more manual steps to extend/retract, can be less sleek than other mechanisms.
Essential Tools and Materials
Gathering the right tools and materials before you start is half the battle. For an adjustable wooden table, you’ll need basics and a few specialized items depending on your chosen mechanism.
Tools You’ll Likely Need:
- Measuring Tape: For accurate measurements.
- Pencil: For marking cuts and drill points.
- Safety Glasses: Always protect your eyes!
- Hearing Protection: Especially when using power tools.
- Dust Mask: To avoid inhaling sawdust.
- Circular Saw or Miter Saw: For cutting wood to size. A miter saw offers more precision for straight cuts.
- Jigsaw: Useful for curved cuts if your design requires them.
- Drill/Driver: For drilling pilot holes and driving screws.
- Screwdriver Set: To match your screw types.
- Clamps: Essential for holding pieces together while glue dries or while fastening.
- Sandpaper (various grits) or Orbital Sander: For smoothing wood.
- Level: To ensure your table is stable and even.
- Square: To make sure your cuts and joints are at perfect right angles.
Materials:
- Wood: Plywood (for tabletops, good for stability), hardwoods like pine, oak, or poplar (for legs and frames, offers strength and beauty), or a combination.
- Screws: Wood screws of appropriate lengths and types (e.g., drywall screws for basic projects, construction screws for sturdier builds).
- Wood Glue: A strong adhesive is crucial for reinforcing joints.
- Finishing Supplies: Stain, polyurethane, paint, or natural oil for protection and aesthetics.
- Adjustable Mechanism: Your chosen lift system, extension slides, or hardware.
- Optional: Casters (for mobility), decorative hardware.
Step-by-Step Project Guide (General Outline)
Building an adjustable wooden table involves careful planning and execution. While specific designs vary, this general outline covers the core steps I follow with my DIYers.
Step 1: Planning and Design
Before you cut a single piece of wood, sketch out your design. Consider:
- Dimensions: What height, width, and depth do you need?
- Mechanism Integration: Where will the adjustable parts fit? How will they operate?
- Weight Capacity: How much weight will the table need to support?
- Aesthetics: What style do you want?
It’s a great idea to look at existing designs for inspiration, but always adapt them to your specific needs and skill level. Consider the National Institute of Standards and Technology (NIST) guidelines on furniture safety and dimensions if building for specific accessibility needs.
Step 2: Cutting Your Wood
Using your measurements, carefully cut all the wood pieces for your tabletop, frame, and legs. Double-check your measurements before cutting to avoid waste. Precision here makes assembly much easier.
Step 3: Building the Tabletop
This could be a single solid piece, or for extendable tables, it might be two or more sections that join together. If using plywood, ensure the edges are finished smoothly or covered with edge banding for a cleaner look. If you’re building an extendable table, this is where you’ll prepare the sections to work with your chosen extension slides.
Step 4: Constructing the Base and Frame
This is the support structure for your tabletop. Depending on your design, it might be a simple frame or a more complex assembly to house the lift mechanism.
- Build the frame for the tabletop.
- Construct the legs or the base structure that will house your adjustable mechanism.
- Ensure all corners are square and joints are strong, using wood glue and screws.
Step 5: Integrating the Adjustable Mechanism
This is the critical step for adjustability. Carefully follow the manufacturer’s instructions for your specific lift or extension hardware.
- For Lift Mechanisms: Align the mechanism perfectly with the tabletop and base. Securely screw it in place, ensuring it operates smoothly without binding. Test the lift before attaching the tabletop permanently.
- For Extension Slides: Mount the slides according to the manufacturer’s guide, ensuring they are parallel and level for smooth operation. Attach tabletop sections to the appropriate parts of the slides.
Take your time here. Misaligned hardware can lead to a table that doesn’t function correctly or is difficult to adjust.
Step 6: Assembly
Attach the tabletop to the base. If using a lift, it will sit between the base and the tabletop. If using an extension mechanism, the tabletop sections will already be attached to the slides. Ensure everything is aligned and secure. Use clamps to hold components in place while you fasten them.
Step 7: Sanding and Finishing
Once assembled, sand all surfaces smooth, starting with a coarser grit sandpaper and moving to finer grits for a silky finish. Wipe away dust and apply your chosen finish (stain, paint, polyurethane, etc.) in thin, even coats. Allow adequate drying time between coats.
Step 8: Final Checks
Test the adjustability thoroughly. Ensure it locks smoothly at different heights or extends easily. Make any minor adjustments needed.
Essential Tips for Success
Even with a clear plan, a few expert insights can make all the difference for your adjustable wooden table project.
Tip 1: Measure Twice, Cut Once — Always
This old adage is golden in woodworking. Mistakes in cutting can be costly and time-consuming to fix. A sharp pencil, a reliable measuring tape, and a good quality square are your best friends.
Tip 2: Don’t Skimp on Hardware
The adjustable mechanism is the star of your project. Invest in quality hardware from reputable brands. Poor-quality lifts or slides can be frustrating, unsafe, and fail prematurely. Check reviews and specifications carefully.
Tip 3: Pilot Holes are Your Friend
Always drill pilot holes before driving screws, especially in hardwoods or near the edges of wood. This prevents the wood from splitting, which is a common beginner mistake. The pilot hole should be slightly smaller than the screw’s shank.
Tip 4: Keep it Level and Square
Use a level and a square constantly throughout the build. An uneven base or a non-square frame will lead to a wobbly table and can cause your adjustable mechanism to bind or not function correctly. A stable foundation is key!
Tip 5: Consider Weight Distribution
When designing and building, think about how weight will be distributed. For lift tables, the center of gravity is important. For extendable tables, ensure the support for the extensions is strong enough.
Tip 6: Practice with Your Mechanism
Before final installation, test your lift or slide mechanism thoroughly. Understand how it extends, retracts, and locks. This will help you identify any potential issues early on and ensure smooth operation.
Tip 7: Safety First, Always!
Always wear safety glasses, especially when cutting or drilling. Use hearing protection with loud power tools and a dust mask to protect your lungs from sawdust. If you’re unsure about a tool or a step, consult online resources or experienced woodworkers. The Occupational Safety and Health Administration (OSHA) provides excellent guidance on PPE.
Choosing the Right Wood for Your Table
The type of wood you choose impacts the look, durability, and cost of your adjustable wooden table. For beginners, balancing these factors is key.
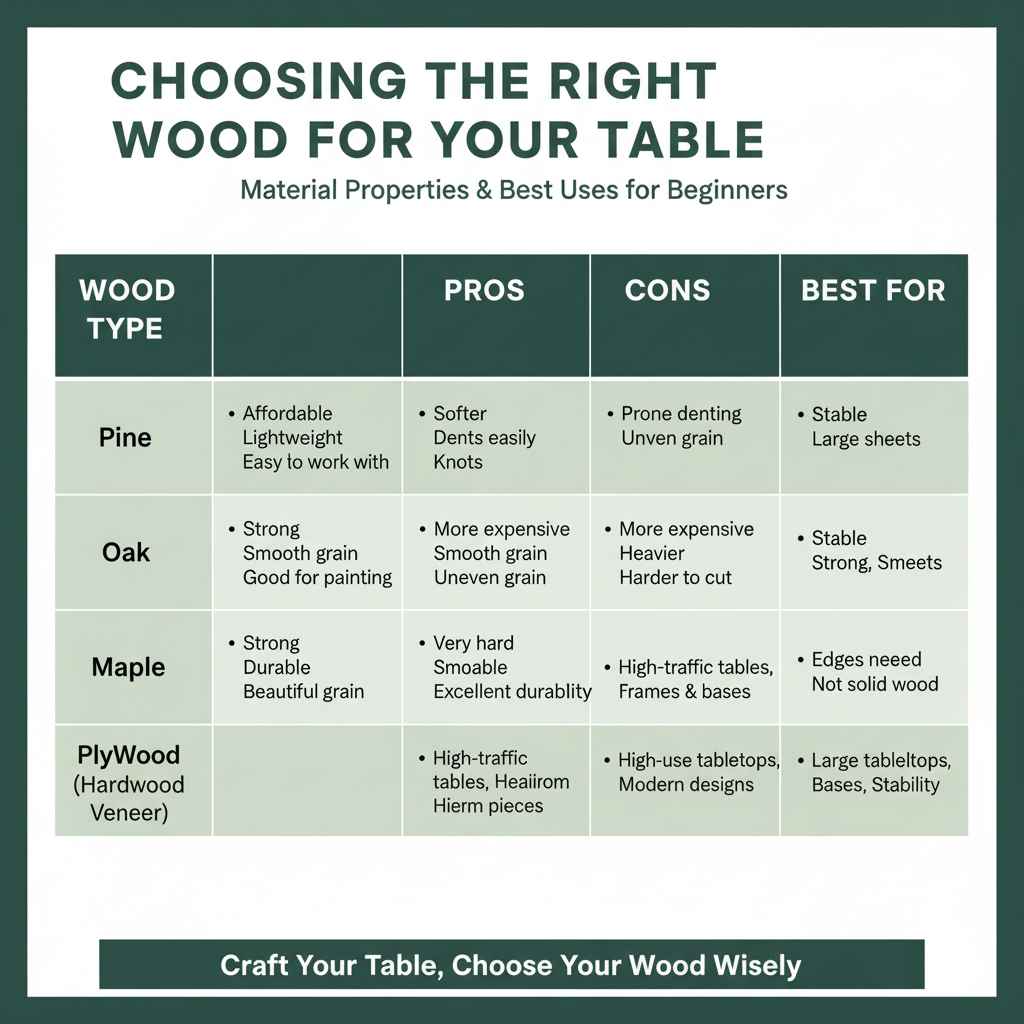
Material Properties Table:
| Wood Type | Pros | Cons | Best For |
|---|---|---|---|
| Pine | Affordable, lightweight, easy to work with, takes stain well. | Softer, can dent/scratch easily, can have knots that affect appearance. | Beginner projects, tabletops where durability is less critical, rustic designs. |
| Poplar | Relatively inexpensive, smooth grain, good for painting, sturdy enough for frames. | Can be prone to denting, grain can be uneven. | Painted tables, frames, and bases. |
| Oak | Strong, durable, beautiful grain patterns, good resistance to wear. | More expensive, heavier, can be harder to cut and sand. | High-traffic tables, durable tabletops, heirloom pieces. |
| Maple | Very hard, smooth and fine grain, excellent durability. | More expensive, can be challenging to stain evenly without prep. | High-use tabletops, modern or sleek designs. |
| Plywood (Hardwood Veneer) | Stable, strong, comes in large sheets, can have attractive wood veneers. | Edges can look unfinished (requires banding), not solid wood character. | Large tabletops, bases, when stability and large size are needed. |
For tabletops, stable materials like hardwood plywood or solid wood planks are excellent choices. For the base and legs, hardwoods like pine, poplar, or oak offer the necessary strength to support the table and its contents, especially when incorporating adjustable mechanisms.
Common Beginner Pitfalls and How to Avoid Them
It’s rare for a first project to be perfect, and that’s okay! Knowing what commonly trips up beginners can help you navigate your adjustable wooden table build more smoothly.
Pitfall 1: Insufficient Planning
Jumping straight to cutting without a detailed plan, including the exact placement of hardware, can lead to errors. Always draw out your design, marking measurements and hardware locations.
Pitfall 2: Forgetting Wood Movement
Solid wood expands and contracts with changes in humidity. If you rigidly join solid wood pieces in a way that restricts this natural movement (like screwing tabletop planks directly to a fixed frame without allowance), it can lead to warping or cracking.
- Solution: For solid wood tabletops, use methods that allow for expansion, like tabletop fasteners (Z-clips, figure-8 fasteners) or allowing a slight gap between planks if the design permits.
Pitfall 3: Overtightening Screws
Driving screws too hard can strip the wood, weaken the joint, or even cause the screw head to pop through the surface. Use a drill with a clutch setting to control torque.
Pitfall 4: Inadequate Support for Mechanisms
Adjustable mechanisms need strong, stable mounting points. If the wood you’re attaching them to is too thin or weak, the mechanism won’t function reliably and could fail.
- Solution: Reinforce mounting areas with extra wood blocking or use thicker materials where mechanisms attach.
Pitfall 5: Rushing the Finishing Stage
Skipping thorough sanding or attempting to apply finishes in cold, damp conditions can result in a less-than-perfect look. Proper preparation and application are crucial for a professional finish. Allow ample drying time between coats; consult the product label for specific recommendations.
Frequently Asked Questions (FAQ)
Q1: How do I choose the right size adjustable wooden table for my space?
A: Measure your space accurately! Consider how you’ll use the table. For dining, allow about 24-30 inches of space per person. For a desk, ensure there’s enough clearance for your chair and work items.