DIY Acoustic Wood Panels: Essential Guide”
DIY acoustic wood panels can transform your home’s sound by making it quieter and more pleasant. This guide shows beginners how to build effective and stylish panels using simple tools and affordable materials for a noticeable improvement.
Are you tired of echoes in your living room, home office, or media room? Does conversation sound muffled, or does music not quite hit that sweet spot? You’re not alone! Many homes can benefit from better acoustics, but professional sound treatment can be expensive. The good news is, you can significantly improve your room’s sound quality yourself. Building your own acoustic wood panels is a rewarding DIY project that’s both cost-effective and visually appealing. We’ll walk you through every step, making it super simple, even if you’re new to woodworking. Let’s get your space sounding its best!
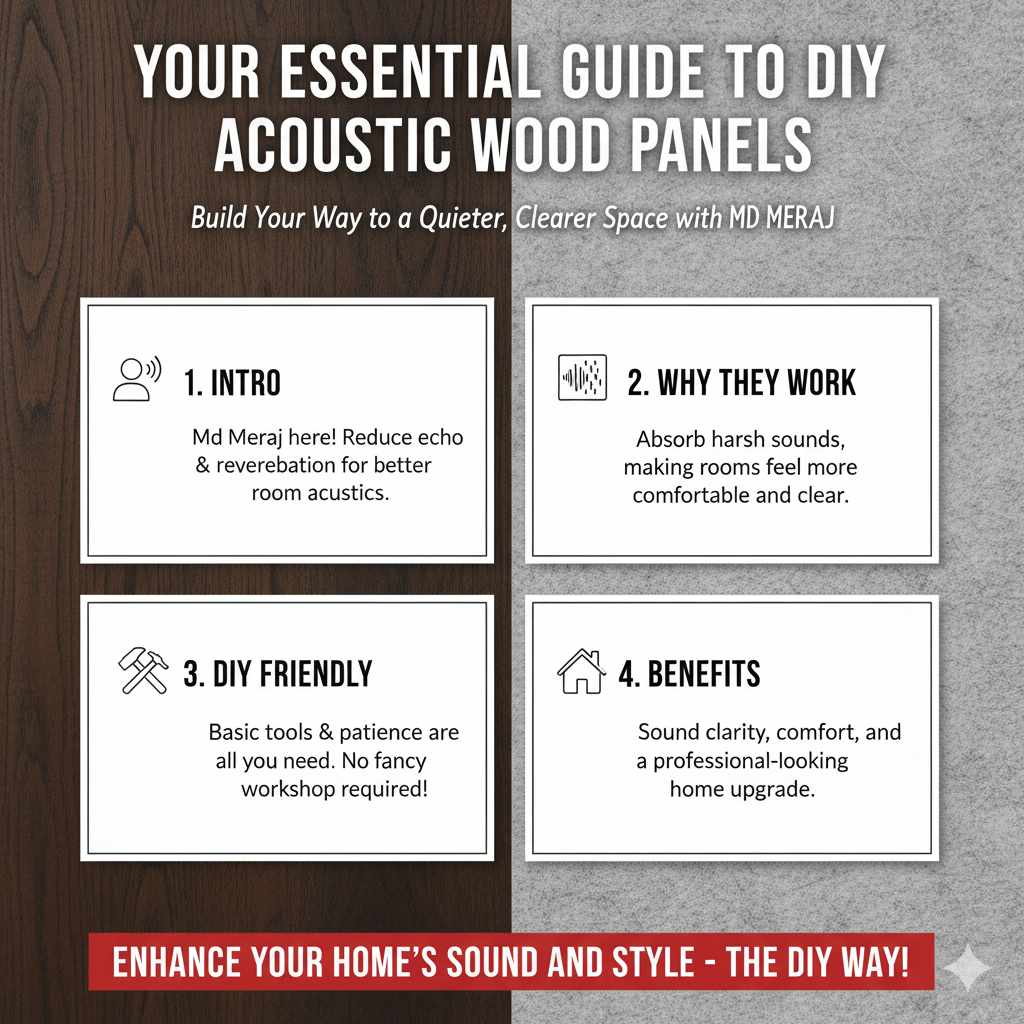
Your Essential Guide to DIY Acoustic Wood Panels
Welcome to the workshop! I’m Md Meraj, and I’m excited to guide you through creating beautiful and functional DIY acoustic wood panels. These panels are more than just decorations; they’re your ticket to a more comfortable and enjoyable living space. They help reduce echo and reverberation, making rooms sound clearer and more pleasant. Think of it as putting a nice blanket on your walls to absorb harsh sounds. You don’t need a fancy workshop or years of experience. With some basic tools and a little patience, you can build panels that look professionally made and make a real difference in your home’s acoustics.
Why Build Your Own Acoustic Panels?
Tackling this project yourself brings amazing benefits:
Cost Savings: Buying pre-made acoustic panels can be very pricey. Building your own lets you control costs significantly, often saving you hundreds of dollars.
Customization: You get to choose the size, shape, fabric, and wood finish to perfectly match your home’s décor. No more settling for generic options!
Sound Improvement: Properly made panels can dramatically reduce echo and reverb, making speech clearer, music richer, and your entire environment more peaceful.
Learning a New Skill: It’s a fantastic way to dip your toes into woodworking, learn basic construction, and build confidence in your DIY abilities.
Satisfaction: There’s a special pride that comes from creating something beautiful and functional with your own hands.
Understanding Acoustics: The Basics
Before we start building, let’s quickly touch on what these panels do. Sound waves bounce off hard surfaces like walls, windows, and bare floors. This bouncing is called reverberation. Too much reverberation makes a room sound “live” or echoey, which can be unpleasant. Acoustic panels work by absorbing some of these sound waves instead of letting them bounce around. They typically consist of a frame, sound-absorbing material (like mineral wool or rigid fiberglass), and a fabric covering, often with a decorative wooden grille. This combination effectively “tames” sound, making your room sound better.
For a deeper understanding of sound absorption, you can explore resources from organizations like the Acoustical Society of America.
Materials You’ll Need
Gathering your materials is the first crucial step. Don’t worry; these are all readily available at your local hardware store or lumberyard.
For the Frame:
1×4 or 1×3 lumber (pine or poplar are good beginner choices)
Wood screws (1 ¼ inch length is usually good)
Wood glue
Sandpaper (120-grit and 220-grit)
Wood finish (stain, paint, or clear coat, if desired)
For Sound Absorption:
Rigid Fiberglass or Mineral Wool Insulation: Recommended brands include Owens Corning 703/705 or Rockwool Rockboard. You’ll need boards typically 2 or 4 inches thick. Wear gloves, a long-sleeved shirt, and an N95 mask when handling these materials, as they can be itchy and irritating. You can find safety guidelines on handling insulation from sources like the Environmental Protection Agency (EPA).
Breathable Fabric: Guilford of Maine is a popular choice for acoustic panels because it’s designed to let sound pass through efficiently. You can also use burlap or a tightly woven cotton. Ensure it’s not too thick or vinyl-backed. About 1-2 yards per panel, depending on size.
For the Decorative Grille (Optional but Recommended):
Lattice strips, thin plywood, or pre-made decorative grille inserts.
Tools You’ll Need:
Measuring tape
Pencil
Safety glasses
Gloves and an N95 mask (especially for insulation)
Saw: A miter saw is ideal for clean cuts, but a handsaw with a miter box can work.
Drill with drill bits and a driver bit for screws
Clamps (corner clamps are very helpful for frames)
Staple gun (heavy-duty) with staples
Utility knife or box cutter
Optional: Router (for decorative edges), OR a jigsaw with a fine-tooth blade to cut your own grille patterns.
Step-by-Step Guide to Building Your DIY Acoustic Wood Panels
Let’s get building! We’ll focus on creating one standard-sized panel (e.g., 2ft x 4ft), which is a common and effective size. You can adjust dimensions as needed.
Step 1: Plan Your Panel Size and Design
Decide where your panels will go and how many you need. A 2ft x 4ft panel is a great starting point. Consider the thickness of your insulation; 2-inch thick insulation is usually sufficient, but 4-inch offers better performance.
Step 2: Cut Your Frame Lumber
For a 2ft x 4ft panel with 2-inch thick insulation, you’ll build a frame that’s slightly smaller on the inside to hold the insulation snugly. A common interior dimension for a 2ft x 4ft panel is 22.5 inches by 46.5 inches. This accounts for the thickness of the wood itself.
Cut List Example for a 2ft x 4ft Panel (using 1×4 lumber, which is ¾” thick x 3 ½” wide):
Two pieces @ 48 inches long
Two pieces @ 21 inches long (This will create an outer frame of 48″ x 24″)
Cut Accuracy: Measure twice, cut once! Ensure your cuts are square (90 degrees). A miter saw makes this easy. If using a handsaw, use a miter box for guidance.
Step 3: Assemble the Frame
This is where your panels start taking shape!
1. Dry Fit: Lay out your four cut pieces in a rectangle. Ensure the corners meet neatly.
2. Apply Glue: Apply a thin bead of wood glue along the end of one piece where it will meet another.
3. Join Corners: Bring the glued end of one piece to the other. Use clamps to hold them together. For perfect 90-degree corners, corner clamps are a lifesaver!
4. Pre-Drill Holes: Before driving screws, pre-drill pilot holes through the face of one board into the end of the other. This prevents the wood from splitting. Use a drill bit slightly smaller than your screw’s diameter.
5. Drive Screws: Drive 1 to 2 screws into each corner, securing the frame.
6. Repeat: Repeat the process for all four corners until your rectangular frame is built.
7. Clean Up: Wipe away any excess glue with a damp cloth before it dries.
Step 4: Sand and Finish the Frame (Optional)
If you want a finished look for your wood frame:
1. Sand: Once the glue is dry, sand the entire frame smooth. Start with 120-grit sandpaper to remove any rough spots or pencil marks, then move to 220-grit for a smooth finish.
2. Apply Finish: Apply your chosen wood stain, paint, or clear coat according to the manufacturer’s instructions. Allow it to dry completely.
Step 5: Cut the Sound-Absorbing Material
Now for the core of your acoustic panel.
1. Measure: Measure the inside dimensions of your assembled frame.
2. Cut Materials: Carefully cut your rigid fiberglass or mineral wool insulation to fit snugly inside the frame. You’ll need two pieces if using 2-inch thick material to achieve 4 inches total thickness, or one piece if using 4-inch thick material.
Safety First: Wear your N95 mask, gloves, and long sleeves. Cut slowly using a utility knife or a serrated knife (like a bread knife). Sometimes scoring and snapping works well for thinner boards.
3. Important Note: Ensure the insulation fits snugly without being compressed too much, as this can affect its performance.
Step 6: Cover the Insulation with Fabric
This is where your panel gets its beautiful aesthetic.
1. Lay out Fabric: Spread your fabric flat on a clean surface. Ensure it’s smooth and free of wrinkles. Place the insulation panel(s) on top of the fabric.
2. Wrap and Staple:
Bring one edge of the fabric up and over the insulation and onto the wood frame.
Start stapling the fabric to the back of the frame, about 2-3 inches from the edge. Pull the fabric taut as you go to avoid wrinkles.
Move to the opposite side. Pull the fabric firmly across the insulation and staple it to the back of the frame. The tension here is key to a smooth finish.
Repeat for the remaining two sides.
3. Neaten Corners: Fold the corners neatly, like wrapping a present, and staple them securely. Trim any excess fabric.
Step 7: Mount the Fabric-Covered Insulation into the Frame
Now, combine the frame and the covered insulation.
1. Positioning: Carefully place the fabric-wrapped insulation into the back of your frame. It should fit snugly.
2. Secure: If the insulation is a very tight fit, it might stay put on its own. If it feels a bit loose, you can add a few staples around the edges of the fabric onto the back of the frame to keep it from shifting.
Step 8: Add Your Decorative Wood Grille (Optional)
This step elevates your panel from functional to furniture.
Simple Grille: You can cut 1×2 lumber to create a simple border around the front of the panel and attach it with small brads or screws. You could also create a criss-cross pattern with lattice strips.
Patterned Grille: For a more intricate look, you can cut patterns into a thin piece of plywood (¼ inch or ⅛ inch) using a jigsaw or a CNC machine if you have access. Ensure the holes are large enough to allow sound to pass through to the absorbent material. For guidance on creating effective grille patterns, consider resources on speaker box design, as similar acoustic principles apply.
Cutting Your Own Grille:
If you’re cutting your own grille from thin plywood or MDF, here are some tips:
1. Design: Draw your pattern onto the wood. Simple geometric shapes or a checkerboard pattern work well. Aim for at least 40-50% open area for good sound transmission.
2. Cut: Use a jigsaw with a fine-tooth blade for clean cuts. You might want to practice on scrap material first.
3. Attach: Once cut, you can attach this grille to the front of your frame using wood glue and small finishing nails or brad nailer. Ensure there’s a small air gap (about 1 inch) between the grille and the fabric-covered insulation for optimal performance. You can achieve this by using small blocks of wood as standoffs.
Material Considerations for Grilles:
The material of your grille matters. Thicker wood or less open patterns can block sound. For optimal acoustic transparency, thinner hardwoods, perforated hardboard, or fabric-covered frames are often preferred. If you’re unsure, simpler designs with more open space are generally better for acoustic performance.
Step 9: Attach Hanging Hardware
You need a way to hang your beautiful new panels.
1. Cleat System: A French cleat is a very secure and professional way to hang heavy panels. You’ll need two interlocking cleats, one attached to the wall and one to the panel.
2. D-Rings and Wire: For lighter panels or if you prefer not to use a cleat, heavy-duty D-rings screwed into the back of the frame with picture-hanging wire can work. Ensure the wire is rated for the panel’s weight.
3. Placement: Attach your chosen hardware according to its instructions, ensuring it’s centered and secure.
Where to Place Your DIY Acoustic Wood Panels
Placing your panels correctly is just as important as building them!
First Reflection Points: These are the most critical spots. Imagine a line from your speakers to your listening position. The first places that line hits a wall, ceiling, or floor are the first reflection points. Place panels here to catch and absorb sound before it bounces towards you.
Back Wall: Panels on the back wall can help reduce echo and “slap back” – sound bouncing from the front to the back and then back again.
Ceiling Cloud: A panel suspended horizontally from the ceiling above your main listening area can significantly tame flutter echo and improve clarity.
Corner Bass Traps: While this guide focuses on wall panels, filling wall-ceiling or wall-wall corners with thicker acoustic material (4-6 inches) can work wonders for controlling low-frequency issues.
A simple way to find first reflection points is to sit in your main listening position with a mirror. Have a friend slide the mirror along the walls and ceiling. Wherever you can see a speaker in the mirror from your seat is a first reflection point.
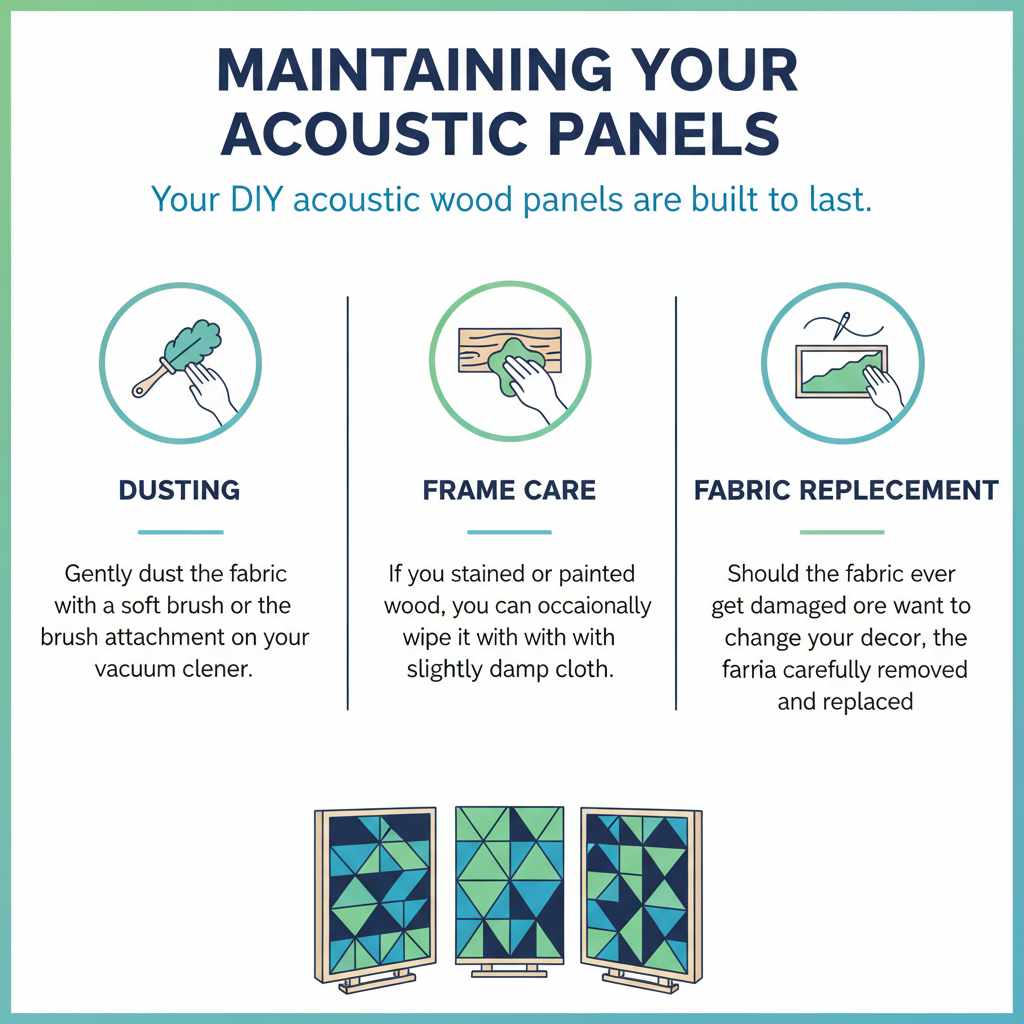
Maintaining Your Acoustic Panels
Your DIY acoustic wood panels are built to last.
Dusting: Gently dust the fabric with a soft brush or the brush attachment on your vacuum cleaner.
Frame Care: If you stained or painted the wood, you can occasionally wipe it with a slightly damp cloth.
Fabric Replacement: Should the fabric ever get damaged or you want to change your décor, the fabric can be carefully removed and replaced.
Frequently Asked Questions (FAQ)
Here are some common questions beginners have about building DIY acoustic wood panels.
Q1: What is the average cost to make one DIY acoustic panel?
A1: The cost can vary, but for a 2ft x 4ft panel, you can expect to spend roughly $40-$80 in materials, depending on the wood, fabric, and insulation you choose. This is significantly less than pre-made panels, which can cost $100-$300 or more each.
Q2: Can I use regular pillow stuffing or foam for sound absorption?
A2: While some soft materials can absorb high frequencies, they are generally not as effective at absorbing the mid and low frequencies that cause most room echo. Rigid fiberglass or mineral wool are specifically designed for broad-spectrum sound absorption and are highly recommended for best results. Standard foam, like that used in mattresses, won’t offer the same acoustic performance.
Q3: Do I need to cover the entire panel with fabric?
A3: Yes, it’s best to cover the sound-absorbing material completely with a breathable fabric. This protects the insulation, makes it safe to handle, and provides a clean, finished look. The fabric needs to allow sound waves to pass through to the absorbent material behind it.
Q4: How thick should my acoustic panels be?
A4: For general echo reduction in a home environment, panels that are 2 inches thick are effective. For better performance, especially in controlling lower frequencies, 4-inch thick panels are recommended. The thickness of the insulation is a key factor in how well the panel absorbs sound.
Q5: Can I make acoustic panels without a wooden frame?
A5: You can, although a frame provides structure, a way to attach the fabric neatly, and a surface for mounting. Some methods involve stretching fabric over insulation boards and then attaching them directly to the wall using specialized clips, or creating a simple fabric-wrapped board without a wooden perimeter frame. However, the wooden frame method is very common for its stability and appearance.
Q6: Are there any safety concerns when working with the insulation?
A6: Yes, it’s important to be cautious. Rigid fiberglass and mineral wool insulation can cause skin irritation and respiratory discomfort. Always wear a long-sleeved shirt, gloves, eye protection, and an N95 respirator mask when cutting and handling these materials. Work in a well-ventilated area. For more detailed safety information, refer to the manufacturer’s guidelines or NIOSH resources.
Q7: How many panels do I need for a room?
A7: The number of panels depends on the room’s size, the materials used, and the existing acoustics. A good starting point is to cover 15-25% of your wall surface area. Begin with a few panels at critical listening points and add more if needed. Don’t overdo it; too much treatment can make a room sound “dead.”
Conclusion
Congratulations on taking the first step towards a better-sounding home! You’ve learned how DIY acoustic wood panels can be built affordably and effectively. From understanding the basics of acoustics to cutting wood, assembling frames, and choosing the right materials, you now have the knowledge to tackle this rewarding project.
Remember, woodworking is about patience, practice, and pride.