DIY Bee Box: Essential Project Guide
Build your own DIY bee box! This guide offers simple plans, tool lists, and step-by-step instructions for creating a safe, functional home for pollinators. Perfect for beginners, this project is rewarding and essential for supporting local bee populations.
Welcome to the workshop! As a fellow woodworker, I know how exciting it is to build something useful and beautiful. Today, we’re tackling a project that’s both rewarding and incredibly important for our environment: a DIY bee box. Many people want to help bees but aren’t sure where to start. Building your own bee house is a fantastic way to support these vital pollinators right in your backyard. Don’t worry if you’re new to woodworking; I’ll break down each step so you can build a sturdy, inviting home for your buzzy friends with confidence.
This guide will walk you through everything you need to know, from choosing the right materials to the final assembly. We’ll cover safety, essential tools, and easy-to-follow plans. Get ready to create a project that’s good for nature and a great learning experience for you!
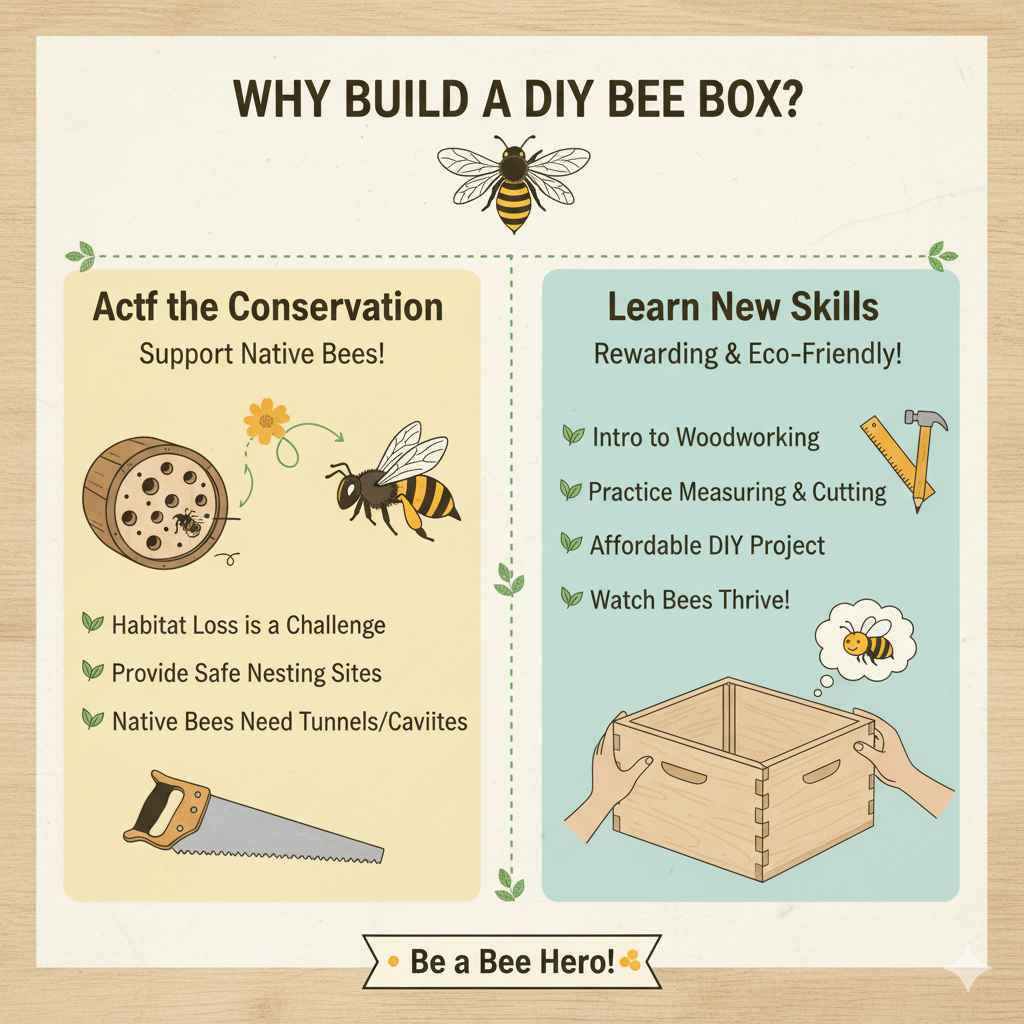
Why Build a DIY Bee Box?
Creating a DIY bee box is more than just a woodworking project; it’s an act of conservation. Our native bee populations are facing many challenges, including habitat loss and pesticide use. Providing them with a safe nesting site can make a real difference. Unlike honeybees, most native bees are solitary and don’t live in hives. They need small tunnels or cavities to lay their eggs. A well-built bee box offers just that.
Beyond the environmental benefits, building a bee box is a wonderful introduction to basic woodworking. It allows you to practice measuring, cutting, and assembling, all while creating something functional and eco-friendly. Plus, it’s an affordable way to contribute to your local ecosystem. Imagine watching solitary bees utilize the home you built – it’s a truly satisfying experience!
Understanding Native Bees and Their Needs
It’s important to know that most bee boxes are designed for solitary native bees, not honeybees. Honeybees live in large colonies and build wax combs, for which they need specialized hives like Langstroth or Top Bar hives. Our DIY bee box project focuses on providing nesting tubes for solitary bees like mason bees and leafcutter bees. These bees are gentle, don’t swarm, and are highly effective pollinators.
These native bees typically look for pre-existing holes or tunnels to nest in. They prefer tubes that are a certain diameter and depth. Our DIY bee box will mimic these natural nesting conditions, offering an attractive and safe place for them to raise their young. Different species have slightly different preferences, but a standard design caters to a wide variety.
Materials You’ll Need for Your DIY Bee Box
Choosing the right materials is crucial for a durable and safe bee box. You want wood that can withstand the elements and won’t leach harmful chemicals. Untreated, natural wood is the best choice. Avoid pressure-treated lumber as the chemicals can be harmful to bees. Pine, cedar, or redwood are excellent options. Cedar and redwood are naturally rot-resistant, making them ideal for outdoor projects.
Here’s a list of what you’ll generally need:
- Untreated Wood: A piece of lumber, typically 1×6 or 1×8 inches, about 4-5 feet long.
- Plywood (for back panel): A piece of untreated plywood, about 1/2 inch thick, roughly the same size as your chosen wood board.
- Fasteners: Exterior-grade wood screws (e.g., 1 1/4 inch or 1 1/2 inch). Stainless steel or galvanized screws will resist rust.
- Drill Bits: A selection of drill bits, including a spade bit or Forstner bit for creating the entrance holes (if not using pre-made tubes). The size is important – typically 1/4 inch to 3/8 inch for solitary bees.
- Optional: Pre-made nesting tubes: You can also purchase pre-made paper or bamboo nesting tubes. These simplify the process greatly!
- Mounting Hardware: Screws or wire for attaching the box to a post or wall.
Essential Tools for Your Project
For this DIY bee box project, we’ll keep the tool list straightforward, focusing on essentials that most DIYers might already have or can easily acquire. Safety first! Always wear safety glasses when cutting or drilling wood.
Here are the tools you’ll want:
- Measuring Tape: For accurate measurements.
- Pencil: To mark your cuts.
- Saw: A hand saw, circular saw, or miter saw to cut the wood to size.
- Drill: A cordless or corded drill for making holes and driving screws.
- Screwdriver Bits: To match your screws.
- Clamps (optional but helpful): To hold pieces together while assembling.
- Sandpaper (medium grit): To smooth rough edges.
- Safety Glasses: Absolutely essential to protect your eyes.
- Work Gloves (optional): For handling wood.
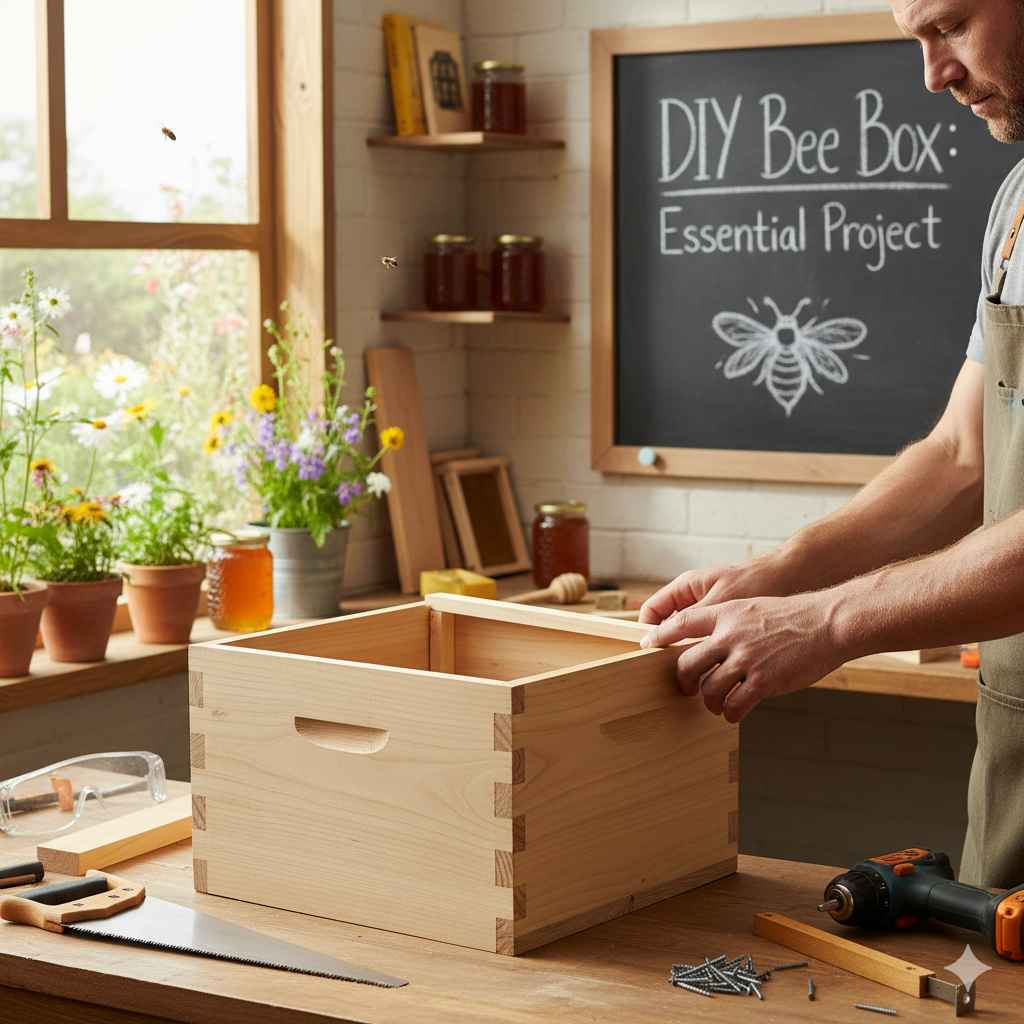
Step-by-Step Guide to Building a Simple DIY Bee Box
Let’s get building! This design focuses on creating a simple, effective bee house. We’ll outline two popular methods: one where you drill holes for nesting tunnels and another using pre-made nesting tubes. Both are great for beginners.
Method 1: Drilling Your Own Nesting Holes
This method involves drilling tunnels directly into a wooden block. It’s a classic approach that looks great and is very effective.
- Cut Your Wood: Start with a solid block of wood. A common size is a 4×4 inch post or a piece of 1×6 lumber cut to about 6-8 inches long. Ensure it’s at least 4 inches thick. Sand any rough edges smoothly.
- Mark Your Holes: Using your pencil and measuring tape, mark spots for your nesting holes. Space them at least 3/4 inch apart. Avoid placing holes too close to the edges.
- Drill the Holes: This is a key step. Choose a drill bit that’s between 1/4 inch and 3/8 inch in diameter. A standard twist bit can work, but a spade bit or Forstner bit will create cleaner, more uniform holes. Drill to a depth of about 4-6 inches. Important: Do not drill all the way through the wood block! The back of the hole needs to be solid for the bees to seal their nests.
- Smooth the Holes: After drilling, gently sand the inside of each hole to remove any splinters. You can use a small sanding stick or a piece of rolled sandpaper. A smooth interior is safer for the bees.
- Add a Roof (Optional but Recommended): To protect the nesting holes from rain, you can add a simple roof. Cut a piece of wood slightly wider and longer than the top of your block. Attach it with screws, creating an overhang.
- Create a Back Panel: If you started with a thick block, you might not need a separate back. If you used thinner boards to create depth, attach a piece of untreated plywood to the back using screws to enclose the nesting area.
- Mounting: Drill a couple of pilot holes through the back panel for mounting screws, or attach a wire hanger.
Method 2: Using Pre-made Nesting Tubes
This method is even simpler and guarantees the correct tunnel size and depth for many native bee species. It’s a great option if you want to get started quickly or if you don’t have the right drill bits.
- Build a Wooden Casing: You’ll need a sturdy wooden box to hold the nesting tubes. Cut pieces of untreated wood (like from a 1×6 or 1×8 board) to create a simple box. A typical size might be 6 inches wide, 6 inches tall, and 6 inches deep, but dimensions can vary.
- Assemble the Casing: Use wood screws to assemble the front, back, top, and sides of the box. Leave the front open to insert the tubes.
- Add a Roof (Recommended): Just like in Method 1, attach a slightly larger piece of wood to the top to create an overhang, protecting the tubes from rain.
- Prepare the Nesting Tubes: You can buy bundles of paper tubes, bamboo sections, or even straw. Ensure the openings are smooth. If using reeds or bamboo, check that there are no obstructions inside. The ideal tube length is typically 6-8 inches, with an interior diameter of 5/16 to 3/8 inches. For reference, checkout resources from organizations like the Xerces Society for detailed specifications.
- Fill the Casing: Tightly pack the nesting tubes into the wooden casing. They should fit snugly to prevent them from falling out or shifting. Stack them closely together.
- Mounting: Attach a piece of plywood to the back of the casing and drill holes for mounting screws, or add a sturdy wire hanger.
Understanding Bee Box Dimensions and Hole Sizes (Table)
The size of your bee box and the nesting holes are important factors that influence which bees might choose to live there. Here’s a general guide:
| Feature | Recommended Dimension/Size | Notes |
|---|---|---|
| Box Depth | 4-8 inches | Ensures adequate nesting tunnel length. |
| Tunnel Diameter (Internal) | 1/4 inch to 3/8 inch (approx. 6-10 mm) | Ideal for mason bees, leafcutter bees, and other small solitary bees. |
| Tunnel Length | 4-8 inches | Slightly shorter than the overall box depth to allow room for sealing. |
| Spacing Between Holes/Tubes (Center to Center) | 3/4 inch to 1 inch | Prevents overcrowding and allows easy access. |
| Roof Overhang | 1-2 inches | Essential for protecting nesting holes from rain and sun. |
Placement and Maintenance of Your DIY Bee Box
Where you place your bee box significantly impacts its success. Bees are sensitive to heat, rain, and predators, so thoughtful placement is key. Maintenance, while minimal, is also important for encouraging reuse.
Optimal Placement Strategies:
- Sunlight: Face the entrance holes towards the east or southeast. This allows the bees to take advantage of the morning sun to warm up and begin their daily activities. Avoid locations that get intense, direct afternoon sun, which can overheat the box.
- Protection: Place the box in a somewhat sheltered location, protected from strong winds and heavy rain. A location under the eaves of a house, shed, or a tree can offer good protection.
- Height: Mounting the box 5-10 feet off the ground is generally recommended. This helps keep them safe from ground predators.
- Proximity to Food Sources: If possible, place the bee box near flowering plants, herbs, or vegetables that provide nectar and pollen. However, avoid placing it directly next to pesticide-treated areas.
- Access: Ensure you can easily reach the box for inspection and maintenance, but also that children and pets won’t disturb it frequently.
Maintenance Tips:
Thankfully, bee boxes require very little maintenance. If you used pre-made tubes, you might need to replace them annually. If you drilled your own holes, here’s what to do:
- Annual Cleaning: After the nesting season ends (usually late fall or early winter), it’s a good idea to clean out used nesting tunnels. Bees fill the tunnels with mud and pollen to create individual cells for their eggs. After the young bees hatch and leave, the tunnel is no longer suitable. You can do this by gently scraping out old nesting material or, if you have a removable back panel, by replacing the tubes or cleaning the drilled holes.
- Check for Pests: Occasionally inspect for any signs of parasitic wasps or mites, though this is less common.
- Repair: Keep an eye on the wood for any signs of decay and make repairs as needed to ensure the box remains sturdy and weatherproof.
For more in-depth information on native bee habitats, resources from USDA Forest Service are excellent.
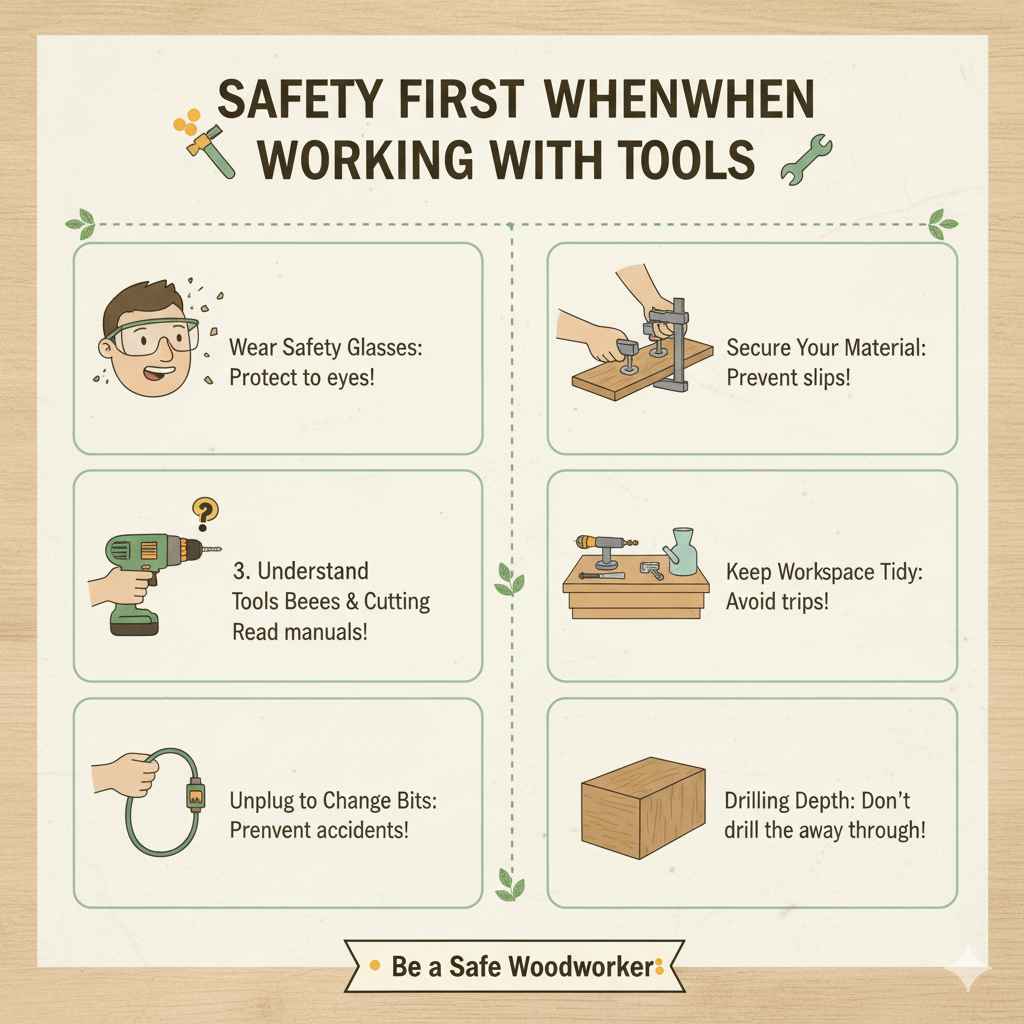
Safety First When Working with Tools
Woodworking is a rewarding hobby, but safety is always the top priority. When building your DIY bee box, even though it’s a simple project, taking a few precautions will ensure you work safely and effectively.
- Wear Safety Glasses: Always wear eye protection when cutting, drilling, or sanding wood. Small wood chips can fly unexpectedly.
- Secure Your Material: When cutting or drilling, make sure the wood is held firmly in place. Use clamps if necessary. This prevents the wood from moving and causing inaccurate cuts or slips.
- Understand Your Tools: Read the manuals for your power tools if you’re unsure about their operation. Know where the on/off switch is and how to use safety features.
- Keep Your Workspace Tidy: A cluttered workspace can lead to trips and falls. Keep sawdust and scrap wood cleared away as you work.
- Unplug When Changing Bits/Blades: If using power tools that require changing blades or bits, always unplug the tool first to prevent accidental starts.
- Drilling Depth: Be mindful of how deep you’re drilling your nesting holes. As mentioned, you don’t want to drill all the way through.
Frequently Asked Questions About DIY Bee Boxes
Here are some common questions beginners have about building and using their own bee boxes:
Q1: Which types of bees will use a DIY bee box?
A: DIY bee boxes are typically designed for solitary native bees, such as mason bees, leafcutter bees, and small carpenter bees. These bees don’t live in colonies and are very gentle. They are excellent pollinators!
Q2: Do I need to paint or treat the wood?
A: No, it’s best NOT to paint or treat the wood, especially the inside of the nesting tunnels. Most paints and stains contain chemicals that can be harmful to bees. Natural, untreated wood like cedar or pine is perfect. If you want to protect the exterior, use a non-toxic, water-based sealant or exterior paint on the outside surfaces only, avoiding the entrance holes and interior.
Q3: How long does a DIY bee box last?
A: With good craftsmanship and materials like cedar or redwood, a well-built bee box can last for many years, often 5-10 years or more. Regular cleaning and occasional repairs will ensure its longevity.
Q4: Should I put anything inside the nesting holes besides tunnels?
A: If you are drilling the holes yourself, you don’t need to add anything. The bees will bring their own mud to construct their nests. If you are using pre-made tubes, they are ready to go. Some people add a bit of soft material like dry grass or fluff to the very back of a drilled hole, but it’s not necessary and can sometimes hinder proper nesting.
Q5: Where is the best place to hang my bee box?
A: The ideal location is on a post or wall, facing east or southeast, receiving morning sun. It should be about 5-10 feet off the ground and protected from strong winds and excessive rain. Placing it near flowering plants is also beneficial.
Q6: Do I need to worry about aggressive bees?
A: The solitary bees that use these boxes are very gentle. They mind their own business and are not aggressive like social bees (e.g., honeybees or wasps) that defend a colony. They may investigate you if you are near their box, but they are unlikely to sting unless directly provoked or handled roughly.
Q7: Can I make a bee box for honeybees?
A: Our DIY bee box is perfect for solitary native bees. Honeybees are social insects that require large, complex hives (like Langstroth or Top Bar hives) built by beekeepers. This project focuses on supporting the many species of native bees that are essential for local pollination.
Conclusion
You’ve done it! You’ve learned exactly how to build a DIY bee box, a simple yet incredibly impactful project. Whether you choose to drill your own nesting tunnels or use pre-made tubes, you’re embarking on a journey to support our vital native bee populations. Remember, using untreated wood, choosing the right dimensions, and placing your bee box thoughtfully are key to its success.