Can Cricut Air 2 Cut Wood: Genius Guide
Yes, the Cricut Air 2 can cut thin wood like balsa and basswood up to 1/16 inch thick. It requires specific blades and techniques, and cannot cut thicker hardwoods. This guide will show you exactly what’s possible and how to achieve great results with your Cricut Air 2 and wood.
Hey there, fellow makers! Have you ever looked at your trusty Cricut Air 2 and wondered if it could handle something a little tougher than paper or vinyl? Specifically, can it cut wood? It’s a question many crafters ponder, especially when dreaming up more durable projects. It can be frustrating to see amazing wooden creations online and not know if your personal cutting machine can bring those ideas to life. Well, take a deep breath because you’ve come to the right place! I’m here to guide you through exactly what your Cricut Air 2 can and cannot do with wood. We’ll break it down simply, so you can start creating beautiful wooden projects with confidence.
Understanding the Cricut Air 2’s Capabilities with Wood
Let’s get straight to it: the Cricut Air 2 isn’t a powerhouse wood-cutting machine like a scroll saw or a CNC router. Its design and mechanics are optimized for lighter materials. However, this doesn’t mean it’s completely out of the game for wood! The key lies in understanding which types and which thicknesses of wood are within its reach.
What Kinds of Wood Can the Cricut Air 2 Cut?
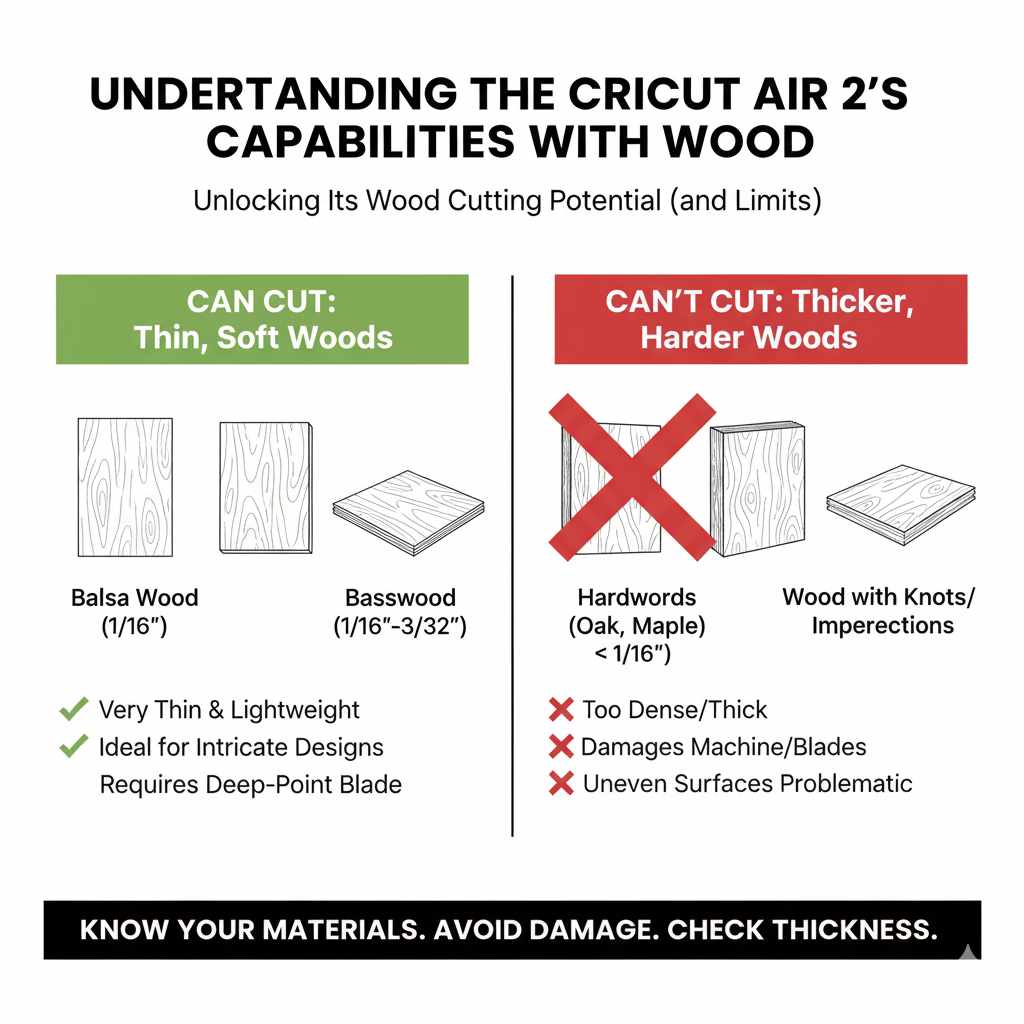
The Cricut Air 2 excels with very thin, soft woods. Think of it as being able to “score” and “cut through” materials that have minimal resistance.
Balsa Wood: This is the champion of thin wood for the Cricut. It’s incredibly lightweight and soft, making it ideal for intricate designs. You’ll typically find balsa wood in sheets of 1/16 inch or 1/32 inch, which the Air 2 can handle.
Basswood (or Bass Wood): Similar to balsa wood, basswood is also a soft hardwood that can be cut by the Cricut Air 2 when it’s in thin sheets (also around 1/16 inch or 3/32 inch at its absolute limit). It’s a bit denser than balsa but still manageable.
Craft Plywood: Some very thin craft plywoods, often found in hobby stores, might be cuttable if they are at or below the 1/16 inch thickness threshold. Always check the thickness before purchasing!
What Kinds of Wood are Out of Reach?
It’s equally important to know what your Cricut Air 2 cannot cut. Attempting to cut these will likely damage your machine, your blade, or the wood itself.
Thicker Hardwoods: Anything above 1/16 inch (or 3/32 inch in rare, ideal circumstances) made from oak, maple, walnut, or even thicker basswood is a no-go.
Plywoods (thicker than 1/16 inch): Standard plywood sheets, even those labeled “craft plywood” if they exceed the thickness limit, will be too tough.
Veneers (thicker types): While very thin wood veneers might work, anything with a bit of substance will be difficult.
Wood with Knots or Imperfections: The rigid nature of the Cricut cutting mat and blade struggles with uneven surfaces. Knots or significant grain variations can cause the blade to skip or get stuck.
Essential Tools and Blades for Cutting Wood with Cricut Air 2
To successfully cut wood with your Cricut Air 2, you need the right blades and accessories. Using the standard Fine-Point Blade simply won’t cut it (pun intended!).
The Deep-Point Blade: Your Wood-Cutting Companion
The Deep-Point Blade is specifically designed to cut through thicker and denser materials than the standard Fine-Point Blade. It has a steeper blade angle and a more durable housing.
Why it’s essential: It can plunge deeper into the material, allowing for complete cuts on thinner woods.
When to replace: Deep-Point Blades dull faster when cutting wood than with paper or vinyl. Keep an eye on your cuts; if they start to look less clean or require multiple passes, it’s time for a new blade. You can find replacement blades on the Cricut website or at major craft retailers.
Cutting Mats: The Foundation for Success
A strong and sticky cutting mat is crucial for holding your wood securely in place. A dull mat means the wood can shift during cutting, leading to inaccurate cuts or a ruined project.
StrongGrip Mat: This is your best friend for cutting wood. Its extra-sticky surface ensures that thin wood sheets stay put throughout the cutting process.
Mat Maintenance: Keep your mats clean by removing debris. You can also use a sticky tack cleaner to refresh their stickiness when needed.
Other Helpful Tools
Brayer: A brayer can help press the wood firmly onto the mat, ensuring maximum adhesion.
Weeding Tools: Sometimes, the wood pieces can be delicate and hard to lift. Fine-tipped weeding tools can be very helpful.
Masking Tape or Painter’s Tape: You might use this around the edges of your wood to prevent the cutting mat from sticking too much in less critical areas, or to secure very small pieces if needed (though this is less common for full cuts).
Step-by-Step Guide: Cutting Wood with Your Cricut Air 2
Ready to dive in? Follow these steps carefully for the best results. Remember, patience is key when working with any cutting machine and new materials!
Step 1: Prepare Your Design
1. Create or Upload Your Design: Design your intricate shapes in Design Space or upload your own SVG files. Keep in mind the limitations of the wood thickness. Very fine details might be challenging, even with thin wood.
2. Size Appropriately: Ensure your design fits within the cutting area of your Cricut mat. For wood, it’s often best to work with designs that aren’t overly complex to start.
3. Select “Cut” Operation: Make sure your design is set to “Cut” and not “Score” or “Write.”
Step 2: Set Up Your Project in Design Space
1. Choose Material Settings: This is critical! In Design Space, when you go to the “Make It” screen and select your material, you’ll need to choose a wood setting.
Look for options like “Balsa Wood – 1/16 inch” or “Basswood – 1/16 inch.”
If you don’t see an exact match, you can create a “Custom Material Setting.” This allows you to fine-tune the pressure, multi-cut depth, and speed. Cricut’s official material settings guide is a good reference, though keep in mind the Air 2 is an Explore family machine.
2. Multi-Cut Feature: For wood, enabling the “Multi-Cut” option is highly recommended. This setting tells the machine to pass over the cut line multiple times, ensuring a clean cut without requiring excessive pressure on a single pass. You might set it for 2-3 passes.
Step 3: Prepare Your Wood Sheet
1. Select the Right Wood: Choose your thin balsa or basswood sheet. Inspect it for any major knots or imperfections.
2. Place on Mat: Carefully lay your wood sheet onto the StrongGrip cutting mat. Position it precisely where it will appear on your virtual mat in Design Space. Apply even pressure.
3. Use a Brayer: Gently roll a brayer over the surface of the wood. This will help ensure the wood is adhering perfectly to the mat and has no air bubbles.
Step 4: Load and Cut
1. Load the Mat: Load the cutting mat with the wood into your Cricut Air 2. Ensure the mat guides are correctly positioned against the edge of the mat.
2. Insert the Blade: Make sure the Deep-Point Blade is correctly installed in Clamp B.
3. Press “Go”: Once the machine prompts you, press the flashing “C” button to start the cutting process.
4. Monitor the Cut: Stay near your machine. Listen to the sounds it makes. If you hear straining or grinding, stop the machine immediately to prevent damage.
5. Unload the Mat: Once the cutting is complete, press the unload button.
Step 5: Remove Your Cut Pieces
1. Gently Peel: Carefully peel the wood away from the cutting mat. If the cut was successful, your pieces should separate cleanly.
2. Assist if Needed: If any pieces aren’t fully cut through, you can carefully use a craft knife or small scissors to finish the cut. If the wood is resisting significantly, it might mean the settings weren’t quite right, or the wood is too thick. Don’t force it!
Troubleshooting Common Wood-Cutting Issues
Even with the best preparation, you might run into a few snags. Here’s how to tackle them.
Issue: Incomplete Cuts
Shallow Depth: Your blade might not be deep enough, or your material setting is too light.
Solution: Ensure you are using the Deep-Point Blade and have selected the correct material setting (or created a custom one). Try increasing the multi-cut passes to 3 or 4.
Warped Wood: If the wood isn’t lying flat, the blade won’t be able to cut consistently.
Solution: Try to use flatter wood. Weigh down the edges of the wood with small weights (not on the cutting path) while it’s on the mat, or use a brayer more vigorously to press it down.
Dull Blade: An old or damaged Deep-Point Blade won’t cut effectively.
Solution: Replace your Deep-Point Blade.
Issue: Wood Shifting During Cutting
Weak Mat Adhesion: Your StrongGrip mat might be losing its stickiness.
Solution: Clean your mat or try refreshing its adhesive. Ensure you’re pressing the wood down firmly with a brayer.
Too Much Force: Sometimes, the machine can exert more force than the mat can hold.
Solution: While you need the wood to be secure, ensure your material settings aren’t set to extreme pressure. The multi-cut feature helps distribute the force.
Issue: “Burned” or Scorched Edges
Friction: While less common on soft woods with the Air 2, very fast or deep cuts can sometimes cause slight scorching from friction.
Solution: If this is an issue, try a slightly slower speed setting (if possible in Design Space for your machine) or ensure your blade is sharp. For the Air 2, focus on clean, precise cuts rather than forcing speed.
Project Ideas for Your Cricut Air 2 Wood Creations
Once you’ve mastered cutting thin wood, the possibilities for decorative and small functional items open up!
Delicate Layered Art and Silhouettes
Cut intricate shapes out of balsa or basswood to layer them for unique wall art, home decor signs, or even detailed card embellishments.
Small-Scale Architectural Models or Dioramas
For hobbyists and model makers, the precision of the Cricut is fantastic for creating tiny building components, furniture, or elements for dioramas.
Stencils
Cut detailed stencils from thin wood. These can be used for painting on fabric, walls, or even baked goods (ensure food-safe wood if intended for this!).
Engraved Effects (with the right tools)
While the Air 2 can’t engrave, you can use it to cut out detailed shapes that, when applied to a larger wooden base, give the effect of engraving or inlay.
Product Tags and Embellishments
Create custom, stylish tags for gifts or products. Thin wooden tags add a touch of handcrafted luxury.
Example Project: Layered Mandala Wall Art
1. Design: Create a layered mandala design in Design Space, using multiple concentric circles and patterns.
2. Materials: Balsa wood (1/16 inch), StrongGrip mat, Deep-Point Blade, wood glue, spray paint (optional).
3. Cutting: Cut each layer of the mandala from different colors of a thin wood sheet, or cut all from one color and paint later. Use your multi-cut settings.
4. Assembly: Glue the layers together, centering each one precisely.
5. Finishing: Once dry, you can paint it, or leave it natural for a rustic look. Mount it on a wall for stunning decor.
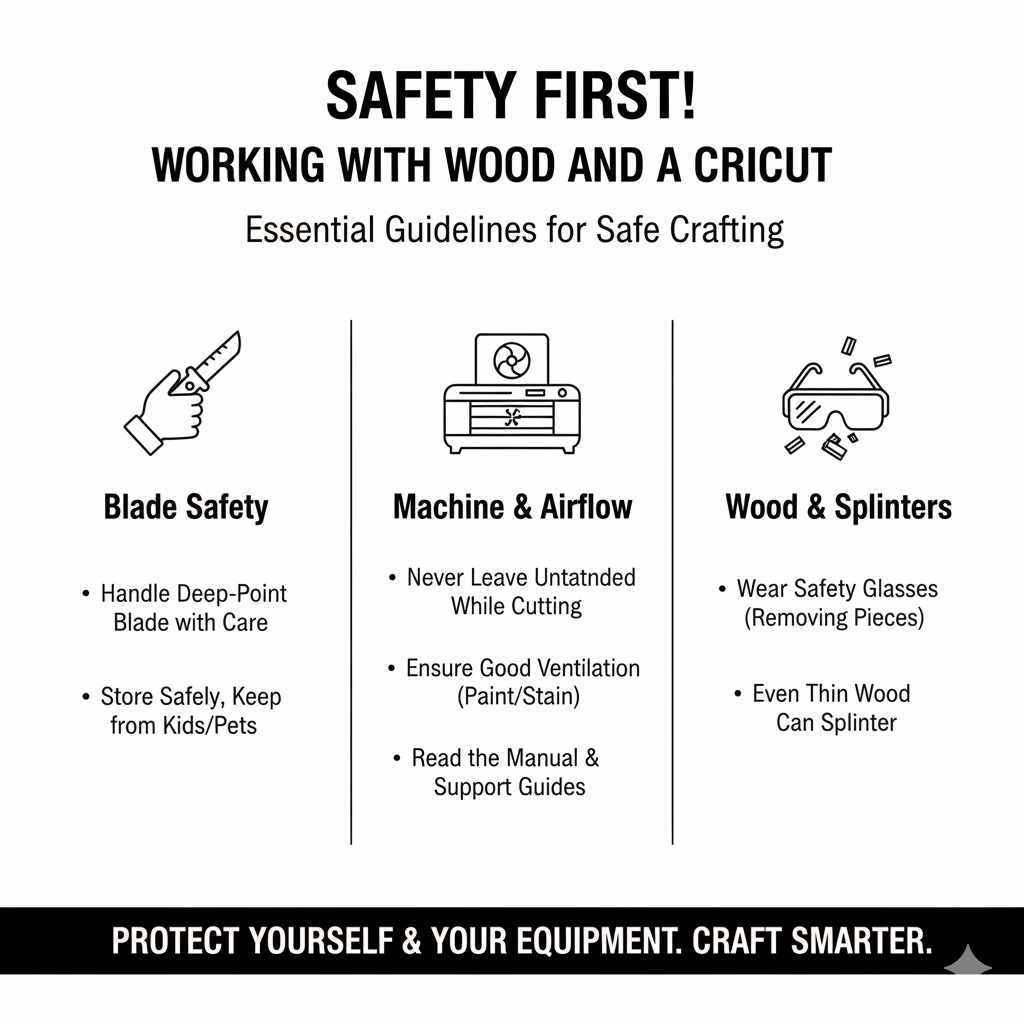
Safety First! Working with Wood and a Cricut
Safety is always my top priority, and it should be yours too. While working with thin wood and a Cricut involves less risk than heavy-duty woodworking, there are still points to consider.
Blade Safety: Always handle the Deep-Point Blade with care. It’s sharp! Store it safely when not in use, and keep it away from children and pets.
Machine Awareness: Never leave your Cricut unattended while it’s cutting, especially when working with new materials. Be aware of the moving parts.
Ventilation: If you plan to paint, stain, or seal your wooden creations, ensure you are working in a well-ventilated area.
Wood Splinters: Even thin wood can cause small splinters. It’s a good idea to wear safety glasses when removing cut pieces from the mat.
* Read the Manual: Familiarize yourself with your Cricut Air 2’s operation and safety guidelines. Cricut’s support page is an excellent resource for official information.
Comparison: Cricut Air 2 vs. Other Wood-Cutting Methods
It’s good to understand where the Cricut Air 2 fits in the world of wood crafting.
| Feature | Cricut Air 2 (Thin Wood) | Scroll Saw | CNC Router |
|---|---|---|---|
| Material Type | Thin balsa, basswood (< 1/16 inch) | Thin to medium hardwoods, plywoods | Wide range of woods, including hardwoods and thick plywoods |
| Complexity | Intricate, delicate shapes, precise details | Excellent for curves, patterns, and delicate cuts | Capable of 2D and 3D carving with extremely fine detail |
| Speed | Slow to moderate (requires multiple passes) | Moderate, user-controlled | Very fast and consistent |
| Learning Curve | Low to moderate | Moderate (requires hand control skill) | High (requires software and toolpath knowledge) |
| Cost | Low (budget-friendly crafting tool) | Moderate (mid-range tool) | High (machine + software investment) |
| Noise Level | Moderate | Moderate to high | Moderate to high (depends on spindle and dust system) |
| Accuracy | High within thin-material limits | Good, dependent on user precision | Extremely high, computer-controlled |
| Best For | Small craft projects, ornaments, layered art | Hobby woodworking, fretwork, custom patterns | Professional sign-making, furniture, 3D carving, batch production |
As you can see, the Cricut Air 2 is best suited for delicate, detailed work on thinner materials. For thicker woods or more robust projects, you’ll need different tools.
Frequently Asked Questions (FAQ)
Q1: What’s the absolute maximum thickness of wood I can cut with Cricut Air 2?
A1: For the absolute best results and minimal risk to your machine, stick to wood that is 1/16 inch (approximately 1.5mm) thick or less. Some users might achieve a cut on certain 3/32 inch (approx. 2.4mm) basswood sheets with specific settings and multiple passes, but this is challenging and not recommended for beginners.
Q2: Do I need a special blade to cut wood with Cricut Air 2?
A2: Yes, absolutely. You will need the Cricut Deep-Point Blade. The standard Fine-Point Blade is not designed to cut through wood, even thin varieties.
Q3: Can I cut wood veneer with the Cricut Air 2?
A3: Very thin wood veneers, especially those that are 1/16 inch or less, can often be cut successfully. Ensure the veneer is not warped and adheres well to the StrongGrip mat. Thicker veneers will be too much for the Air 2.
Q4: What material settings should I use in Design Space for wood?
A4: Look for pre-set options like “Balsa Wood – 1/16 inch” or “Basswood – 1/16 inch.” If these aren’t available or don’t work, you can create a custom setting where you can adjust pressure and multi-cut passes. Enabling “Multi-Cut” to 2-4 passes is highly recommended for a clean cut.