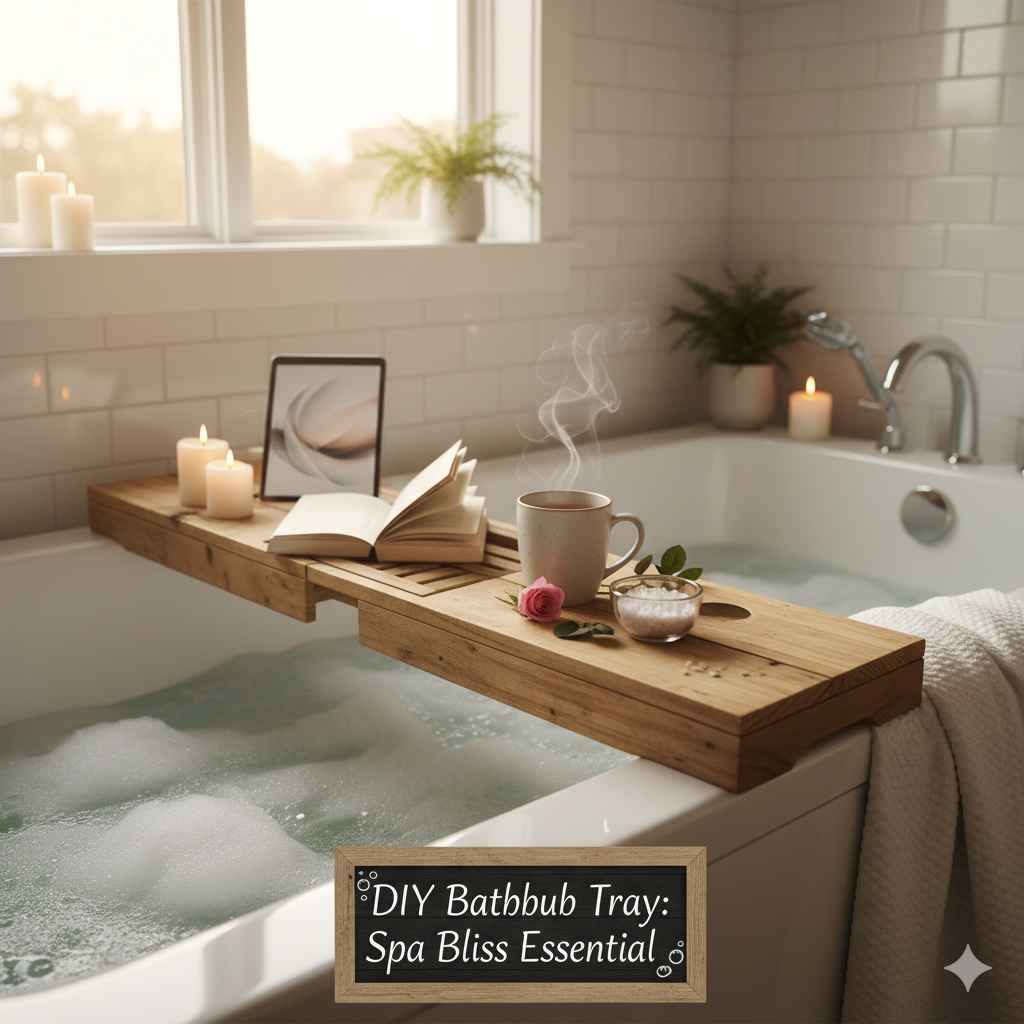
DIY Bathtub Tray: Genius Essential for Spa Bliss
Create a stunning DIY bathtub tray to bring spa-like relaxation into your home. This easy, beginner-friendly project transforms your bath into a serene escape without breaking the bank.
Imagine sinking into a warm, bubbly bath, a good book in hand, a soothing candle flickering, and a refreshing drink within easy reach. Sounds like pure bliss, right? For many of us, this dream often hits a snag: where do you put everything without it sliding into the water? Propping items on the edge of the tub rarely works, and balancing them precariously is a recipe for disaster. It’s a common frustration that keeps us from fully unwinding. But what if I told you that you can build your own elegant bathtub tray in just a weekend?
This guide will walk you through a simple, step-by-step process to craft a beautiful and functional piece that will elevate your bath time from ordinary to extraordinary. We’ll cover everything you need, from materials to finished product, with easy-to-follow instructions designed for absolute beginners.
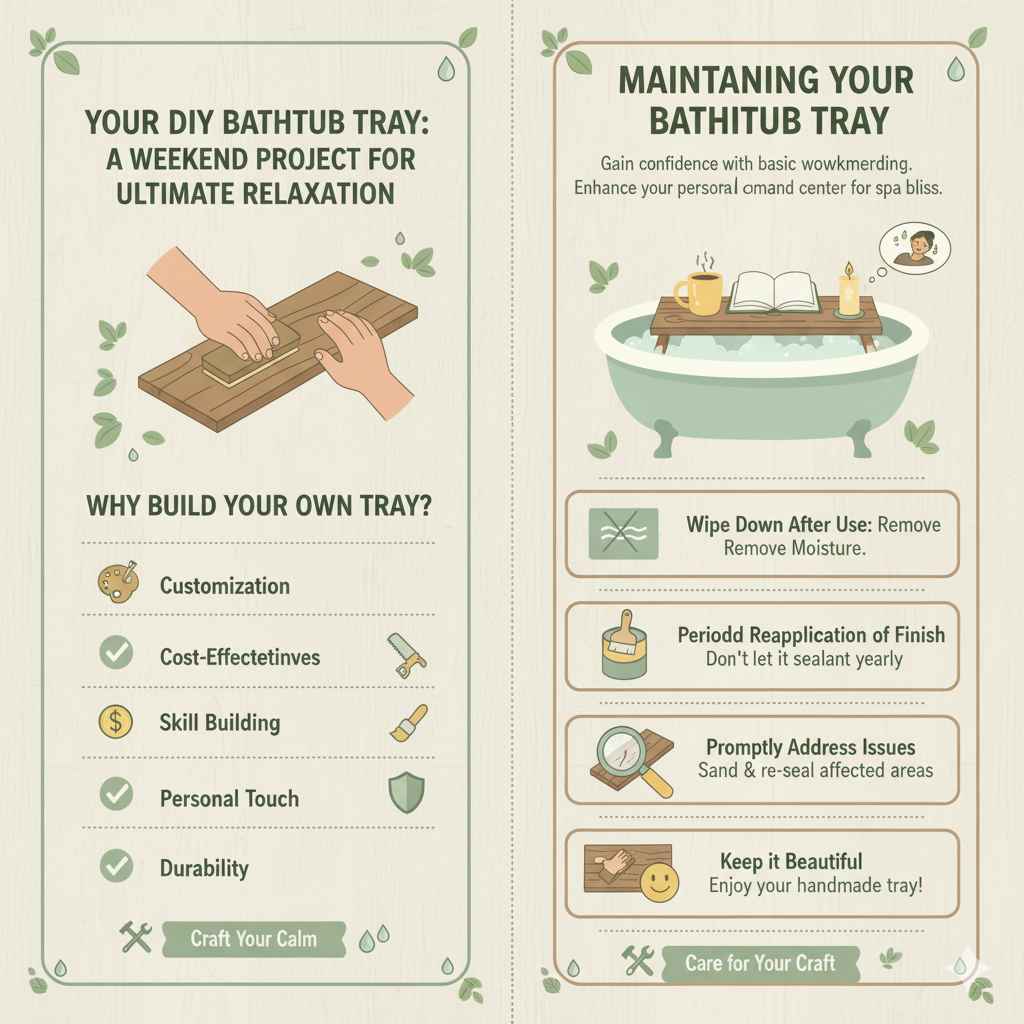
Your DIY Bathtub Tray: A Weekend Project for Ultimate Relaxation
As your woodworking mentor, I love projects that blend practicality with a touch of luxury. A DIY bathtub tray is exactly that! It’s a fantastic starter project for anyone looking to gain confidence with basic woodworking skills. You don’t need a fancy workshop or a lot of expensive tools. Most importantly, you get a custom piece that fits your tub perfectly and enhances your relaxation ritual. Think of it as your personal command center for spa bliss.
Why Build Your Own Bathtub Tray?
Store-bought bathtub trays can be pricey and often don’t have the exact look or functionality you desire. Plus, there’s a special satisfaction that comes from creating something with your own hands. Building your own tray offers:
- Customization: You choose the wood, the finish, and the dimensions to perfectly match your tub and your style.
- Cost-Effectiveness: DIY is almost always more affordable than buying a pre-made item, especially for quality materials.
- Skill Building: It’s a low-stakes project perfect for learning essential woodworking techniques.
- Personal Touch: You can stain, paint, or seal it to complement your bathroom décor.
- Durability: With the right wood and finish, your DIY tray will last for years, resisting moisture and wear.
Materials You’ll Need for Your Bathtub Tray Project
Gathering your supplies is the first step towards a successful build. For this project, we’ll focus on using common and easily accessible materials. This list is designed to be beginner-friendly. Always ensure you are purchasing lumber that is straight and free of significant knots or defects.
Wood Selection:
The most crucial part is choosing the right wood. You need something that can handle humidity. Here are some excellent choices:
- Cedar: Naturally water and rot-resistant, and smells amazing! It’s a bit softer, so it’s easy to work with.
- Redwood: Similar to cedar, it offers excellent resistance to decay and insects due to its natural oils.
- Mahogany: A hardwood that’s more durable and water-resistant, though it can be more expensive and harder to cut.
- Marine-Grade Plywood: While not solid wood, this is specifically designed for moist environments. It’s stable and holds up well. Choose a thickness of at least 3/4 inch for durability.
For this guide, we’ll assume you’re using common lumber like pine or poplar, and we’ll focus on proper sealing to protect it. If you’re using a naturally resistant wood like cedar, you’ll still want to seal it for maximum longevity.
Wood Dimensions (Example for a standard tub):
Adjust these based on your tub’s width. Measure the distance across the top of your tub, from edge to edge, where the tray will sit. Add a few inches for overhang so the tray feels secure.
- Main Tray Surface: One piece, 1 inch thick x 8 inches wide x 30 inches long (adjust length as needed)
- Support Legs/Strips: Two pieces, 1 inch thick x 2 inches wide x 8 inches long (these will sit on the tub edge)
- Optional: Cup Holder Insert: One piece, 1 inch thick x 4 inches wide x 4 inches long (for a simple single cup holder)
- Optional: Bookshelf/Tablet Holder: One piece, 1 inch thick x 1.5 inches wide x 28 inches long (for the front edge to hold items)
Note on Wood Thickness: The “1 inch thick” often refers to nominal lumber size. Actual dimensions are usually closer to 3/4 inch. You can use standard 1×8 boards for the main surface and 1×2 or 1×3 boards for the support strips.
Hardware and Finishing Supplies:
- Waterproof Wood Glue: Look for exterior-grade or marine-grade glue.
- Screws: Stainless steel or coated deck screws (1 1/4 inch to 1 1/2 inch length) to resist rust.
- Sandpaper: Assorted grits (e.g., 120, 180, 220) for smooth finishing.
- Wood Sealer/Finish: A high-quality, waterproof, and non-toxic finish. Polyurethane (water-based is less likely to yellow), exterior spar urethane, or a marine-grade epoxy resin are excellent choices.
- Tools:
- Measuring Tape
- Pencil
- Saw: A handsaw, circular saw, or miter saw (a miter saw will give the cleanest cuts and angles).
- Clamps: At least two bar clamps or pipe clamps.
- Drill/Driver: With drill bits for pilot holes and a driver bit for screws.
- Optional: Jigsaw (for rounded corners or cutouts like a cup holder).
- Optional: Orbital Sander (makes sanding faster).
- Optional: Safety Glasses and Hearing Protection (always recommended!)
- Optional: Wood filler (if you have any small gaps or imperfections you want to fill).
Step-by-Step Guide to Building Your Bathtub Tray
Let’s get building! Remember to work safely. Wear your safety glasses, especially when cutting and drilling. If you’re new to cutting wood, measure twice and cut once!
Step 1: Cut Your Wood to Size
Using your measurements from the materials list, carefully cut your wood pieces. If you don’t have a miter saw, a handsaw can work, but take your time to make straight cuts. Accuracy here will make assembly much easier.
- Main Tray Surface: 1 piece @ 8 inches x 30 inches
- Support Strips: 2 pieces @ 2 inches x 8 inches
- (Optional) Cup Holder Blank: 1 piece @ 4 inches x 4 inches
- (Optional) Front Lip: 1 piece @ 1.5 inches x 28 inches
Pro Tip: If you’re new to using power saws, consider asking for help at your local lumber yard. Many will make a few basic cuts for you for a small fee, ensuring you get accurate starting pieces.
Step 2: Sand Everything Smooth
This is where we start giving our tray that polished, spa-like feel. Start with a coarser grit sandpaper (like 120) to smooth out any rough edges or saw marks. Then, move to a medium grit (180) and finally a fine grit (220) for a silky-smooth finish. Sand all surfaces and edges. Don’t forget the ends of your pieces!
Safety First: Sanding creates dust. Always wear a dust mask and safety glasses. If using an orbital sander, it’s much faster, but a sanding block works just fine. Just know your arms might get a workout!
Step 3: (Optional) Prepare the Cup Holder
If you’re adding a cup holder, now is a good time to prepare it. Decide where you want the cup holder on your main tray surface. Mark the area. You can trace the bottom of a glass or mug you plan to use. Using a jigsaw or a Forstner bit (if you have one), carefully cut out the circular opening. Sand the inside edge of the hole smooth.
Alternatively, you can build a simple rectangular cutout or even just glue a pre-made metal cup holder insert into a routed or cut opening.
Step 4: Assemble the Support Strips
These strips will act as the feet of your tray, helping it rest securely on your tub’s edge. They need to be attached perpendicular to the main tray surface, towards each end. Place one support strip on the underside of the main tray, about 1-2 inches from each end. Ensure it’s flush with the side edges of the main tray surface. This creates a stable base and prevents the tray from sliding off.
Apply waterproof wood glue to the top edge of the support strip. Position it on the underside of the main tray. Drill pilot holes through the main tray surface and into the support strip to prevent the wood from splitting. Then, drive your stainless steel screws through the pilot holes to secure the support strip. Repeat for the other support strip on the opposite end.
Tip: Attaching these strips at a slight angle inward can sometimes provide a more secure grip on curved tub edges. You can also use small metal L-brackets for extra reinforcement.
Step 5: (Optional) Attach the Front Lip
If you want a lip to hold books, tablets, or prevent items from sliding off the front, attach the front lip piece now. Apply wood glue to the edge of the main tray where the lip will attach. Position the lip piece so it’s flush with the top surface of the main tray and extends forward. Use clamps to hold it in place while you drill pilot holes and drive screws from the underside of the main tray into the lip piece. For added strength, you can also pre-drill and screw down through the lip into the main tray surface.
Step 6: Final Sanding and Cleaning
Before applying any finish, give the entire tray a final once-over with your finest grit sandpaper (220). This ensures all surfaces are smooth and ready for sealing. Wipe down the entire piece with a tack cloth or a slightly damp cloth to remove all dust. Any dust left behind will show up under your finish.
Choosing and Applying the Right Finish
This is a critical step for a bathtub tray. Water and humidity are its enemies. A good waterproof finish not only protects the wood but also gives it a beautiful, lasting sheen.
Finishing Options:
Here’s a quick comparison of popular waterproof finishes:
| Finish Type | Pros | Cons | Best For |
|---|---|---|---|
| Water-Based Polyurethane | Easy to apply, low odor, quick drying, good durability, clear finish. | Can require more coats than oil-based, not as hardy as epoxy. | Beginners, natural wood look, good protection. |
| Oil-Based Polyurethane | Very durable, creates a hard shell, good water resistance. | Strong fumes, longer drying time, can yellow over time. | High-traffic areas, maximum durability. |
| Exterior Spar Urethane | Excellent UV resistance, very flexible and durable, designed for outdoor elements. | Can be more expensive, can have a slight amber tint. | Environments with extreme moisture and temperature changes. |
| Marine-Grade Epoxy Resin | Extremely waterproof and durable, creates a glass-like finish, fills small imperfections. | Can be tricky to mix and apply, requires good ventilation, can be expensive. | Ultimate waterproofing, high-gloss finish, detailed projects. |
For most DIY bathtub trays, a high-quality water-based polyurethane or exterior spar urethane is a fantastic balance of ease of use, durability, and protection. If you’re aiming for a truly show-stopping, waterproof finish, especially if you’ve added decorative elements or cutouts, epoxy resin is the ultimate choice.
Application Steps:
- Work in a well-ventilated area. Outdoors or in a garage with the door open is ideal.
- Apply the first coat. Use a good quality brush. Apply thin, even coats. Work with the grain of the wood. Avoid over-brushing, as this can create bubbles.
- Let it dry completely. Drying times vary by product. Check the manufacturer’s instructions.
- Lightly sand between coats. After the first coat dries, lightly scuff the surface with your finest grit sandpaper (220 or 320). This helps subsequent coats adhere better. Wipe off all dust.
- Apply subsequent coats. Most finishes require at least 3 coats for good protection. For a bathtub tray, 4-5 coats are even better.
- Allow for full curing. Even after the finish is dry to the touch, it takes time to fully cure and reach its maximum hardness. This can take several days to a week or more, depending on the product. Be gentle with your tray during this curing period.
Important Note on Safety and Non-Toxicity: Ensure the finish you select is safe for use in a bathroom and non-toxic once cured. For items that will come into contact with skin or bath products, look for finishes labeled as food-safe or non-toxic once fully cured. This is especially important if using epoxy resin.
Tips for a Perfect DIY Bathtub Tray
Here are some extra pointers to make your project even better:
- Measure Your Tub Carefully: Before you buy any wood, measure the width of your tub. Extend the tape measure from the outside edge of one side to the outside edge of the other. This measurement is crucial for determining the length of your tray. Aim for the tray to be a few inches longer than your tub width for a secure overhang.
- Consider the Shape: You can leave the ends of the tray square, or you can round them over with a jigsaw and sandpaper for a softer look.
- Add a Tablet/Book Stand: For readers, attach a thin strip of wood along the front edge at a slight angle. Or, you can build a small, folding stand that attaches to the tray.
- Incorporate Additional Features: Think about adding compartments for soap, a loop for a washcloth, or even a small drawer.
- Drainage Holes: If you’re concerned about water pooling in any crevices or the cup holder, consider drilling a few small drainage holes (1/4 inch) in discreet locations on the underside.
- Non-Slip Pads: For extra security, you can glue small, non-slip rubber or silicone pads to the underside of the support legs.
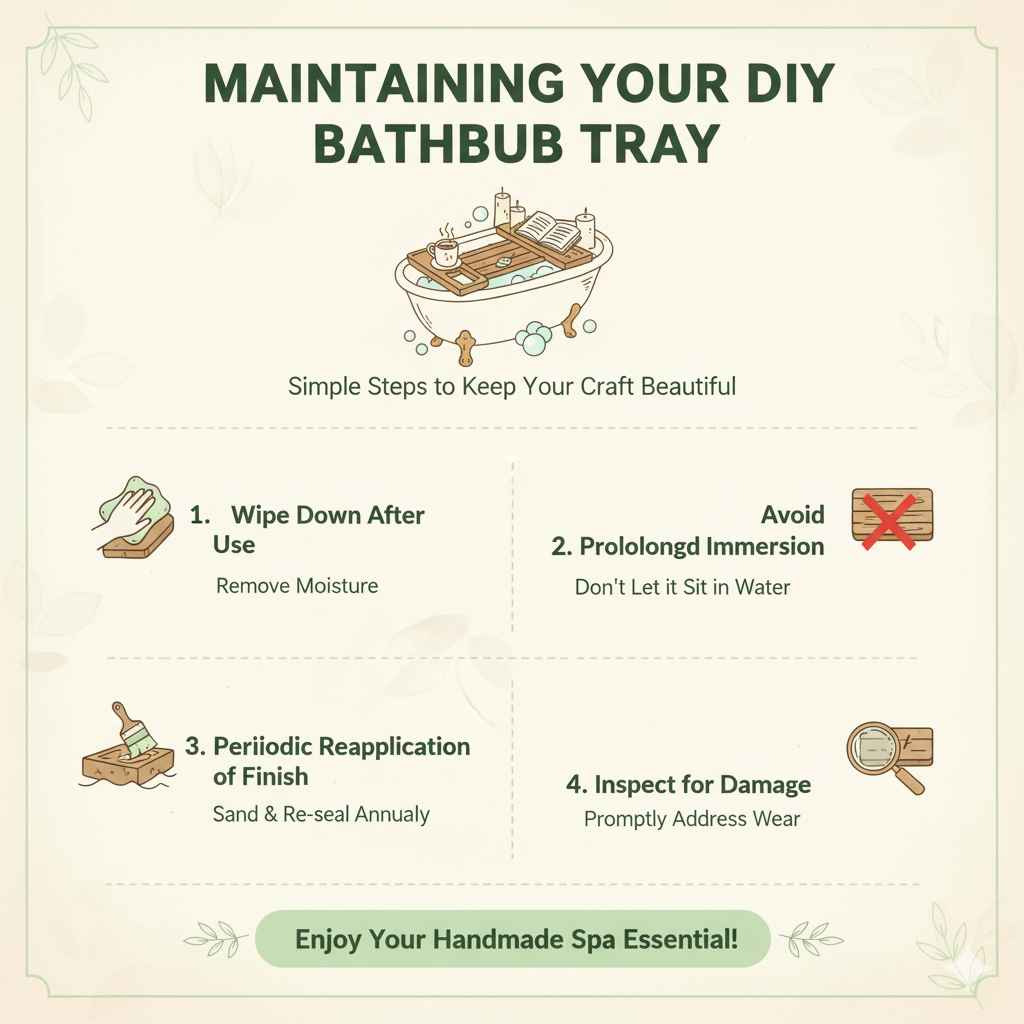
Maintaining Your Bathtub Tray
To keep your beautiful DIY bathtub tray looking its best, follow these simple maintenance tips:
- Wipe Down After Use: After each bath, quickly wipe down the tray with a clean, dry cloth to remove moisture.
- Avoid Prolonged Immersion: While sealed, try not to let the tray sit in standing water for extended periods.
- Periodic Reapplication of Finish: Every year or two, depending on humidity and use, you might want to give the tray a light sanding and reapply a fresh coat of your chosen sealant.
- Inspect for Damage: Occasionally check for any signs of wear, scratches, or peeling finish. Address these issues promptly by sanding and re-sealing the affected area.
By taking these simple steps, your handmade bathtub tray will remain a functional and attractive part of your bathroom for many years to come.
Frequently Asked Questions about DIY Bathtub Trays
Here are answers to common questions beginners might have about creating their own bathtub tray:
How wide should a bathtub tray be?
The width of the tray depends on your tub. Measure the distance across the top of your tub from edge to edge. The tray should typically be 4-8 inches wider than your tub to allow for a secure overhang on both sides. For example, if your tub is 30 inches across, a 34-38 inch long tray would be a good starting point.
What kind of wood is best for a bathtub tray?
Woods naturally resistant to moisture and decay are ideal, such as cedar, redwood, or teak. However, common woods like pine or poplar can also work very well if thoroughly sealed with a durable, waterproof finish like marine-grade epoxy, spar urethane, or multiple coats of high-quality polyurethane.
Is it hard to make a bathtub tray?
No, making a DIY bathtub tray is a great beginner-level woodworking project. It involves basic cutting, sanding, and assembly techniques. With clear instructions and a few common tools, most beginners can successfully complete this project.