Does Paint Dry Darker or Lighter: Essential Guide
Does paint dry darker or lighter? Generally, paint dries a shade darker than it appears when wet, primarily due to the evaporation of water and solvents. Understanding this phenomenon is key to achieving your desired color.
Ever held that paint swatch up, fell in love with the shade, only to have the freshly painted wall look… a little off? You’re definitely not alone! This is a super common head-scratcher for anyone dipping their toes into painting, whether it’s a brand-new piece of furniture or just refreshing a room. That magical transformation from wet to dry paint can sometimes feel a bit like a trick. But don’t worry, it’s all completely normal science and easily understood. We’re going to break down exactly why this happens and how you can work with it to get the beautiful results you’re aiming for. Let’s uncover the secrets behind drying paint and make your next painting project a breeze!
Your Essential Guide: Does Paint Dry Darker or Lighter?
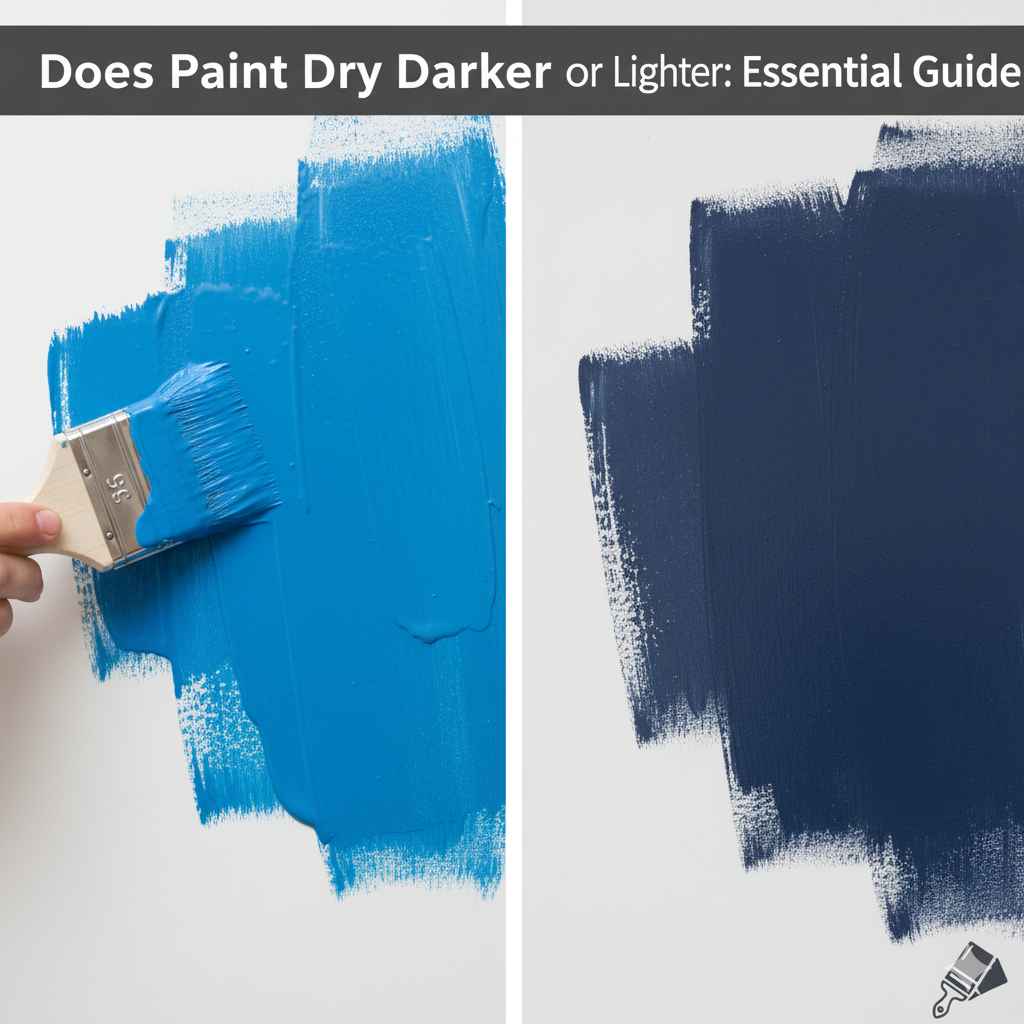
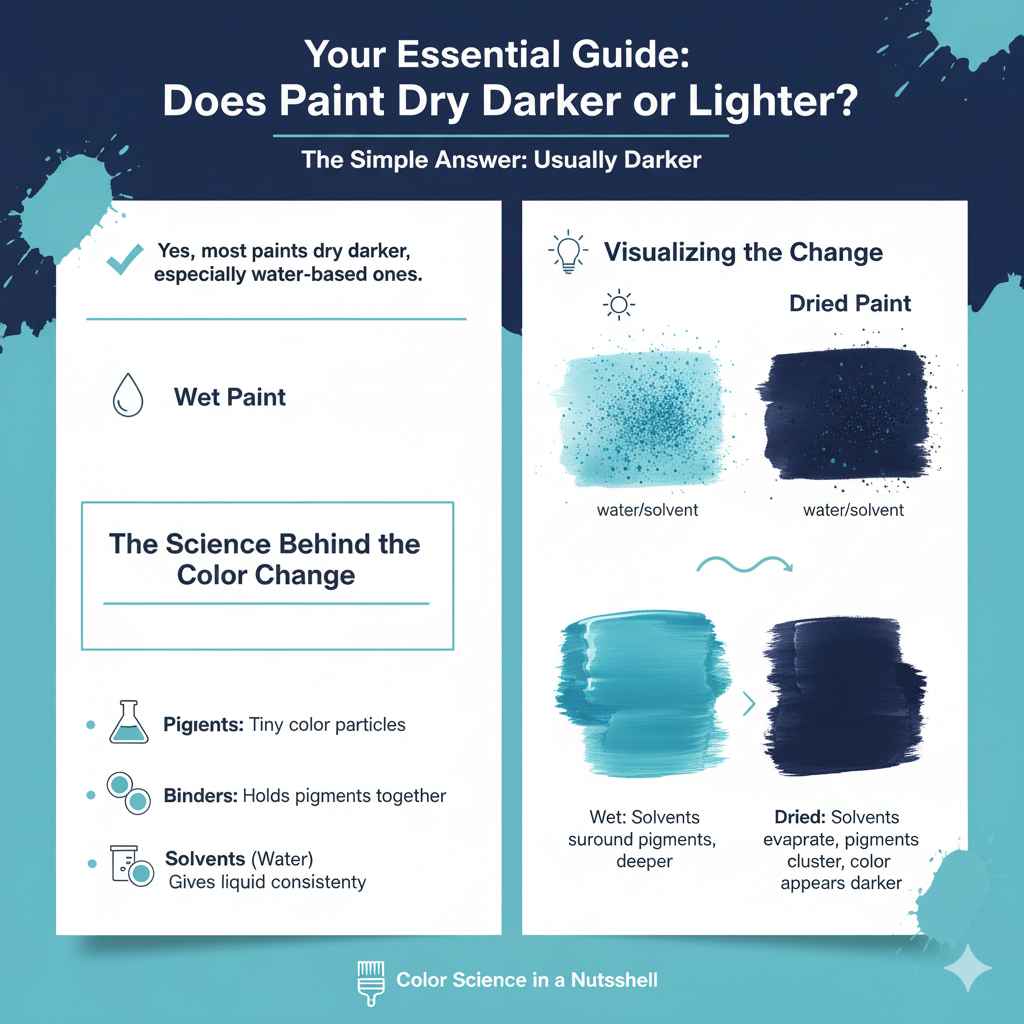
This is the big question on every painter’s mind. You’ve picked out the perfect color, carefully applied the first coat, and then… it looks different. Why? The simple answer is that most paints, especially water-based ones, tend to dry a little bit darker than they appear when they’re still wet. This isn’t some paint-maker conspiracy; it’s a predictable chemical and physical change.
Think of it like looking at a wet sponge compared to a dry one. When wet, the color looks rich and deep. Once it dries out, it often appears lighter and more muted. Paint goes through a similar process as its liquid components evaporate.
The Science Behind the Color Change
So, what’s really going on in that paint can? It all comes down to the components of the paint and what happens as it dries.
Pigments: These are the tiny particles that give paint its color. They don’t change.
Binders: This is the sticky stuff that holds the pigments together and makes the paint adhere to the surface. It can be acrylic, latex, oil, or other types.
* Solvents (and Water): In water-based paints (like latex or acrylic), water is the main solvent. In oil-based paints, mineral spirits or other petroleum-based solvents are used. These are the liquids that give paint its wet, workable consistency.
When you apply paint, the solvents (including water) begin to evaporate into the air. As these liquids disappear, the pigment and binder particles get closer together. This closer proximity can scatter light differently, making the color appear more intense or, in many cases, darker. It also helps the binder form a solid film on the surface, which also affects how light reflects.
Here’s a simple way to visualize it:
- Wet Paint: The water/solvents surround the pigment particles, making them appear smoother and the color deeper.
- Drying Paint: As water/solvents evaporate, clumps of pigment and binder form. The gaps between these clumps, and the way light bounces off them, can make the dried film appear darker or sometimes more opaque.
Factors Influencing Whether Paint Dries Darker or Lighter
While the general rule is “dries darker,” there are nuances. Several factors can influence the final appearance:
1. Paint Type
This is the biggest factor. The type of binder and solvent system used significantly impacts how the paint dries.
- Water-Based Paints (Latex, Acrylic): These are the most common for home interiors. They almost always dry darker. The water evaporates, and the acrylic or latex binder solidifies, pulling the pigment particles closer together.
- Oil-Based Paints: These tend to dry darker as well, but the process is slightly different. The oils oxidize and polymerize. They can sometimes result in a richer, deeper hue.
- Stains: Wood stains are a bit different. Both oil-based and water-based stains typically penetrate the wood. As the solvent evaporates, the pigment remaining in the wood can appear darker or lighter depending on the wood’s porosity and the stain’s formulation. Often, stains dry to a similar shade or slightly lighter as the carriers evaporate.
- Specialty Paints: Some specialty finishes, like metallic paints, can have unique drying behaviors due to the way the metallic flakes settle and reflect light when dry.
2. Surface Porosity
The material you’re painting plays a role. A porous surface, like unprimed wood or drywall, will absorb some of the paint’s liquid binder and pigment. This absorption can make the paint appear lighter once dry, as less pigment is sitting directly on the surface.
- Sealed/Primed Surfaces: If a surface is well-sealed or primed, less of the paint is absorbed, and the color change will be more predictable, usually leaning towards drying darker.
- Raw Wood: On raw wood, the color might look lighter than you expect once dry because the wood has soaked up some of the pigment.
3. Sheen (Finish)
The level of sheen – matte, eggshell, satin, semi-gloss, high-gloss – also affects perception. Higher sheens contain more binders and fewer flatting agents (which create the matte look). This can make higher-sheen paints appear slightly richer and sometimes darker or more vibrant once dry compared to their matte counterparts.
- Matte Finishes: Light scatters more across the rougher surface, often making the color appear slightly lighter and less intense.
- Glossy Finishes: The smooth surface reflects light more directly, giving the color a richer, often deeper appearance.
4. Air Temperature and Humidity
Drying conditions can subtly influence the final look, though usually not as dramatically as paint type. High humidity can slow down evaporation, potentially leading to a slightly different film formation. Extreme temperatures can also affect how the binder polymerizes.
5. Thickness of Application
Applying paint too thinly might allow the underlying color of the surface to show through more, making the dried color appear lighter than intended. Applying it too thickly can sometimes lead to uneven drying or a slightly different final hue.
The “Touch-Up” Conundrum
Have a small scuff on your wall and need to touch it up? This is where the “dries darker” rule becomes incredibly important. If you try to touch up a spot with paint that’s been sitting in the can for a while, or even just a different batch, you might notice a visible difference compared to the surrounding paint. This is because the paint on the wall has fully dried (and potentially aged), while your touch-up paint is applied wet. The wet touch-up will likely dry a shade darker than the surrounding paint, creating a noticeable patch.
For seamless touch-ups, it’s always best to use leftover paint from the original application. If you don’t have any, or if the original paint color might have faded slightly over time (yes, paint can fade!), you might need to blend the touch-up area carefully or even consider repainting a larger section.
Practical Tips for Achieving Your Desired Color
Knowing that paint typically dries darker is a powerful tool! Here’s how to use that knowledge to your advantage:
1. Test, Test, Test!
This is the golden rule of painting. Never skip this step, especially with a new color or new brand of paint.
- Paint Swatches: Get sample pots of your chosen colors.
- Paint on the Actual Surface: Apply patches of each color directly onto the wall or furniture you plan to paint. Use a primer first if you plan to use one for the final project.
- Observe Over Time: Let the swatches dry completely. Observe them in different lighting conditions (daylight, artificial light) at different times of the day. This is the best way to see how the color truly looks when dry.
- Wait for Full Cure: Remember that paint can take days or even weeks to fully cure, during which time the color can continue to subtly change.
2. Understand Your Undertones
Colors aren’t just red, blue, or green. They have undertones. A gray paint might have blue, green, or purple undertones. These undertones can become more or less prominent as the paint dries. Testing helps you see these subtle shifts.
3. Consider the Finish
If you’re between a matte and a satin finish, consider how the sheen affects the color. If a color looks beautiful in a satin finish but you want a matte look, be aware that the matte version might appear slightly washed out or lighter. It’s a good idea to test both finishes if you’re unsure.
4. Use a Good Quality Primer
A primer not only helps paint adhere better and cover existing colors but also provides a uniform base. This means the topcoat will behave more predictably, and the color will be truer to the swatch once dry. For example, primers are crucial for getting deep, rich colors to pop. According to the International Code Council, proper surface preparation, which includes priming, is a fundamental aspect of durable construction and finishes that contribute to building safety and longevity.
5. Buy Enough Paint (From the Same Batch)
To avoid touch-up issues and ensure color consistency across a large project, always buy all the paint you’ll need at once. Check for the batch number or code on the cans – using cans with the same code ensures they are from the same manufacturing run, minimizing slight color variations.
6. Account for Lighting
As mentioned, lighting is huge! A color can look completely different in a dimly lit basement versus a brightly lit living room. Always test paint in the actual room where it will be used, paying attention to how natural and artificial light affects it throughout the day.
When Paint Might Dry Lighter
While it’s less common, some paints can appear lighter after drying. This usually happens under specific circumstances:
- Very Thin Coats on Highly Absorbent Surfaces: If you apply a very thin coat of paint on an unprimed, very porous surface (like bare drywall), the surface might absorb so much pigment that the dried finish looks lighter than the wet application.
- Certain Tinted Primers: Sometimes, a tinted primer that is very close in color to your topcoat can affect the final shade.
- Specific Specialty Finishes: Some chalk paints or mineral paints, due to their powdery texture when dry, might appear lighter or more muted than when wet.
Paint Drying Stages: What to Expect
Paint drying isn’t an instant event. It happens in stages:
Stage 1: Wet Application
- The paint is liquid and spreadable, with all components (pigment, binder, solvent/water) mixed together.
- Color appears most vibrant and looks as it does in the can.
Stage 2: Drying (Evaporation)
- Solvents/water begin to evaporate.
- Paint starts to lose its wet sheen and begins to set.
- This is typically when the color change becomes noticeable – often appearing slightly darker.
- The surface will feel dry to the touch, but chemical changes are still occurring.
Stage 3: Curing (Hardening)
- This is a longer process, which can take days or weeks depending on the paint type and environmental conditions.
- The binder fully solidifies and forms a durable film.
- The color stabilizes to its final shade. Minor adjustments in hue might still occur during this stage.
You can find more detailed information on paint drying and curing times from resources like the American Coatings Association, which provides excellent insights into paint chemistry and application for durability and performance.
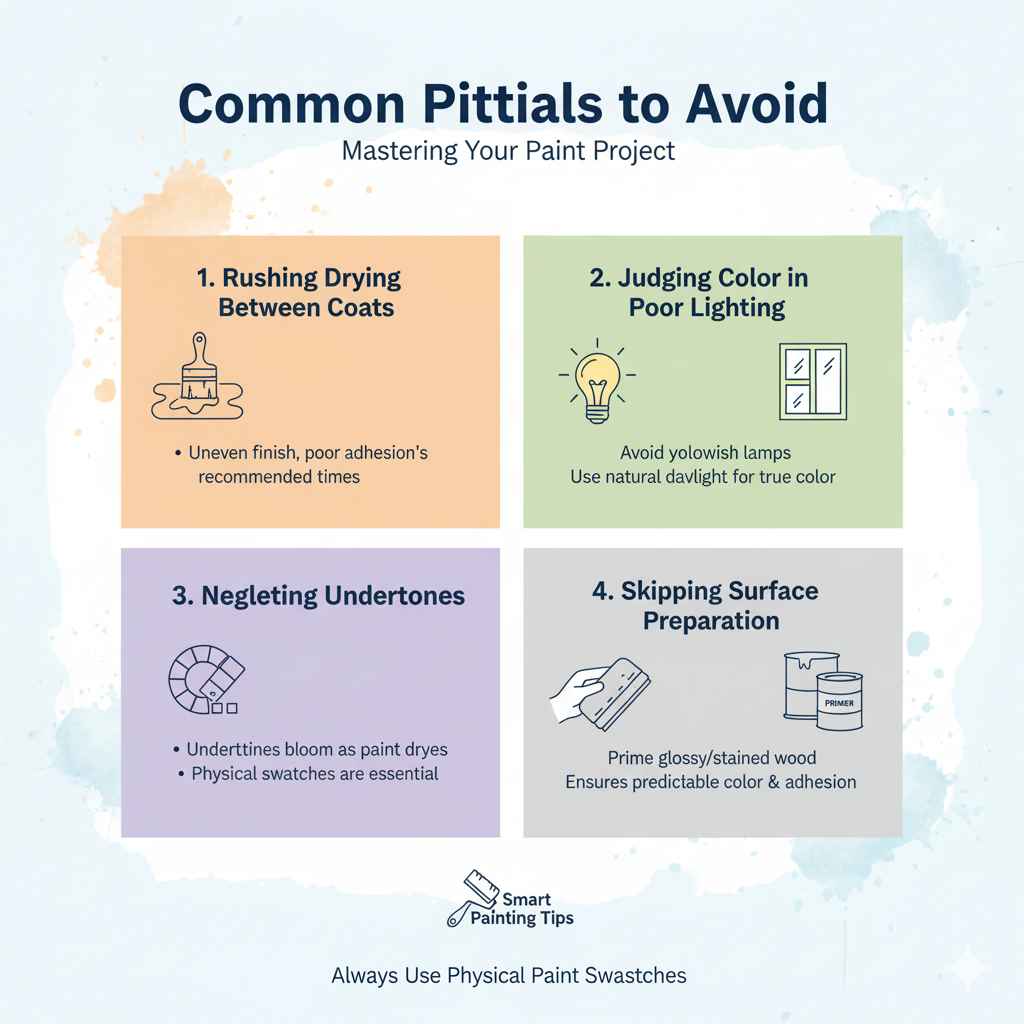
Common Pitfalls to Avoid
Let’s look at some mistakes that beginners often make regarding paint drying and color:
1. Rushing the Drying Between Coats
Applying a second coat before the first coat has sufficiently dried can lead to an uneven finish, poor adhesion, and a color that doesn’t look right. Always follow the manufacturer’s recommended drying times for recoating.
2. Judging Color in Poor Lighting
Using a clip-on lamp with a yellowish bulb in a dark room will give you a very different impression of a color than natural daylight in a well-lit space.
3. Not Considering the Undertones
Picking a color based solely on its main hue without considering its undertones is a recipe for disappointment. Those undertones often ‘bloom’ or change as paint dries.
4. Neglecting Surface Preparation
Painting over a glossy, unprimed surface or directly onto stained wood without sealing it can lead to unpredictable color results and poor paint performance. Good prep makes all the difference.
5. Relying Solely on Digital Colors
Colors on computer screens or phone displays are calibrated differently and don’t accurately represent how paint will look in your home. Always use physical paint swatches.
Frequently Asked Questions (FAQ)
Q1: Will all paints dry darker?
No, not all paints will dry darker. While most common water-based and oil-based paints do dry a shade darker, some specialty paints or applications on highly absorbent surfaces with very thin coats might appear lighter. The most common outcome, however, is a slightly darker dried finish.
Q2: How long does it take for paint to dry versus cure?
Paint typically feels dry to the touch within 1-2 hours. However, this doesn’t mean it’s fully dry or cured. The recoat time (when you can apply another layer) is usually several hours. Full curing, which is when the paint reaches its maximum hardness and durability, can take anywhere from a few days to 30 days, depending on the paint type and environmental conditions.
Q3: How can I ensure my paint color is exactly what I want?
The best way is to perform test swatches. Paint small sections of your actual project surface with your chosen colors and allow them to dry completely. Observe these test areas in your project’s lighting conditions at different times of day before committing to painting the entire surface.
Q4: What is an “undertone” in paint color?
An undertone is a subtle hue within a main color that influences its overall appearance. For example, a “white” paint might have a blue, yellow, or pink undertone. These undertones can become more or less apparent as the paint dries, which is why seeing a dried swatch is crucial.
Q5: Can humidity affect how dark or light my paint dries?
Yes, humidity can have an effect. High humidity slows down the evaporation of water from water-based paints. This can sometimes lead to a slower drying process and potentially a slightly different film formation, which might subtly alter the final hue. For best results, paint in moderate humidity conditions.
Q6: What’s the difference between “dry to touch” and “fully cured”?
“Dry to touch” means the surface won’t transfer wet paint to your finger under light pressure. “Fully cured” means the paint film has achieved its final hardness and durability through chemical processes. You can usually recoat after several hours, but the paint is still vulnerable until it’s fully cured. Avoid exposing newly painted surfaces to heavy use or cleaning until they are cured.
Conclusion
Navigating the world of paint colors and their drying behavior can seem like a puzzle, but armed with the knowledge that paint typically dries darker, you’re already ahead of the game. Remember that this change is a natural part of the drying process, influenced by the paint’s composition, the surface it’s applied to, and the finish you choose. By consistently testing your colors on the actual surface and understanding the stages of drying, you’ll gain so much confidence in your painting projects.
Don’t let an unexpected color shift dampen your DIY spirit! Embrace the art of testing, choose quality materials, and pay attention to those little details like lighting and surface prep. Whether you’re painting a feature wall, a beloved piece of furniture, or your entire home, taking these steps will ensure your finished project looks exactly how you envisioned it, a true testament to your craftsmanship. Happy painting!