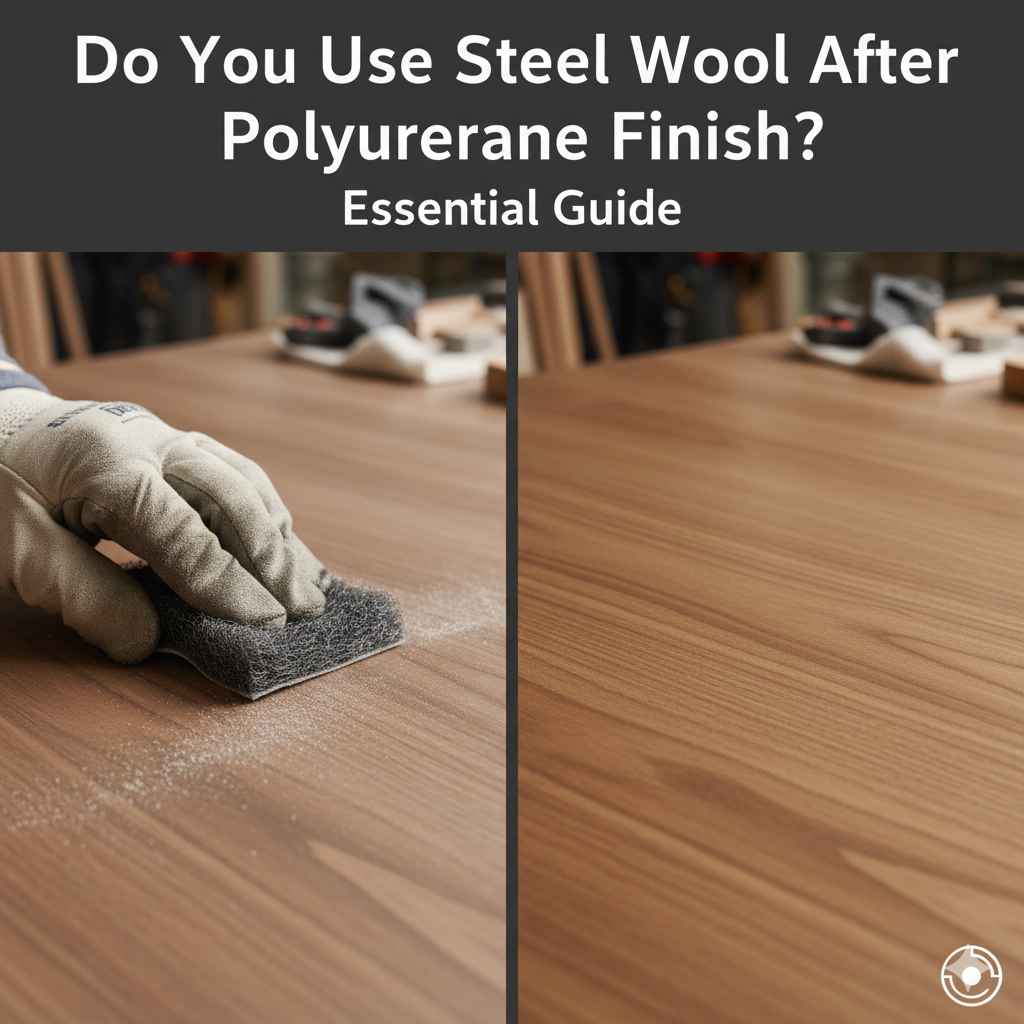
Can You Use Acrylic Paint On Wood: Essential Guide
Yes, you absolutely can use acrylic paint on wood! Acrylic paint is a versatile and beginner-friendly choice for adding color and a protective finish to many wood projects. It dries quickly, cleans up easily with water, and adheres well with proper preparation. This guide will walk you through everything you need to know to achieve beautiful, lasting results.
Hey there, fellow DIYers and wood lovers! Md Meraj here, your go-to guy for making woodworking projects feel less like a chore and more like fun. We’ve all stood in the paint aisle, staring at gorgeous wooden pieces we’ve crafted, wondering, “What’s the best way to bring this to life?” A super common question pops up: “Can you use acrylic paint on wood?” It’s a fantastic question because acrylics are so accessible. You might feel a little unsure if they’re durable enough or if they’ll look… well, painted in a less-than-ideal way. Don’t worry, we’ll tackle this together! I’ll show you exactly how acrylic paint can be your best friend for finishing wood, making your projects stand out with color and a smooth finish. Let’s dive into making your wood creations shine!
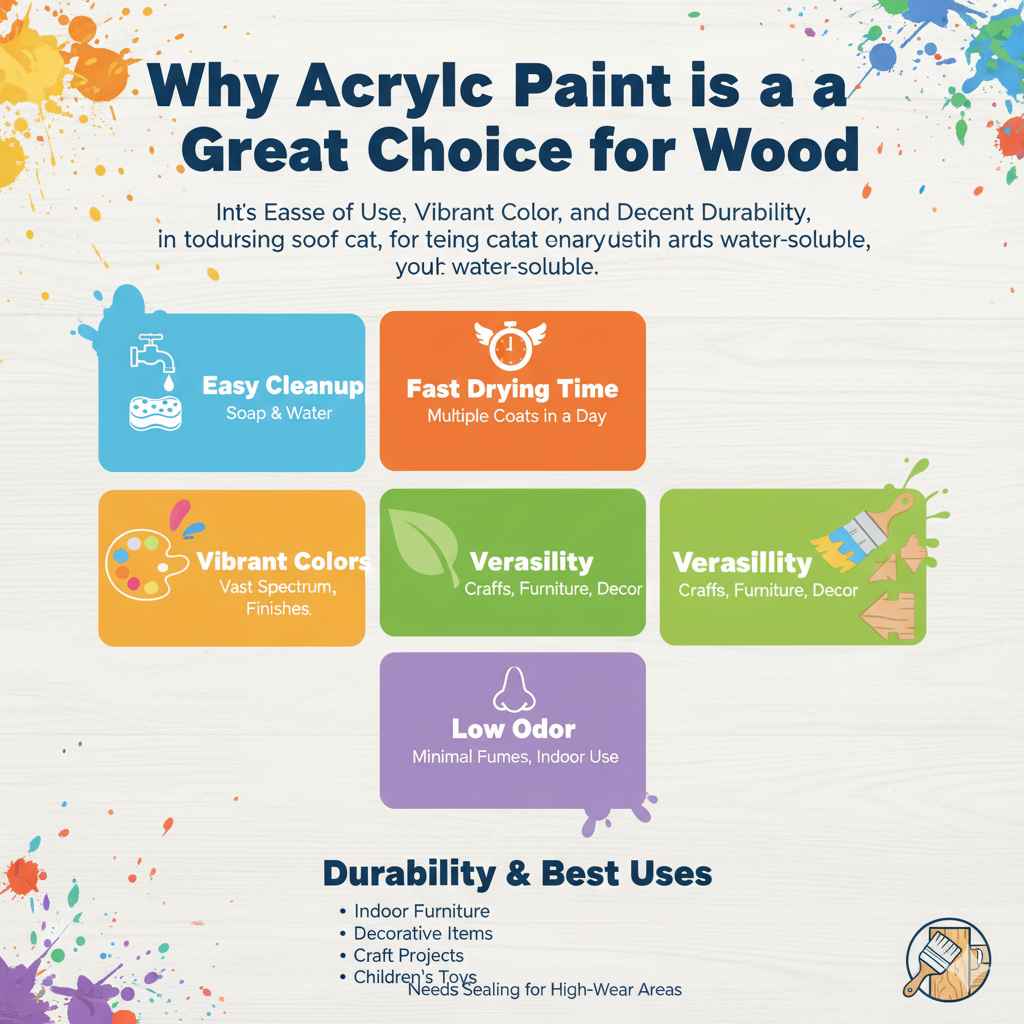
Why Acrylic Paint is a Great Choice for Wood
Acrylic paints are a popular choice for wood finishing, and for good reason! They offer a fantastic blend of ease of use, vibrant color, and decent durability when applied correctly. For beginners, they are incredibly forgiving. Unlike oil-based paints, acrylics are water-soluble, meaning you can clean up your brushes and any spills with just soap and water. This is a huge plus for keeping your workspace tidy and making the entire process more enjoyable.
Here’s a quick look at why acrylics are often the go-to:
Easy Cleanup: As mentioned, water is your best friend here. No need for harsh solvents.
Fast Drying Time: This means you can apply multiple coats in a single day, speeding up your project.
Vibrant Colors: Acrylics come in a vast spectrum of colors, from matte to high-gloss finishes, allowing for endless creative possibilities.
Versatility: They can be used on a variety of wood surfaces, from small craft items to furniture pieces.
Low Odor: Unlike some other types of paint, acrylics have minimal fumes, making them pleasant to work with indoors.
Durability and When to Use Acrylics
While acrylics are great, it’s important to understand their limitations. For pieces that will get heavy wear and tear or be exposed to harsh weather, you might need a more robust solution. However, for indoor furniture, decorative items, wall art on wood panels, craft projects, and even children’s toys (with the right safety considerations), acrylic paint offers excellent durability, especially when sealed properly. The key is preparation and the right topcoat.
Getting Started: Essential Supplies
Before you dip your brush, let’s gather what you’ll need. Having the right supplies makes the process so much smoother and helps ensure a professional-looking finish.
Here’s your essential toolkit:
Acrylic Paints: Choose artist-grade acrylics for better pigment and durability, or craft acrylics for smaller projects or if you’re on a budget.
Brushes: A variety of synthetic brushes (flat, round, detailing) will cover most needs. Natural bristles can also work but might not last as long with acrylics.
Primer (Optional but Recommended): A good quality primer, like a water-based acrylic primer or a wood primer, helps paint adhere better and provides an even base. This is especially useful for raw wood or dark-colored woods.
Clear Sealant/Topcoat: Crucial for protecting your painted surface. Options include acrylic sealers, polyurethane (water-based for minimal yellowing), or varnishes. Available in matte, satin, or gloss finishes.
Sandpaper: Various grits (e.g., 120-grit for smoothing, 220-grit for a finer finish).
Sanding Block: Helps distribute pressure evenly for a smoother result.
Tack Cloth or Damp Rag: For removing dust after sanding.
Painter’s Tape: For clean lines and masking off areas.
Drop Cloth or Newspaper: To protect your work area.
Water Container: For rinsing brushes.
Rag or Paper Towels: For wiping up excess paint or spills.
Step-by-Step Guide: Painting Wood with Acrylics
Now, let’s get down to business! Painting wood with acrylics is a straightforward process that anyone can master. Follow these steps, and you’ll be creating beautiful, painted wood pieces in no time.
Step 1: Prepare Your Wood Surface
This is arguably the most important step. A well-prepared surface ensures the paint adheres properly and lasts longer.
1. Clean the Wood: Wipe down your wood piece with a damp cloth or a slightly soapy cloth to remove any dirt, dust, or grime. If there’s any old finish or wax, you’ll need to remove that first. For raw wood, ensure it’s completely dry.
2. Sand the Surface: Start with a medium-grit sandpaper (around 120-grit) to smooth out any rough spots or imperfections. Work your way up to a finer grit (220-grit) for a super smooth finish. Always sand with the grain of the wood.
3. Remove Dust: After sanding, thoroughly wipe the surface with a tack cloth or a clean, damp rag to remove all sanding dust. Dust left on the surface will prevent the paint from adhering well and can cause a bumpy finish.
Step 2: Apply a Primer (Recommended)
While you can paint directly onto wood, a primer will make a world of difference.
1. Choose Your Primer: A good quality water-based acrylic primer or a dedicated wood primer is ideal. Priming helps create a uniform surface, prevents the wood grain from showing through inconsistently, and ensures your topcoat colors are true. For porous woods like pine, priming is especially beneficial.
2. Apply the Primer: Using a brush or roller, apply a thin, even coat of primer. Avoid thick, gloppy applications, as they can create brush marks.
3. Let it Dry: Allow the primer to dry completely according to the manufacturer’s instructions.
4. Light Sanding: Once dry, lightly sand the primed surface with fine-grit sandpaper (220-grit or higher) to knock down any raised grain or imperfections. Wipe away the dust with a tack cloth.
Step 3: Paint Your Wood Piece
Now for the fun part – adding color!
1. Stir Your Paint: Gently stir your acrylic paint. Avoid vigorous shaking, which can create air bubbles.
2. Apply the First Coat: Using your chosen brush, apply a thin, even coat of acrylic paint. Work in smooth, consistent strokes, preferably following the grain of the wood. Don’t try to get full coverage with the first coat; thin coats are better.
3. Let it Dry: Acrylic paint dries quickly. Depending on humidity and temperature, it might be dry to the touch in 15-30 minutes. However, it needs to be fully cured before applying the next coat or a sealant.
4. Apply Additional Coats: Once the first coat is dry, apply a second coat. You’ll likely find the coverage improves significantly. Repeat this process, allowing each coat to dry thoroughly, until you achieve the desired opacity and depth of color.
Step 4: Seal Your Painted Wood
This step is critical for protecting your work and ensuring longevity. An unsealed acrylic paint job on wood can scratch or wear away easily, especially on high-touch surfaces.
1. Choose Your Sealer: Select a clear sealant that complements your desired finish. Water-based polyurethane is a popular choice because it offers excellent durability and doesn’t yellow as much as oil-based versions. Acrylic sealers are also a good option and are water-soluble for easy cleanup. For a natural look, matte finishes work well; for more shine, go for satin or gloss.
2. Apply the Sealer: Apply the sealant in thin, even coats using a clean brush or foam applicator. Again, work with the grain. Avoid overworking the sealer, which can lead to bubbles or streaks.
3. Multiple Coats are Key: Allow each coat of sealer to dry completely (check the product label for drying times; this can be longer than paint). Apply at least two to three coats for adequate protection. Lightly sanding with very fine-grit sandpaper (320-grit or higher) between coats can help create a smoother finish, but ensure all dust is removed before the next application.
4. Cure Time: Remember that many sealants require a curing period (often several days to a couple of weeks) to reach their maximum hardness and durability. Be gentle with your painted piece during this time.
Tips for a Flawless Finish
Achieving a professional look with acrylics on wood is totally doable. Here are a few expert tips to help you get there:
Work in a Well-Lit Area: Good lighting helps you see drips, uneven patches, and brush strokes clearly.
Use Quality Brushes: Good brushes hold paint better and apply it more smoothly, minimizing streaks and maximizing coverage. Synthetic brushes are excellent for acrylics.
Thin Coats are Your Friend: It’s always better to apply multiple thin coats than one thick, gloppy coat. Thin coats dry faster, adhere better, and look smoother.
Clean Brushes Immediately: Acrylic paint dries fast and can permanently ruin your brushes if not cleaned promptly. Rinse with warm water and soap until all paint is gone.
Test a Small Area: If you’re working on an important piece, test your colors, primer, and sealant on a scrap piece of the same wood first.
Embrace the Grain (or Hide It): If you want the wood grain to show through, use fewer paint coats or a diluted paint wash. If you want a solid, opaque finish, prime well and use enough coats of paint. For a smooth, modern look, ensure your surface is very smooth before painting.
Consider the Wood Type: Different woods absorb paint differently. Softwoods might require more primer and coats than hardwoods.
When to Choose Acrylics vs. Other Paints for Wood
It’s helpful to know where acrylic paints fit in the landscape of wood finishing.
| Paint Type | Pros | Cons | Best For |
|---|---|---|---|
| Acrylic Paint | Water-based, fast-drying, low odor, easy cleanup, vibrant colors | Can be less durable than oil-based paints without a good sealer, can chip. | Indoor furniture, crafts, décor, wall art, toys, projects requiring quick drying and easy cleanup. Excellent beginner choice. |
| Latex Paint | Water-based, durable, good for large areas, widely available | Can have more of a plastic-like finish, can chip with heavy wear. | Walls, trim, exterior siding, larger indoor furniture pieces where a durable but not necessarily fine-art finish is acceptable. |
| Oil-Based Paint | Very durable, smooth finish, excellent adhesion | Strong odors, long drying times, requires mineral spirits for cleanup, can yellow over time. | High-traffic furniture, doors, trim, outdoor projects requiring maximum durability, situations where a high-gloss, smooth finish is desired. |
| Chalk Paint | No priming or sanding needed (often), matte finish, very forgiving | Requires a wax or sealer, can be chalky, not as durable on its own. | Shabby chic, vintage looks, furniture needing a quick refresh without extensive prep. |
| Milk Paint | Natural ingredients, matte finish, can create chippy or smooth look | Requires mixing, can be unpredictable, needs sealing, can be expensive. | Vintage, antique looks, furniture needing an authentic aged appearance. |
For Woodworking Beginners
Acrylics are generally the top recommendation for beginners working with wood. Their forgiving nature with cleanup and quick drying times make the learning curve much gentler. You can focus on learning techniques like smooth application and achieving clean lines without the stress of harsh chemicals or lengthy drying periods.
For Durability
If your project is going to experience heavy use, moisture, or outdoor elements, you might want to consider oil-based paints or high-quality enamels, but always remember that a good sealer is paramount for acrylics. For outdoor projects, specially formulated exterior acrylics might be an option, but always check the product details carefully. For general indoor furniture, properly sealed acrylic paint is quite durable.
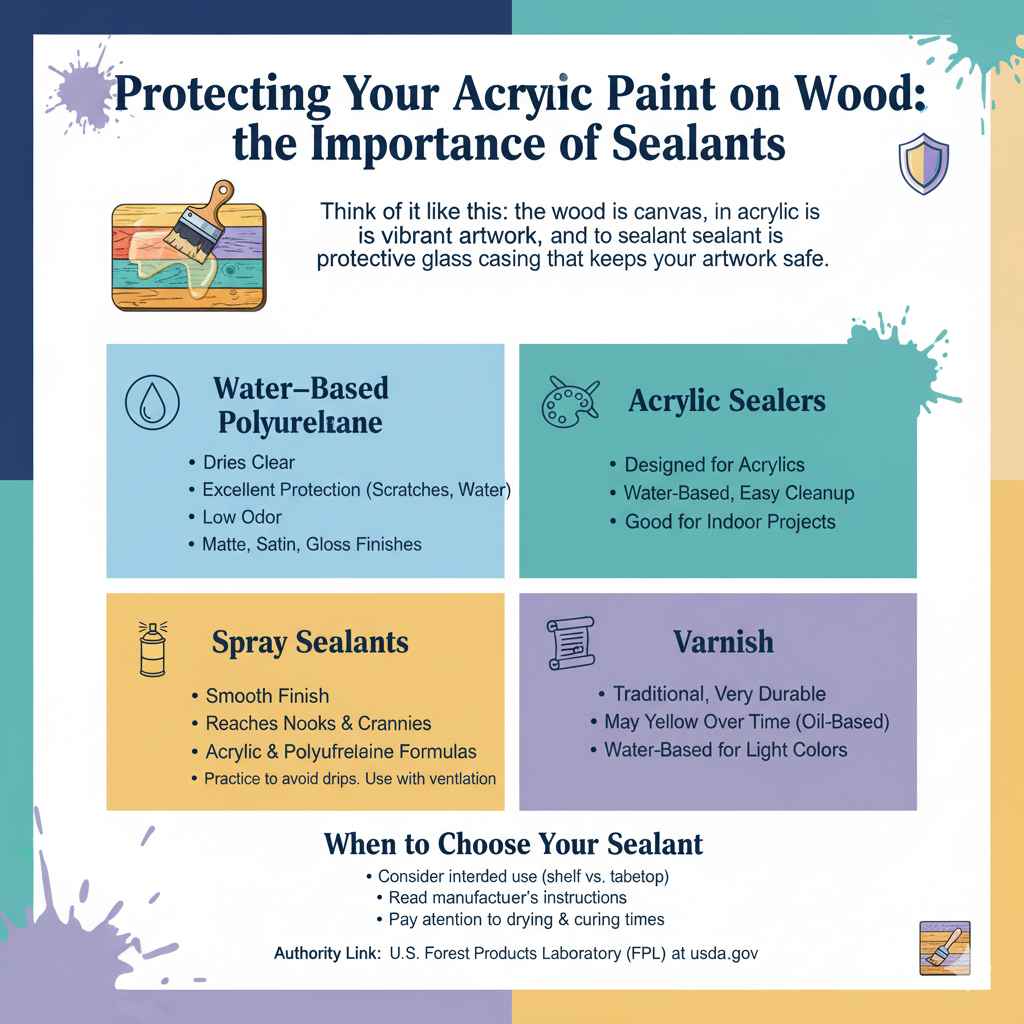
Protecting Your Acrylic Paint on Wood: The Importance of Sealants
As we’ve touched upon, sealing your acrylic-painted wood is non-negotiable for longevity. Think of it like this: the wood is the canvas, the acrylic paint is the vibrant artwork, and the sealant is the protective glass casing that keeps your artwork safe.
Types of Sealants for Wood Projects:
Water-Based Polyurethane: This is a favorite for a reason. It dries clear, offers excellent protection against scratches, water, and general wear, and has a lower odor than oil-based versions. It comes in matte, satin, and gloss finishes.
Acrylic Sealers: These are specifically designed to work with acrylic paints. They are also water-based and easy to clean up. They offer good protection for most indoor wood projects.
Spray Sealants: Available in both acrylic and polyurethane formulas, spray sealants can be excellent for reaching nooks and crannies and providing a very smooth finish. However, practice is needed to avoid drips and uneven application. Ensure good ventilation when using spray sealants.
* Varnish: Traditional varnishes can be very durable but may yellow over time, especially oil-based varieties. Water-based varnishes are a better choice for light-colored projects.
Authority Link: For more general information on wood finishes and sealants, the U.S. Forest Products Laboratory (FPL) at the usda.gov offers extensive research and technical guides, though often quite technical.
When choosing a sealant, consider the intended use of the wooden item. A decorative shelf won’t need as robust a finish as a dining tabletop or a child’s toy. Always read the manufacturer’s instructions regarding application, drying times, and curing periods.
Frequently Asked Questions About Acrylic Paint on Wood
Here are some common questions beginners have when painting wood with acrylics.
Frequently Asked Questions
Can I paint directly onto finished wood with acrylic paint?
While you can, it’s highly recommended to lightly sand any existing finish to create a better surface for the acrylic paint to adhere to. If the finish is glossy, sanding is essential for preventing peeling or chipping later.
How many coats of acrylic paint do I need on wood?
This depends on the paint color, the wood color, and the desired opacity. Typically, one to three coats are sufficient for good coverage. Always allow each coat to dry completely before applying the next. For lighter colors over dark wood, you’ll likely need more coats or a primer.
Will acrylic paint chip off wood easily?
Acrylic paint by itself can chip, especially on high-impact surfaces. Proper surface preparation (cleaning, sanding), applying a good primer, and most importantly, sealing the paint with a durable topcoat (like polyurethane or a strong acrylic sealer) will significantly prevent chipping and increase its lifespan.
Is acrylic paint safe for wood toys?
Yes, acrylics are a popular choice for painting wooden toys. Ensure you use non-toxic, child-safe acrylic paints and seal them with a non-toxic, durable topcoat. Many art supply stores carry specific lines of “child-safe” or “non-toxic” paints. Always check the product labels.
Can I use spray acrylic paint on wood?
Absolutely! Spray acrylic paints can be convenient for quick coverage and a smooth finish, especially on intricate pieces. However, they require good ventilation, practice to avoid runs and drips, and proper adherence to manufacturer instructions for best results.
How long does acrylic paint take to cure on wood?
Acrylic paint itself dries to the touch relatively quickly (30 minutes to a few hours). However, it takes longer to fully cure and harden, typically 24 hours to a few days for the paint layer itself. The sealant’s curing time is a separate, and often longer, process, which can take up to two weeks to reach maximum durability. Handle the item gently during this period.
What kind of wood is best for acrylic painting?
Virtually any type of wood can be painted with acrylics, from softwoods like pine and poplar to hardwoods like oak and maple. The main differences will be in how much primer and how many paint coats are needed due to the wood’s porosity and how smoothly it sands. Smooth, well-sanded wood will always yield the best results.
Conclusion: Your Wood Creations, Reimagined with Color!
So, there you have it! Painting wood with acrylics is a fantastic, accessible, and rewarding way to transform your projects from plain wood to colorful masterpieces. We’ve walked through why acrylics are a top choice, gathered our essential supplies, and detailed the steps from preparation to that all-important final coat of sealant.
Remember, the key to success lies in good preparation and a quality topcoat. Don’t be afraid to experiment with colors, techniques, and finishes.