Can You Stain Wet Wood? Proven Essential Guide
Staining wet wood is generally not recommended for best results. While it’s possible in emergencies with specific techniques, it often leads to blotchy finishes, poor adhesion, and a less durable, uneven color. For a beautiful, long-lasting stain job, always ensure your wood is completely dry.
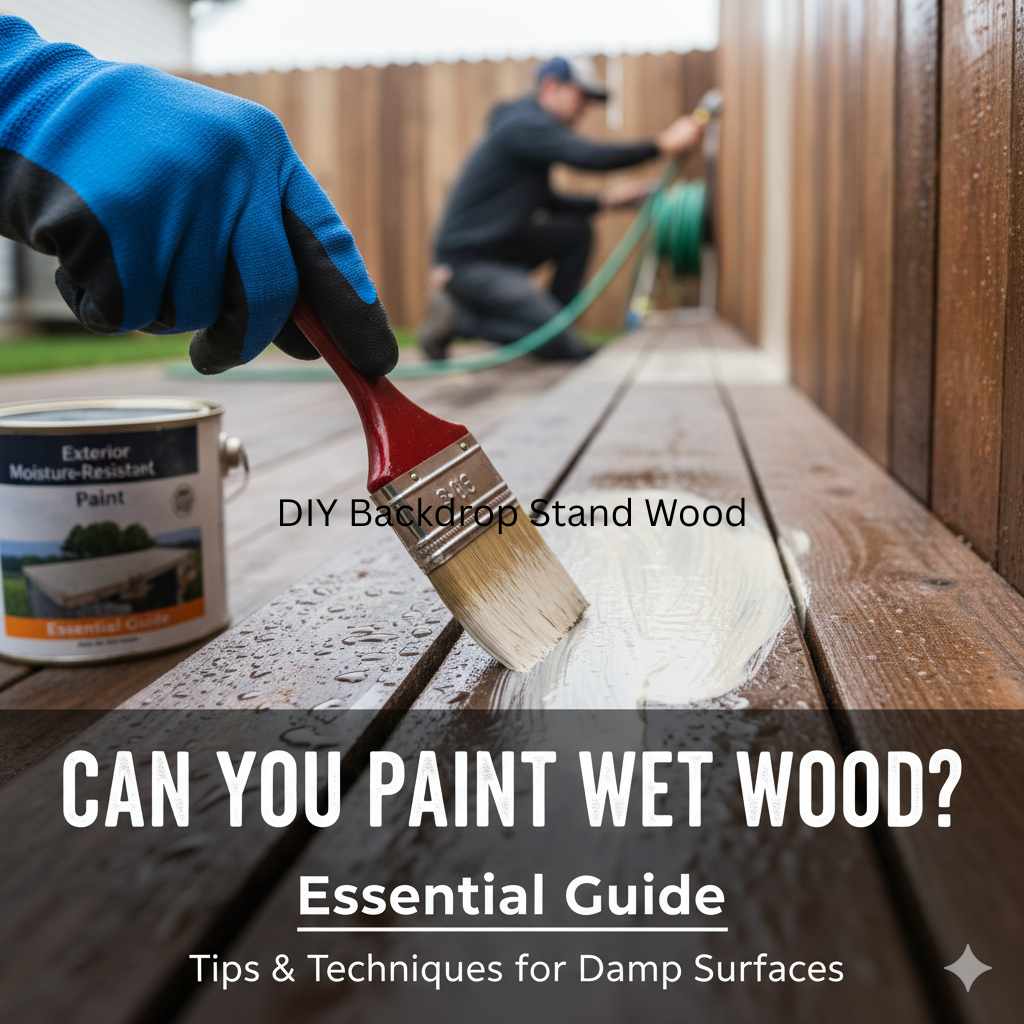
Have you ever been in a situation where you just finished an outdoor project, maybe a fence post or a quick garden bench, and rain is looming? Or perhaps you’ve encountered a piece of seemingly perfect wood that feels just a little… damp? The temptation to slap on some stain to protect your work or move forward can be strong. Can you stain wet wood?” is a question that pops up for many DIYers when time is tight or conditions aren’t ideal. The short answer is usually “no,” but let’s explore why and what happens if you try.
Wood is like a sponge. When it’s wet, its pores are already full of water. Stains, whether oil-based or water-based, need to penetrate those pores to give the wood color. If the pores are already saturated with water, there’s less room for the stain to soak in evenly. This can lead to all sorts of finishing headaches that are much harder to fix later than it is to simply wait for the wood to dry.
This guide will break down what you need to know about staining wood, especially focusing on why wet wood is a problem, what outcomes to expect if you ignore the advice, and the best practices for achieving a beautiful, professional-looking finish every time. We’ll cover the science behind why dry wood is crucial and offer tips for drying wood quickly if you’re in a pinch. Let’s get your projects looking their absolute best!
Why Dry Wood is Key for Staining
Wood, as a natural material, behaves differently depending on its moisture content. Think of it like a thirsty plant and water. When the plant is dry, it eagerly soaks up water. Wood behaves similarly with stains. When it’s dry, it’s ready to absorb the stain, allowing the pigments to seep into the wood fibers and change its color.
Moisture in wood can come from several sources: rain, humidity, or the wood itself being freshly cut or treated. Regardless of the source, excess water within the wood structure is the main enemy of a good stain job. This is because water and stain don’t mix well, and wood can only hold so much liquid.
The Science of Absorption
Stains work by penetrating the surface of the wood. The pigments that give stain its color are suspended in a liquid carrier (like oil or water). As the carrier evaporates or soaks into the wood, it leaves the pigments behind, coloring the wood fibers. This process requires the wood’s natural pores to be open and ready to accept the stain.
When wood is wet, its cells are already swollen with water. This leaves very little room for a stain to penetrate. Imagine trying to pour more water into a cup that’s already full to the brim. The extra liquid will just sit on top or run off, rather than mixing in. Similarly, stain applied to wet wood will struggle to penetrate evenly. This leads to an uneven, blotchy, or streaky appearance, which is the most common and frustrating outcome.
Moisture Content Matters
The ideal moisture content for most woodworking and finishing projects is typically between 6% and 12%. For exterior projects, it might be slightly higher, perhaps up to 15%. Anything above this range can cause significant problems when applying stain.
You can test your wood’s moisture content using a simple tool called amoisture meter. These are relatively inexpensive and can save you a lot of potential heartache. You simply press the probes into the wood, and it gives you a reading. Understanding and respecting the moisture content is fundamental to achieving professional results.

What Happens When You Stain Wet Wood?
So, you’ve ignored the advice or perhaps it absolutely has to be done today. What are you likely to encounter when you try to stain wood that isn’t dry enough?
- Uneven Color and Blotches: This is the most common issue. Because the stain can’t penetrate evenly, some areas will absorb more color than others, leading to dark patches and light streaks. This is especially noticeable on soft woods like pine or poplar.
- Poor Adhesion: The stain might not soak into the wood fibers as it should. This can mean that the finish sits more on the surface, making it more prone to peeling, flaking, or rubbing off over time, even after it appears to have dried.
- Extended Drying Time: Water needs to evaporate from the wood, and the stain carrier (oil or water) also needs to cure. Having excess water present means these processes take much, much longer. Your project might remain tacky for days or even weeks.
- Mottled or “Muddy” Appearance: Instead of a rich, clear color, the stain can sometimes create a dull, murky look when applied to damp wood, especially if you’re using a lighter stain.
- Ruined Finish: In severe cases, the stain might not adhere at all, or it could react unexpectedly with the moisture, leading to a finish that is impossible to correct without stripping and starting over.
Trying to stain wet wood is often a shortcut that leads to a much longer and more complicated process of fixing mistakes. It’s a classic case of “haste makes waste” in the woodworking world.
Can You Stain Slightly Damp Wood? An Emergency Approach
Let’s be honest, sometimes life happens. You might have a window of opportunity to apply a finish, and the wood is only slightly damp, not soaking wet. In such emergency situations, there are a few things you can try, but understand these are compromises and not ideal.
Important Note: These techniques are for when you have no other choice and understand the risks involved. They work best with certain types of stains and wood, and results will still be compromised compared to staining dry wood.
Choosing the Right Stain
For slightly damp wood, oil-based stains might offer a slightly better chance than water-based stains. Oil-based stains tend to sit more on the surface initially and may be less affected by minor moisture. However, they still require wood pores to be open for good adhesion.
Stain and Sealers in One: Some products are designed as a combination stain and sealer. These tend to form a film on the surface more readily. While they can offer some color and protection, they’re not the same as a true penetrating stain and may not provide the same depth of color or durability.
Application Techniques for Damp Wood
- Thorough Wipe-Down: Use clean, dry cloths to wipe down the wood surface vigorously. Your goal is to remove as much surface moisture as possible without trying to force it into the wood or create friction heat that could inadvertently open pores at the wrong time.
- Apply Thinly: If you must stain, apply the stain in very thin, even coats. The goal is to get a light color rather than deep saturation. Thick coats will likely pool and never dry properly.
- Work Small Sections: Don’t try to stain a large area at once. Work in manageable sections so you can apply and wipe off excess stain before it has a chance to react poorly with any lingering moisture.
- Wipe Off Excess Aggressively: After the recommended “penetration” time (which you might need to shorten), wipe off the excess stain very thoroughly with clean, dry cloths. You want to remove as much pigment from the surface as possible to prevent buildup.
- Allow Extended Drying Times: Be prepared for your project to take significantly longer to dry. Ensure it is in a warm, dry, and well-ventilated area. You may need to wait much longer than the product instructions suggest before applying a topcoat.
When NOT to Even Consider Staining
- Soaking Wet Wood: If the wood is visibly wet, dripping, or has leaves stuck to it from rain, do not stain it.
- High Humidity Environments: If you are in an area with extremely high humidity, the wood may never dry properly, and any finish applied will struggle to cure.
- For Critical Structural Elements: If this is a load-bearing beam, a deck floor, or anything critical for safety and longevity, always wait for ideal conditions.
For any project where aesthetics and durability are important, patience truly is a virtue. It’s always better to wait for the wood to dry completely.
How to Dry Wood Properly for Staining
When you need to get wood dry for staining, there are several methods, ranging from simple patience to more active techniques.
Patience is a Virtue
The simplest and most effective way to dry wood is to simply let it air dry. The time this takes depends on many factors:
- Ambient Temperature: Warmer air holds more moisture and helps evaporation.
- Humidity Levels: Lower humidity allows for faster drying.
- Airflow: Good ventilation around the wood is crucial.
- Wood Thickness and Species: Thicker pieces and denser woods take longer to dry.
For outdoor projects, stacking wood outdoors in a protected but airy location is often sufficient. Ensure it’s elevated off the ground. Indoor projects might need the wood to acclimate to room temperature and humidity after being outdoors. A good rule of thumb for any project is to bring wood inside for at least 24-48 hours before finishing.
Accelerating the Drying Process
If you’re short on time, you can speed things up:
- Use a Fan: Placing a fan to blow air across the surface of the wood can significantly increase the rate of evaporation.
- Dehumidifier: In a closed room, a dehumidifier can pull a lot of moisture out of the air, encouraging the wood to release its moisture.
- Heat Gun (with Caution): A heat gun on a low setting can help dry the surface, but be very careful not to scorch the wood. This is best for small areas and requires constant movement of the heat gun.
- Low Heat Oven/Kiln (Advanced): For woodworking professionals, drying kilns or specialized ovens are used, but this is not a practical solution for a typical DIYer.
Always follow up any active drying methods with a moisture meter check to ensure you’ve reached the ideal moisture content. For example, the Forest Products Laboratory, part of the U.S. Department of Agriculture (USDA), publishes extensive research on wood drying and moisture management, highlighting the importance of proper drying techniques for wood stability and performance.
Preparing Wood for Staining
Once your wood is dry, proper preparation is key to a flawless stain job. This involves more than just ensuring it’s not wet.
Sanding is Essential
Sanding removes any mill marks, rough spots, and ensures a smooth surface for the stain to adhere to. Start with a coarser grit sandpaper (e.g., 80 or 100 grit) to remove imperfections and move to finer grits (e.g., 150, then 220 grit) for a smooth finish. Always sand in the direction of the wood grain.
Tip: For very soft woods like pine that tend to blotch, consider using a pre-stain wood conditioner. This product helps to even out the wood’s porosity, allowing the stain to be absorbed more uniformly.
Cleaning Off Dust
After sanding, it’s critical to remove all dust. Dust left on the surface will get trapped in the stain, creating a gritty, unprofessional finish. Use a vacuum cleaner with a brush attachment, followed by a tack cloth or a clean, lint-free cloth dampened with mineral spirits (for oil-based stains) or water (for water-based stains).
Consider Your Stain Type
There are two main types of stains:
- Oil-Based Stains: These penetrate well and are often favored for their rich color and ease of wiping. They typically require mineral spirits for cleanup.
- Water-Based Stains: These offer quicker drying times and easier cleanup with water. However, they can sometimes raise the grain more and may require a wood conditioner for soft woods.
There are also gel stains, which sit more on the surface and are good for tricky woods or achieving a more opaque look. Always read the manufacturer’s instructions for the specific stain you are using.
Applying Stain: Step-by-Step
With dry, prepped wood and your chosen stain, you’re ready to apply. Follow these steps for best results:
- Read the Can: Always, always, always read the product instructions. Different stains have different application methods and drying times.
- Stir, Don’t Shake: If using an oil-based stain, stir the can thoroughly with a stir stick to redistribute the pigments. Shaking can create tiny air bubbles that will ruin your finish.
- Apply Evenly: Use a high-quality natural bristle brush (for oil-based) or synthetic brush (for water-based) or a clean cloth. Apply the stain in the direction of the wood grain. Work in small sections.
- Allow Penetration: Let the stain sit on the wood for the time recommended on the can (usually 5-15 minutes) to allow it to penetrate.
- Wipe Off Excess: This is a crucial step! Using clean, lint-free cloths, wipe off ALL excess stain. Wipe in the direction of the grain. The longer you leave stain on without wiping, the darker and more difficult it will be to achieve an even finish. Your goal is to remove everything that hasn’t penetrated the wood.
- Allow to Dry/Cure: Let the stained wood dry completely. This can take anywhere from 4 to 24 hours or even longer, depending on the product, temperature, and humidity. Ensure good ventilation.
- Second Coat (Optional): If you want a darker color, you can apply a second coat after the first is completely dry. Repeat steps 3-5.
- Apply Topcoat: Once the final coat of stain is dry, you can apply a protective topcoat (like polyurethane, varnish, or lacquer) to seal and protect the stained finish. Follow the instructions for your chosen topcoat.
Table: Stain Application Comparison
Here’s a quick comparison of applying stain to dry versus damp wood, highlighting the likely outcomes:
| Characteristic | Staining Dry Wood (Ideal) | Staining Slightly Damp Wood (Emergency) | Staining Soaking Wet Wood (Not Recommended) |
|---|---|---|---|
| Penetration | Even and deep | Uneven, shallow | Minimal to none, surface only |
| Color Consistency | Uniform, rich color | Blotchy, streaky, mottled | Extremely blotchy, uneven, or no color |
| Adhesion | Excellent | Poor to fair | Very poor, likely to peel |
| Drying Time | As per product instructions | Significantly extended, unpredictable | Extremely extended, may never fully cure |
| Final Appearance | Smooth, professional, durable | Likely requires correction or re-staining | High risk of failure, requires stripping and redoing |

When to Reconsider Your Project
Sometimes the best way to ensure a great outcome is to pause and reassess. If you’re feeling pressured by weather, time, or impatience, take a deep breath. Consider these points:
- The Effort vs. Reward: Is the time and effort you’ll save by staining wet wood worth the potential frustration and the likelihood of having to redo the work? Often, it’s not.
- Cost of Materials: Stains, sealers, and topcoats are an investment. Ruining them on wet wood means you’ll have to buy more.
- Your Satisfaction: Do you want a project you’re proud of, or one that you’re trying to live with despite its flaws?
If your project absolutely cannot wait, your best bet on slightly damp wood is to apply a product that offers color and protection, even if it’s not a traditional stain. An exterior-grade paint, for instance, is far more forgiving on damp surfaces than a stain and will offer robust protection. However, this sacrifices the wood grain’s natural beauty that stain is meant to enhance.
FAQ
Q1: Can I stain wood that was just rained on?
A1: It is strongly advised not to. Wood that has just been rained on is saturated. Staining it will almost certainly result in a blotchy, uneven, and poorly adhered finish. Wait until it is completely dry.