Can You Screw Into Wood Filler for Screws: Proven Essential
Yes, you can screw into wood filler for screws, but with crucial caveats and specific types of wood filler that are designed for this purpose. Not all wood fillers are created equal, and using the wrong kind will lead to weak connections, stripped screws, and disappointment. This guide will show you how to successfully screw into wood filler, ensuring your repairs are strong and lasting.
Dealing with damaged wood, like stripped screw holes or small cracks, is a common frustration for any DIYer. You want to fix it good and proper so you can put things back together, right? But then comes the question: can you just fill it and put a screw right back in? It’s a bit tricky, because some fillers are soft and crumbly, totally unsuitable for holding a screw. Others are rock-hard, but might not bond well. Don’t worry, though! We’re going to walk through exactly what you need to know, from choosing the right stuff to making sure your repairs are as strong as can be. Ready to tackle those fixes with confidence?
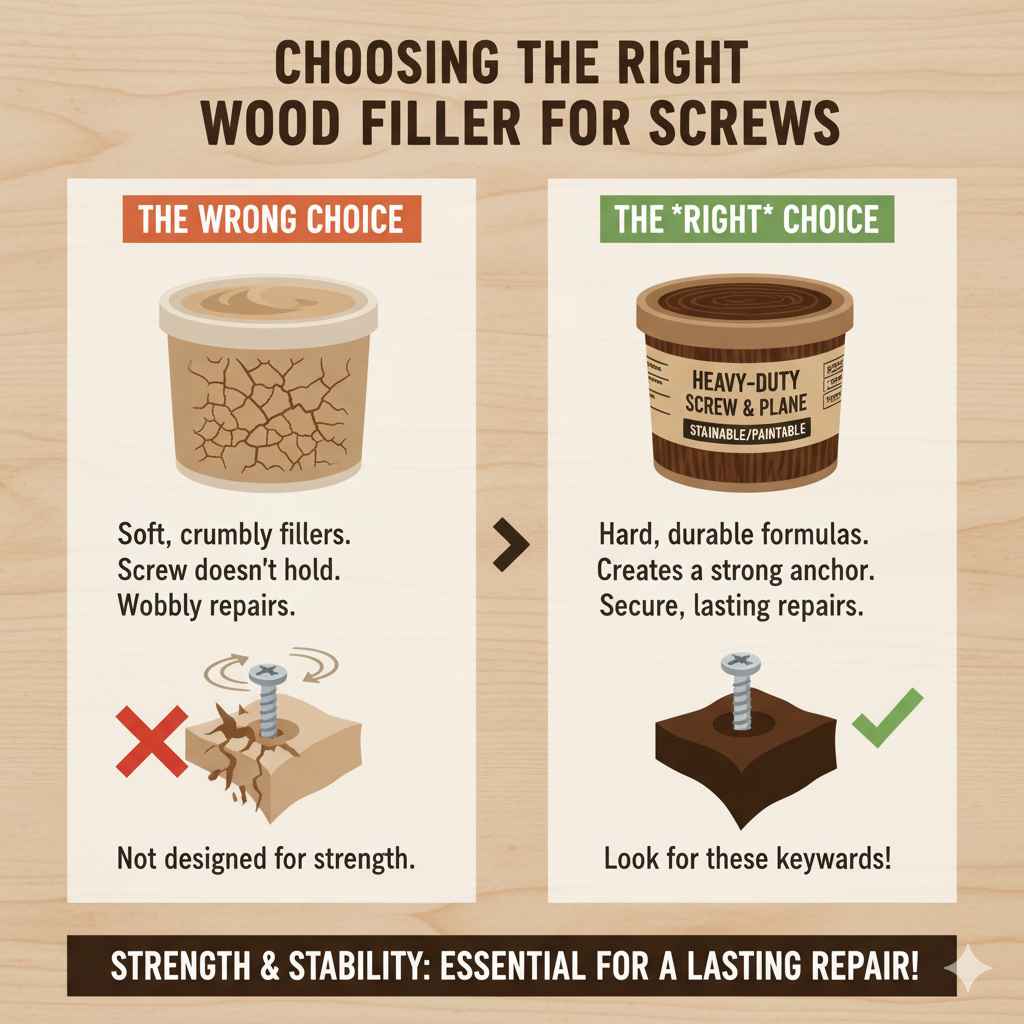
Choosing the Right Wood Filler for Screws
This is the most important step. Think of your wood filler like the foundation of a house – it needs to be strong and stable. If you just grab any old tub of filler, you’re likely setting yourself up for a wobbly repair or a screw that just spins and spins.
The key is to look for wood fillers that are specifically formulated to be hard, durable, and able to hold screws. These are often labeled as “heavy-duty,” “stainable and paintable,” or even explicitly state “can be screwed or planed.”
Types of Wood Filler and Their Screw-Holding Capabilities
| Type of Wood Filler | Screw-Holding Ability | Best For | Beginner Notes |
|---|---|---|---|
| Latex/Water-Based Wood Filler | Poor to Fair | Small cosmetic repairs, filling nail holes where no screw will go. | Shrinks significantly as it dries, not strong enough for screws. Avoid for screw repairs. |
| Cellulose-Based Wood Filler | Fair | Filling small dents and gouges, minor cosmetic touch-ups. | Can shrink a bit, moderate strength, but still not ideal for direct screw holding if significant force is expected. |
| Epoxy Wood Filler | Excellent | Structural repairs, filling large voids, rotten wood restoration, and areas requiring high strength. | Two-part mixing, dries very hard and durable. Excellent for screw holding, even under load. Can be harder to work with initially. |
| Polyester Wood Filler (e.g., Bondo for Wood) | Excellent | Filling deep cracks, gouges, and structural repairs where strength is paramount. | Also a two-part system (resin and hardener). Dries rock-hard, sandable, and can hold screws very effectively. Fast drying time. |
| Wood Patch/Wood Repair Compounds | Good to Excellent | Filling larger holes, repairing damaged edges, and structural fixes. | Varied formulations, but many are designed for strength and can hold screws well. Check product specificatiosn. |
For our purpose – screwing into wood filler – you absolutely want to lean towards the “Good to Excellent” categories. Epoxy and polyester-based fillers are your superstars here. They cure into a hard, solid material that acts almost like a new piece of wood, ready to grip a screw.
When It’s Okay (and When It’s Not) to Screw into Filler
Let’s be clear. You’re not trying to build a bridge with screws going into filler. This technique is best for repairs where the filler is acting as a reinforcement or to fix a stripped-out hole where there was good wood before.
Suitable Scenarios for Screwing into Wood Filler:
- Repairing Stripped Screw Holes: This is the most common use. The filler reinforces the hole, giving the new screw something solid to bite into.
- Filling and Re-drilling Small Pilot Holes: If a pilot hole is slightly too large or damaged, filling it and re-drilling can create a perfect new hole.
- Attaching Hardware to Previously Damaged Areas: For items like cabinet hinges or decorative hardware where the original wood is compromised.
- Reinforcing Weakened Spots: Filling small cracks or voids that might otherwise cause a screw to split the wood further.
When to Avoid Screwing into Wood Filler:
- Structural Load-Bearing Joints: Never rely on wood filler to hold critical structural components together. For example, don’t try to join two large pieces of wood with a screw going through filler.
- Areas Subject to Extreme Stress or Vibration: While some fillers are strong, they might not withstand constant, heavy stress like some machinery mounts or outdoor furniture under constant use.
- When Using Cheap, Soft Fillers: As mentioned, water-based or basic spackling compounds are a definite no-go.
- If the Filler Isn’t Fully Cured: Patience is key! Driving a screw into partially cured filler is a recipe for failure.
Think about the forces involved. Will the screw be holding significant weight? Will it be constantly tightened and loosened? If the answer is yes to either, you might need to explore more robust repair methods, like doweling or even replacing the damaged section of wood. For most DIY repairs around the house, though, the right filler will do the job wonderfully.
Step-by-Step Guide: How to Screw into Wood Filler
Alright, let’s get our hands dirty (but not too dirty, we’ve got tools for that!). This process is straightforward if you follow these steps. We’ll focus on the most common scenario: repairing a stripped screw hole.
Step 1: Prepare the Area
First things first, clean out the damaged area. If you’re dealing with a stripped screw hole, remove any loose wood splinters or old filler. A small brush, a toothpick, or even a stiff craft knife can help here. You want a clean cavity for the new filler to adhere to.
Step 2: Choose and Mix Your Filler (if applicable)
Select a high-quality, screw-holding wood filler. For epoxy or polyester fillers, you’ll need to mix two parts according to the manufacturer’s instructions. This usually involves combining a resin with a hardener on a disposable surface and mixing thoroughly until a uniform color is achieved. Work quickly, as these types of fillers can set fast!
For a simpler, single-component wood repair compound, you might just need to open the lid and stir.
Step 3: Apply the Wood Filler
Using a putty knife or even a gloved finger (for some epoxy types), press the filler firmly into the damaged hole or crack. Pack it in tightly to ensure there are no air pockets. Overfill the hole slightly, as most fillers will shrink a little as they cure, and you want enough material to ensure a solid grip for the screw.
Pro Tip: For a stripped screw hole, try to press the filler into the threads of the original screw hole if possible. This will give the new screw more to grab onto.
Step 4: Let it Cure Completely
This is critical! Refer to the product’s instructions for cure times. These can vary wildly – from 30 minutes for some fast-set epoxies to 24 hours or more for others. You need the filler to be rock-hard. If you try to screw into it too soon, you’ll just create a mess and a weak repair. A good test is to try and indent it with your fingernail; if you can, it’s not ready.
Step 5: Sand and Shape
Once fully cured, you’ll likely have a slight bulge of filler. Use sandpaper (start with a medium grit like 120 and finish with a finer grit like 220) to sand the filler flush with the surrounding wood surface. If you’re planning to paint, a smooth finish is important. If you’re going to stain, ensure your chosen filler is stainable and remember that the filler might take stain differently than the wood.
Step 6: Drill a Pilot Hole
Crucial step! Do not just drive the screw directly into the cured filler without a pilot hole. Select a drill bit that is slightly smaller than the diameter of the screw you plan to use. Drill a pilot hole into the center of the filled area. Go deep enough to get a good grip, but not so deep that you go through the other side if that’s not intended.
Drilling a pilot hole prevents the screw from splitting the cured filler (which can happen because it’s now a solid, albeit composite, material) and guides the screw straight, ensuring a strong connection. For more about choosing the right drill bit size, check out resources from organizations like the Wood Magazine.
Step 7: Drive the Screw
Now for the moment of truth! Slowly and steadily drive your screw into the pilot hole. If you feel too much resistance, stop. You might need a slightly larger pilot hole or a screw with a coarser thread. Make sure the screw goes in straight. Don’t overtighten, as this can still damage the filler or the surrounding wood.
Congratulations! You’ve successfully repaired a damaged area and secured a screw with confidence. This method can breathe new life into furniture, cabinets, and countless other wooden items.
Tips for Success and Troubleshooting
Even with the best intentions, things can sometimes go awry. Here are some tips to help you achieve perfect results and what to do if you run into common problems.
Tips for a Stronger Hold:
- Use Structural Fillers: As we’ve emphasized, epoxy or two-part polyester fillers are your best bet for strength.
- Overfill and Shape: Packing the filler in generously and sanding it back provides a solid mass of material.
- Drill a Pilot Hole (Always!): This cannot be stressed enough. It creates a controlled entry for the screw.
- Consider Screw Type: Coarse-threaded screws will generally offer a better grip in cured filler than fine-threaded screws.
- Allow Ample Cure Time: Rushing the cure process is the most common mistake and leads to weak connections.
Troubleshooting Common Problems:
- Screw Spins Freely:
- Cause: Filler wasn’t dry enough, pilot hole was too large, or the filler material itself isn’t dense enough for the screw.
- Solution: Remove the screw. Try drilling a new, smaller pilot hole slightly off-center from the original. If that still fails, you might need to dig out the filler and reapply a stronger, two-part epoxy filler, ensuring it fully cures before re-drilling and screwing.
- Filler Cracks When Screwing:
- Cause: Filler wasn’t fully cured, or you drilled the pilot hole too close to the edge of the filled area.
- Solution: Remove the screw and examine the crack. If it’s minor, you can try filling it with a bit more filler, letting it cure, and then re-drilling a pilot hole carefully centered. For larger cracks, you may need to remove the old filler and start again, ensuring complete cure time.
- Screw Won’t Go In Straight:
- Cause: Pilot hole wasn’t drilled perfectly straight.
- Solution: Back the screw out slowly. You can try to gently coax it straight as you re-drive, or you may need to fill the crooked pilot hole entirely and drill a new, straight one.
- Filler is Too Hard to Sand:
- Cause: Some two-part epoxy fillers can cure extremely hard.
- Solution: Ensure you’re using the right grit sandpaper. Start coarser (like 80-100 grit) if necessary for initial shaping, then move to finer grits. For very tough areas, a sanding block or even a rotary tool with a sanding attachment can help, but use with caution to avoid removing too much material.
Remember, woodworking is often about problem-solving. Don’t be disheartened by a small setback. Assess the issue, and you’ll find a solution. For more on drilling techniques, you can find helpful advice on the Family Handyman website.
When to Consider Alternatives to Screwing into Filler
While screwing into wood filler is a fantastic repair technique for many situations, it’s not the be-all and end-all. There are times when a different approach might be more durable, stronger, or simply more appropriate for the specific repair you’re undertaking.
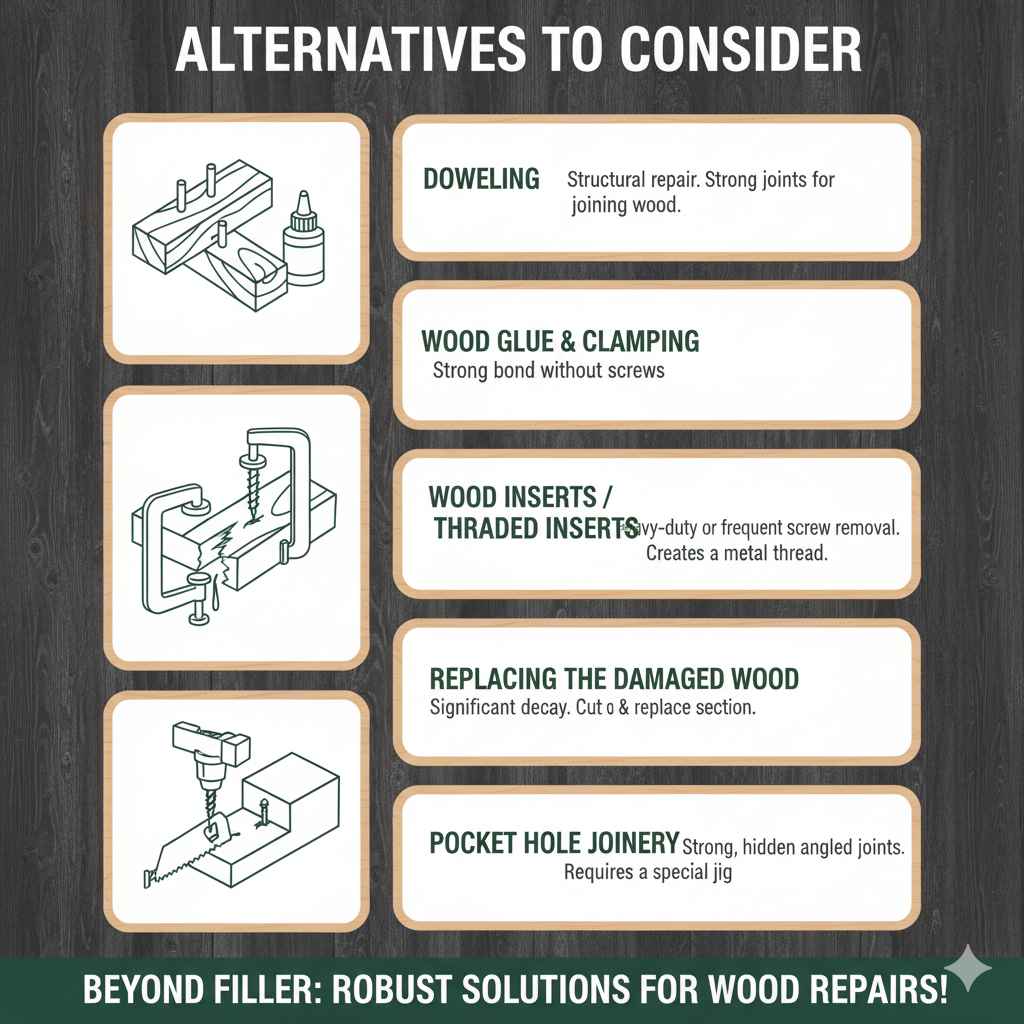
Alternatives to Consider:
- Doweling: For structural repairs or when you need to join two pieces of wood, dowels are excellent. You drill matching holes in both pieces, insert dowels with glue, and clamp them together. This creates a very strong joint.
- Wood Glue and Clamping: For simple breaks or cracks where you don’t need to re-insert a screw, wood glue often suffices. Apply glue, clamp the pieces together tightly, and let the glue cure according to the manufacturer’s instructions.
- Wood Inserts/Threaded Inserts: For situations where you anticipate needing to remove and re-insert screws frequently, or for very heavy-duty applications, threaded inserts are a great option. You install a metal insert into the wood (or filler), which then provides a strong, reliable thread for your screws.
- Replacing the Damaged Wood: Sometimes, the most straightforward and strongest repair is to cut out the damaged section of wood and replace it with a new, solid piece. This is particularly true for significant decay or structural damage.
- Pocket Hole Joinery: If you’re joining two pieces of wood at an angle and need a strong, hidden connection, pocket holes are a popular and effective method. This requires a special jig but provides very strong results.
Choosing the right method depends on the specific project, the type of wood, the forces the repair will endure, and your desired aesthetic. Always assess the situation realistically. For instance, attaching a floating shelf that will bear significant weight would likely benefit from more robust anchoring than just screws into filler, perhaps involving wall studs or heavy-duty anchors.
Frequently Asked Questions (FAQ)
Q1: What’s the best type of wood filler to use if I need to screw into it?
For screw-holding strength, the best options are two-part epoxy wood fillers or high-quality polyester wood fillers. These cure to a very hard, dense material that can effectively grip screws.
Q2: Can I use standard spackling paste or drywall mud to fill a hole for a screw?
No. Standard spackling paste and drywall mud are designed for cosmetic repairs and are too soft and brittle to hold screws. They will crumble and fail under the pressure of a screw.
Q3: How long do I need to wait before drilling into wood filler?
Always check the product’s instructions, as cure times vary greatly. However, a general rule of thumb for robust fillers is to allow at least 24 hours for them to cure completely and reach maximum hardness, or until they are completely unindentable with your fingernail.
Q4: Do I still need to drill a pilot hole even if the filler is very hard?
Yes, absolutely. Drilling a pilot hole is essential. It creates a clear, controlled path for the screw, preventing the cured filler from cracking and ensuring the screw goes in straight and securely.
Q5: Will the screw hold as well in filler as it does in solid wood?
A properly applied, high-quality screw-holding filler can provide a surprisingly strong hold, often comparable to or even stronger than soft or rotted wood. However, it may not be as inherently strong as screwing directly into dense, solid hardwood. For critical structural loads, consider alternatives.
Q6: Can I stain or paint over wood filler that I plan to screw into?
Many modern wood fillers are designed to be stainable and paintable. However, the color and grain may not perfectly match the surrounding wood, especially with staining. Always test on a scrap piece of filler first if appearance is critical. Most epoxy and polyester fillers are best painted.