Can I Cut Aluminum With a Chop Saw: The Genius Method
Yes, you can cut aluminum with a chop saw! With the right blade, speed, and technique, a chop saw can efficiently and cleanly cut aluminum, making it a fantastic tool for DIY projects. This guide shows you the safe and effective method.
Ever looked at some aluminum stock and wondered if your trusty chop saw could handle it? It’s a common question for DIYers who want to work with aluminum but are unsure if their existing tools are up to the task. Aluminum is lighter and less dense than steel, but cutting it incorrectly can still lead to frustrating results like melted metal, rough edges, or even a damaged saw.
Don’t worry! With the right approach, cutting aluminum with a chop saw is not only possible but remarkably effective. It opens up a world of possibilities for your projects, from crafting custom frames to creating intricate designs. We’ll walk you through the secret to a clean, safe cut, step-by-step. Let’s get started!
Why the Confusion About Cutting Aluminum?
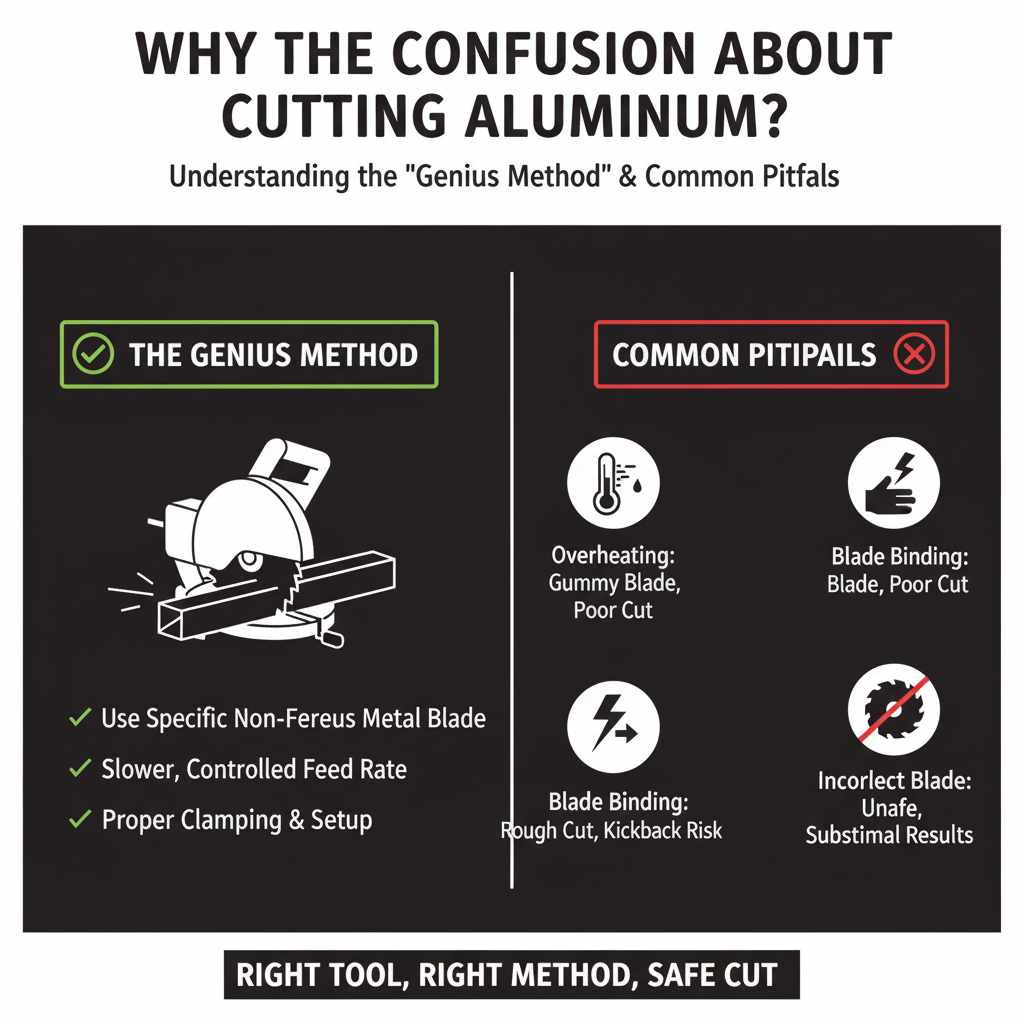
Many people assume a chop saw, often designed for wood or metalworking with abrasive blades, is too aggressive for aluminum. This is a valid concern! The high speeds and standard blades can indeed cause problems. However, the “genius method” isn’t about using a different tool; it’s about understanding the nuances of how to use your existing chop saw for this specific material.
The key lies in avoiding the common pitfalls that lead to poor cuts. These pitfalls include:
Overheating: Aluminum has a low melting point. Rubbing too fast or with the wrong blade generates heat that can melt and gum up the blade and workpiece.
Blade Binding: If the aluminum isn’t held securely or the cut is too aggressive, the blade can bind, leading to a rough cut or kickback.
Incorrect Blade Choice: Using a wood-cutting blade or a standard abrasive metal blade can yield suboptimal results and be unsafe.
The Genius Method: What You Need
The beauty of this method is that it leverages a tool many of us already have or can easily acquire. The real “genius” comes from understanding the specific accessories and techniques required.
Essential Tools and Materials
Gather these items before you begin to ensure a smooth and safe operation:
Chop Saw: This can be a compound miter saw (ideal for wood, but adaptable with the right blade) or a dedicated metal-cutting chop saw.
Specific Aluminum-Cutting Blade: This is crucial! More on this below.
Safety Equipment:
Safety Glasses or Full Face Shield: Absolutely non-negotiable.
Hearing Protection: Chop saws can be loud.
Work Gloves: To protect your hands from sharp edges and debris.
Dust Mask or Respirator: Aluminum dust can be harmful if inhaled.
Clamps: Sturdy clamps are vital to secure the aluminum firmly to the saw’s base.
Measuring Tape and Marking Tool: For accurate cuts.
Cutting Fluid or Lubricant (Optional but Recommended): Helps reduce heat and friction.
Brush or Compressed Air: For clearing away dust and debris.
The Star of the Show: The Right Blade
This is where most people go wrong. You can’t just grab any blade. For cutting aluminum effectively with a miter saw or chop saw, you need a specific type of blade:
High Tooth Count Carbide-Tipped Blade: These blades are designed for non-ferrous metals like aluminum. They typically have a high number of teeth (60-100 teeth or more for smaller blades) with a specific tooth geometry (often a “triple chip grind” or ATB – Alternate Top Bevel) that slices through metal cleanly without melting. These blades are designed to cut at higher speeds than traditional abrasive metal cutoff wheels.
Avoid Abrasive Blades: While some dedicated metal chop saws use abrasive wheels, these create a lot of heat and sparks and aren’t ideal for the precise, clean cuts needed for many aluminum DIY projects. They also generate a lot of dust that can be hard to manage.
Avoid Standard Wood Blades: Wood blades have fewer teeth and a different gullet design that will quickly clog with soft aluminum, leading to melting and a very poor cut.
An authoritative resource on choosing the right saw blades for different materials is the Wood Magazine, which often covers material-specific cutting techniques.
Understanding RPMs: Speed Matters!
The speed at which the blade spins (measured in Revolutions Per Minute or RPMs) is critical. Many standard miter saws spin at very high RPMs, which is fine for wood. However, for aluminum, sometimes a slower speed is better, particularly if you are using a more general-purpose metal blade.
Standard Miter Saw: If your miter saw has a variable speed setting, try to set it to a lower RPM. If not, proceed with caution and a good blade.
Dedicated Metal-Cutting Saw: These are often designed to run at lower RPMs specific for metallurgy.
This table outlines some general guidelines for blade types and speeds when cutting aluminum:
| Material | Blade Type | Carbide Teeth Count (for similar diameter blades) | Typical RPM Range | Notes |
|---|---|---|---|---|
| Aluminum | Carbide-Tipped Non-Ferrous Metal Blade | 60-100+ | 2000-4000 RPM (for miter saws) | Crisp cuts, less heat generation. |
| Abrasive Cutoff Wheel (on metal chop saw) | N/A | 3000-5000 RPM | Rougher cuts, high heat/sparks. Best for construction-grade cuts. |
Step-by-Step: Cutting Aluminum Like a Pro
Now that you have your gear, let’s get to the cutting. This process is straightforward but requires attention to detail for safety and the best results.
Step 1: Safety First! Gear Up Thoroughly
Before you even plug in the saw, put on your safety gear. This includes:
Safety glasses or a full face shield.
Hearing protection.
Work gloves.
A dust mask or respirator.
Ensure your work area is clear of clutter and has good ventilation.
Step 2: Secure the Aluminum Piece
This is paramount for a safe cut and to prevent material damage.
Position: Place the aluminum on the saw’s base where you want to cut.
Clamp It Down: Use your clamps to secure the aluminum firmly to the base and the fence of the saw. The clamps should be positioned close to the blade’s path, preventing any movement during the cut. Ensure the clamps won’t interfere with the blade’s path.
Step 3: Mark Your Cut Line
Use a fine-tip marker or a scribe to clearly mark your cut line on the aluminum. For very precise cuts, you might want to use a fine-grit sandpaper to lightly scuff the surface where you’ll mark, helping the marker adhere better and create a crisper line.
Step 4: Select and Install the Correct Blade
As discussed, install your high-tooth-count, carbide-tipped blade designed for non-ferrous metals. Double-check that it’s installed correctly, with the teeth pointing in the right direction for the saw’s rotation. Ensure the blade is securely tightened.
Step 5: Make the Cut – Slowly and Steadily
This is where the magic happens.
Align: Bring the blade down (without power) to align it perfectly with your marked cut line.
Lubricate (Optional): If you’re using a cutting fluid, apply a small amount directly to the cut line.
Power On: Turn on the saw and let it reach full speed.
The Feed: Slowly and smoothly bring the blade down through the aluminum. Do not force the cut. Let the blade do the work. A steady, controlled descent is key to preventing melting and achieving a clean finish.
Complete the Cut: Once the cut is complete, allow the blade to stop spinning entirely before you lift it. This prevents stray chips from flying and avoids damaging the cut surface.
Step 6: Clear Debris and Inspect Your Work
Lift Blade: Once the blade has stopped, lift it clear of the aluminum.
Remove Clamps: Carefully remove the clamps.
Clean Up: Use a brush or compressed air to clear away any aluminum dust or chips from your saw and the workpiece.
Inspect: Examine your cut. It should be smooth, with minimal burrs.
Tips for the Best Aluminum Cuts
Beyond the basic steps, a few extra tricks can elevate your aluminum cutting game.
Use a Cutting Fluid or Lubricant
Applying a specialized metal cutting fluid, WD-40, or even a light machine oil to the cut line can significantly improve the cutting process. Lubricant:
Reduces friction and heat buildup.
Prevents the aluminum from melting and gumming up the blade.
Helps clear chips away from the blade.
Apply it just before you start the cut.
Don’t Rush the Feed Rate
The most common mistake is trying to push the saw through the aluminum too quickly. Let the sharpness of the blade and the power of the saw do the work. A slow, steady feed rate ensures the teeth are engaged properly and minimizes heat.
Consider the Thickness of the Aluminum
Thicker aluminum pieces may require a slower feed rate than thinner ones. For very thick sections, you might need multiple passes or a more powerful saw designed for heavy-duty metal cutting.
Manage Dust and Chips
Aluminum dust can be fine and pervasive. Always wear appropriate respiratory protection. For larger projects, consider setting up dust collection if your saw supports it or using a shop vacuum to collect chips as you cut. According to the Occupational Safety and Healthy Administration (OSHA), managing metal dust is important for workplace safety.
Practice on Scrap Pieces
If you’re new to cutting aluminum with a chop saw, it’s always a good idea to practice on scrap pieces. This allows you to get a feel for the material, the blade’s performance, and your saw’s response without the pressure of a critical project.
What Types of Aluminum Can You Cut?
Most common aluminum alloys are suitable for cutting with a chop saw using the right blade. This includes:
Aluminum Extrusions: Commonly used for frameworks, frames for DIY furniture, and structural components.
Aluminum Flat Bar and Angle: Used in various DIY and repair projects.
Aluminum Sheet: While best cut with shears or a jigsaw with a metal blade, thin aluminum sheets can be cut with a chop saw, though care must be taken to prevent flexing and tearing.
However, it’s worth noting that certain hardened aluminum alloys or very thick aluminum stock might be better suited for specialized metal-cutting saws. Always check the specifications of your saw and blade against the material you intend to cut.
Pros and Cons of Using a Chop Saw for Aluminum
Like any tool and technique, there are advantages and disadvantages to cutting aluminum with a chop saw.
| Pros | Cons |
|---|---|
| Speed and Efficiency: Significantly faster than many manual cutting methods. | Blade Cost: Specialized aluminum-cutting blades can be more expensive than wood blades. |
| Clean Cuts: With the right blade, you can achieve very precise, smooth cuts. | Melting Risk: If the wrong blade or technique is used, aluminum can melt and gum up the blade. |
| Accessibility: Many woodworkers already own a miter saw, making this a convenient option. | Dust and Debris: Produces fine aluminum dust that requires good safety practices and cleanup. |
| Versatility: Suitable for a range of aluminum profiles and thicknesses. | Noise: Chop saws can be quite loud, requiring hearing protection. |
| Straight Cuts: Excellent for making perfectly straight, square cuts essential for many projects. | Heat Generation: Can still generate heat, especially with less-than-ideal conditions. |
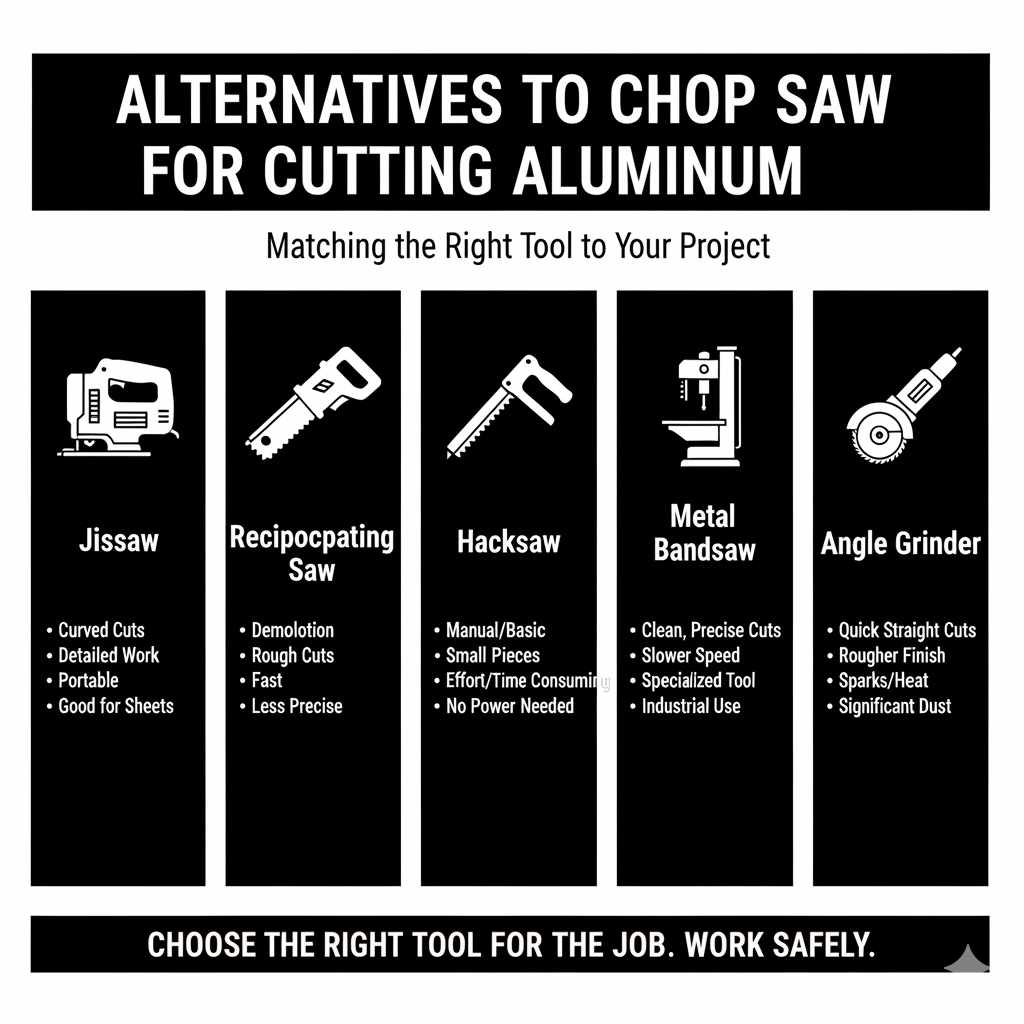
Alternatives to Chop Saw for Cutting Aluminum
While a chop saw is a great option, sometimes other tools might be a better fit depending on your project and the aluminum you’re working with.
Jigsaw with a Metal Blade: Excellent for curved cuts and detailed work. It’s also more portable for on-site jobs. Popular Mechanics offers great tips on using jigsaws for metal.
Reciprocating Saw (Sawzall) with a Metal Blade: Good for demolition or rough cuts. Not ideal for precise work.
Hacksaw: The most basic but takes significant effort and time for anything more than small pieces.
Metal Bandsaw: Specialized for metal cutting, offering very clean and precise cuts, often with slower speeds ideal for metal.
* Angle Grinder with a Cut-off Wheel: Quick for straight cuts but produces a lot of sparks and heat, and the dust is significant. Primarily for rougher cuts.
For precise, straight cuts on aluminum extrusions and profiles, the chop saw method described here stands out for its balance of speed, quality, and accessibility.
Frequently Asked Questions (FAQ)
Here are some common questions beginners have about cutting aluminum with a chop saw.
Q1: Can I use a wood-cutting blade to cut aluminum on my miter saw?
It’s not recommended. Wood blades have too few teeth and the wrong tooth geometry. They will clog up quickly with soft aluminum, melt the material, and can damage your blade and the workpiece. Always use a blade specifically designed for cutting non-ferrous metals.
Q2: How do I prevent aluminum from melting when cutting?
The primary ways to prevent melting are using the correct blade (carbide-tipped for non-ferrous metals), ensuring the blade is sharp, using a proper feed rate (slow and steady), and optionally using a cutting fluid or lubricant. Also, ensure your saw isn’t running at an unnecessarily high RPM for the aluminum.
Q3: What is the best type of blade for cutting aluminum with a chop saw?
The best blade is a carbide-tipped blade with a high tooth count (60-100+ teeth for typical miter saw sizes) specifically designed for cutting non-ferrous metals like aluminum. Look for blades with a “triple chip grind” or ATB for the cleanest cuts.
Q4: Is it safe to cut aluminum with a chop saw?
Yes, it is safe as long as you take proper precautions. Always wear appropriate safety gear (eye protection, hearing protection, gloves, respirator), securely clamp your workpiece, and use the correct blade and technique. Ensure your work area is clear and well-ventilated.
Q5: How thick of aluminum can I cut with a chop saw?
A standard compound miter saw or chop saw can typically cut through aluminum extrusions and bar stock up to about 1/4 inch (6mm) thick with the correct blade. For thicker aluminum, you might need a more specialized metal-cutting saw or consider multiple passes, though this increases the risk of melting or binding.
Q6: Will cutting aluminum create a lot of sparks?
No, when using the correct carbide-tipped blade for non-ferrous metals, you should not see significant sparks. Sparks are typically generated when using abrasive cut-off wheels on metal chop saws, which melt their way through the material. The specialized blades slice cleanly without excessive sparking.
Q7: How do I clean up aluminum dust after cutting?
Aluminum dust can be fine and potentially hazardous. Always wear a respirator during and after cutting. Use a brush to gather larger chips. For fine dust, a shop vacuum with a fine-dust filter is the most effective method. Avoid dry sweeping, which can put dust into the air. Clean the saw and your work area thoroughly.
Conclusion
Cutting aluminum with a chop saw is a straightforward and highly effective technique when done correctly. By understanding the critical importance of using a specialized aluminum-cutting blade, maintaining proper saw speed, securing your workpiece firmly, and employing a slow, steady feed rate, you can achieve clean, professional-looking cuts every time.
Don’t let uncertainty hold you back from using this powerful combination for your DIY projects. Whether you’re building custom shelving, crafting intricate metal art, or simply need to cut aluminum for repairs, the methods outlined here will equip you with the confidence and knowledge to succeed. Remember to always prioritize safety, and soon you’ll be cutting aluminum with the precision and ease of a seasoned pro. Happy building!