How To Attach Legs To A Table Without Apron
Attaching table legs without an apron requires robust, direct-to-tabletop methods. Options include heavy-duty leg mounting plates, sturdy mortise and tenon joints, or strong dowel joinery. Always ensure your tabletop is thick enough for the chosen hardware or joint. Prioritize precise alignment, secure fastening, and strong wood glue for lasting stability and safety.
So, you’re looking to build a sleek, modern table, or perhaps refurbish an old one, but there’s no apron in sight? This is a common situation that can leave many DIYers scratching their heads. An apron, that supportive frame connecting the legs just under the tabletop, usually makes attaching legs straightforward. Without it, you might feel a bit lost on how to get a sturdy, reliable connection.
Don’t worry, you’re in the right place! As your woodworking mentor, Apollo Radar, I’m here to simplify this challenge. We’ll explore several effective, beginner-friendly ways to attach legs to a table without an apron, ensuring your project is both beautiful and built to last. Let’s get those legs firmly in place!
How To Attach Legs To A Table Without An Apron: Your Complete Guide
Attaching legs directly to a tabletop, especially without the traditional apron support, requires careful planning and the right techniques. The goal is always a strong, stable, and durable connection that can withstand daily use. Let’s dive into the most reliable methods you can use.
Understanding the Challenge: Why No Apron Matters
An apron traditionally serves several crucial functions. It adds significant structural rigidity, preventing the legs from wobbling or splaying outwards. It also provides a broad surface for securely attaching the legs using simple screws or bolts.
When you remove the apron, you’re asking the direct connection between the leg and the tabletop to do all the heavy lifting. This means your chosen method must be strong enough to resist racking forces (side-to-side movement) and support the table’s weight.
The thickness and material of your tabletop also become much more critical. Thinner tabletops may not provide enough material for certain hardware or joinery methods, limiting your options.
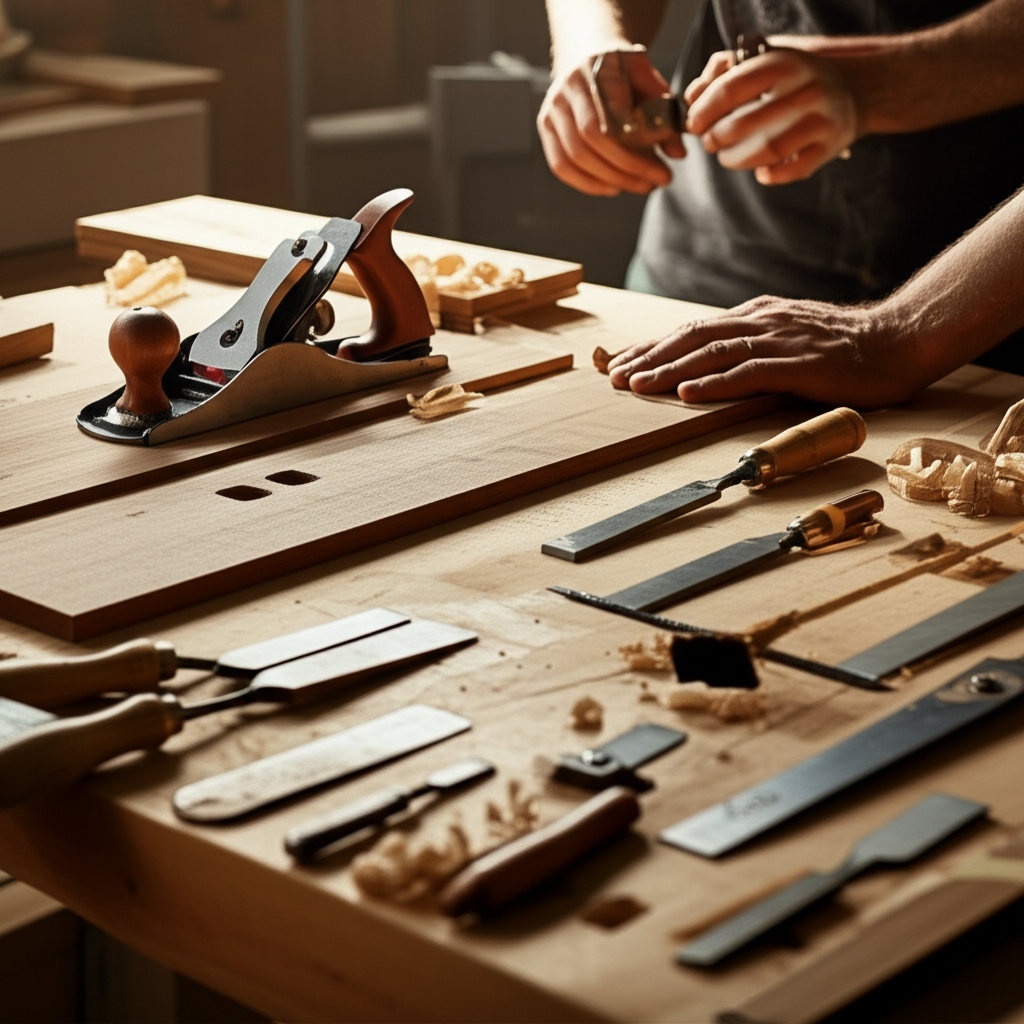
Essential Tools and Materials for Attaching Table Legs Without An Apron
Before we start, let’s gather what you’ll need. Having the right tools makes any woodworking project smoother and safer.
Basic Tools You’ll Need:
- Safety Glasses: Always protect your eyes!
- Measuring Tape & Pencil: For accurate marking.
- Square: To ensure perfect 90-degree angles.
- Drill/Driver: For pilot holes and driving fasteners.
- Drill Bits: Various sizes, including countersink bits.
- Clamps: Essential for holding pieces securely during assembly and gluing.
- Wood Glue: High-quality wood glue is crucial for joint strength.
- Sandpaper: For smoothing surfaces and preparing for finish.
- Wrenches/Sockets: If using bolts or T-nuts.
- Rubber Mallet: For gently seating joints.
Materials & Hardware Options:
- Table Legs: The stars of the show!
- Tabletop: Ensure it’s flat and stable.
- Leg Mounting Hardware (if applicable):
- Heavy-Duty Leg Top Plates
- Threaded Inserts & Hanger Bolts
- T-nuts & Bolts
- Specialty Leg Brackets
- Wood Dowels: For dowel joinery.
- Hardwood Stock: For mortise and tenon or cleat systems.
- Screws/Bolts: Appropriate length and type for your chosen method.
Step-by-Step Guide: How To Attach Legs To A Table Without An Apron
Let’s walk through the most popular and effective methods. Choose the one that best suits your tabletop, skill level, and desired aesthetic.
Method 1: Using Heavy-Duty Leg Mounting Plates (Easiest for Beginners)
This is often the simplest and most accessible method for beginners, requiring minimal specialized tools. It’s ideal for smaller to medium-sized tables with solid wood or thick plywood tabletops.
- Prepare Legs and Tabletop:
- Ensure the top of each leg is perfectly flat and square.
- Determine the exact placement of each leg on the underside of your tabletop. Use your square and measuring tape to mark the center point for the plate and screw holes. Aim for consistent placement from the table’s edge.
- Attach Leg Mounting Plates:
- Place a leg mounting plate onto the marked position on the underside of the tabletop.
- Using an awl or a small drill bit, pre-drill pilot holes for the plate’s screws. These pilot holes should be slightly smaller than the screw’s shank to prevent splitting the wood.
- Securely fasten the plate to the tabletop using the screws provided or appropriate wood screws. Ensure they are driven flush and tight.
- Safety Tip: Always use pilot holes. Drilling directly without them can split your tabletop, especially near the edges.
- Attach Legs to Plates:
- Most heavy-duty plates have a threaded receiver. Insert a hanger bolt (a bolt with wood screw threads on one end and machine screw threads on the other) into the top of your table leg.
- Screw the hanger bolt into the leg until it’s firmly seated. You can use two nuts jammed together on the machine thread to create leverage for screwing it in.
- Align the threaded end of the hanger bolt with the plate’s receiver and screw the leg onto the plate. Tighten it firmly with a wrench or by hand until snug.
- Craftsmanship Tip: Don’t overtighten, as this can strip the threads or damage the leg.
Method 2: Mortise and Tenon Joint (Strongest & Most Traditional)
The mortise and tenon joint is a classic for a reason: it’s incredibly strong and durable. This method is best for solid wood tabletops and requires more advanced woodworking skills and tools, but the result is beautiful and robust.
- Cut the Tenons on Legs:
- Carefully measure and cut a tenon (a projection) on the top end of each table leg. The tenon should be sized to fit precisely into the mortise you’ll create in the tabletop.
- Typically, the tenon will be about 1/3 the thickness of the leg and extend 1-1.5 inches.
- This can be done with a table saw, band saw, or even hand saws and chisels.
- Safety Tip: Use push sticks and proper guards when cutting tenons on power tools.
- Cut the Mortises in the Tabletop:
- Mark the exact location for each leg on the underside of your tabletop.
- Using a mortising machine, router with a plunge base, or a drill press and chisels, carefully cut the mortises (rectangular holes) into the tabletop.
- The mortises must precisely match the dimensions of your tenons for a tight fit.
- Accuracy Tip: Cut the mortises slightly undersized and pare them to fit with a sharp chisel for the best results.
- Dry Fit and Refine:
- Test fit each leg into its corresponding mortise. It should be a snug fit, requiring a gentle tap with a rubber mallet.
- If too tight, carefully trim the tenon or widen the mortise. If too loose, you may need to shim or recut.
- Glue and Clamp:
- Apply a generous amount of high-quality wood glue to both the tenon and inside the mortise. Ensure full coverage.
- Insert the leg into the mortise and tap it gently with a rubber mallet until fully seated.
- Clamp the leg firmly to the tabletop, applying even pressure until the glue cures. Use cauls (scrap wood pads) to protect the tabletop surface from clamp marks.
- Wipe away any excess glue with a damp cloth immediately.
- Craftsmanship Tip: A well-fitted mortise and tenon joint, combined with strong wood glue, is often stronger than the surrounding wood itself.
Method 3: Dowel Joinery (Reliable & Moderately Difficult)
Dowel joinery offers a strong, hidden connection. It’s less complex than a mortise and tenon but requires precise drilling. This method is excellent for solid wood tabletops.
- Prepare Legs and Tabletop:
- Ensure the top of each leg is perfectly flat and square.
- Determine the leg placement and mark the exact points for your dowel holes on both the tabletop and the top of each leg. You’ll typically use 2-4 dowels per leg, depending on leg size.
- Accuracy Tip: Use a doweling jig for precise, perfectly aligned holes. This is crucial for strong dowel joints.
- Drill Dowel Holes:
- Using a drill press or a hand drill with a doweling jig, drill holes into the top of each leg and the corresponding locations on the underside of the tabletop.
- Ensure the drill bit matches the dowel diameter.
- Drill to the correct depth – usually half the dowel length plus a little extra for glue, ensuring the dowels don’t bottom out.
- Safety Tip: Securely clamp your workpiece before drilling to prevent movement and ensure accuracy.
- Dry Fit:
- Insert the dowels into the leg holes and then attempt to fit the leg onto the tabletop.
- It should be a snug fit. If not, re-check hole alignment and depth.
- Glue and Clamp:
- Apply wood glue generously into each dowel hole and onto the dowels themselves.
- Insert the dowels into the leg.
- Align the leg with the tabletop and press firmly, using a rubber mallet if necessary, to seat the leg fully.
- Clamp the leg firmly to the tabletop, applying even pressure until the glue cures.
- Wipe away excess glue.
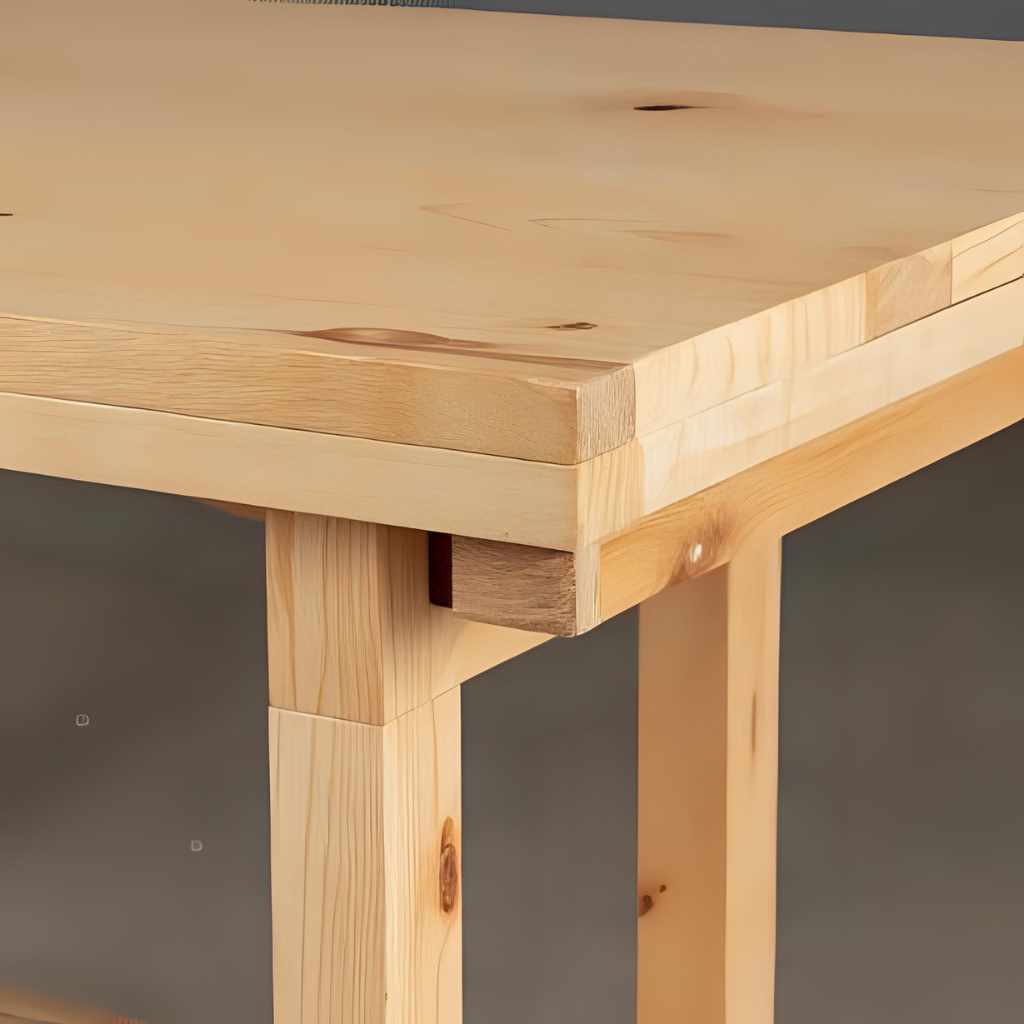
Method 4: Using Wood Blocks or Cleats (Good for Lighter Tables)
This method provides good support for lighter tables and can be a good option when your tabletop isn’t thick enough for other joinery, or you want a removable leg system. It uses solid wood blocks or cleats screwed directly to the tabletop.
- Prepare Blocks/Cleats:
- Cut four sturdy wood blocks or cleats for each leg. These should be made from hardwood and be roughly 1.5-2 inches thick and long enough to span the width of the leg plus an inch or two on either side.
- Pre-drill pilot holes and countersink them in the blocks/cleats for screws that will attach them to the tabletop.
- Position Legs and Blocks:
- Place a leg in its desired position on the underside of the tabletop.
- Position two blocks against two adjacent sides of the leg, flush with the top of the leg. Mark their positions.
- Repeat for the other two sides, creating a snug corner around the leg.
- Attach Blocks/Cleats to Tabletop:
- Apply wood glue to the mating surfaces of the blocks/cleats and the tabletop.
- Screw the blocks/cleats securely to the tabletop from the top side of the blocks, ensuring the screws don’t penetrate the tabletop surface.
- Allow the glue to cure.
- Attach Legs to Blocks:
- Once the blocks are firmly attached, slide the leg into the corner formed by the blocks.
- Drill pilot holes through the blocks into the leg, ensuring screws are long enough for a strong hold but don’t exit the leg.
- Screw the leg into the blocks from the inside. You can also use bolts and threaded inserts for a stronger, removable connection.
- Durability Tip: Using hardwood for your blocks/cleats will provide a much stronger and more stable connection than softwood.
Comparison of Leg Attachment Methods Without An Apron
Choosing the right method depends on your skill level, desired strength, and the table’s design. Here’s a quick comparison:
| Method | Strength | Difficulty | Tools Needed | Aesthetics | Removable? |
|---|---|---|---|---|---|
| Heavy-Duty Leg Plates | Good | Beginner | Drill, Screwdriver, Wrench | Clean, Modern | Yes |
| Mortise and Tenon | Excellent | Advanced | Router/Mortiser, Chisels, Clamps | Traditional, Integrated | No (Permanent) |
| Dowel Joinery | Very Good | Intermediate | Drill, Doweling Jig, Clamps | Clean, Integrated | No (Permanent) |
| Wood Blocks/Cleats | Fair to Good | Beginner | Drill, Screwdriver, Saw | Functional, Visible if not hidden | Yes |
Tips for Better Results When Attaching Legs To A Table Without An Apron
Achieving a professional-looking and durable table connection takes a bit of care. Here are Apollo Radar’s top tips:
- Always Dry Fit: Before applying any glue or final fasteners, always dry fit your components. This allows you to check for alignment, snugness, and any necessary adjustments. It’s much easier to fix issues before glue dries!
- Use Quality Wood Glue: Don’t skimp on wood glue. Titebond III or similar high-quality glues offer excellent bond strength and durability. Apply generously to all mating surfaces for joinery methods.
- Clamp Properly: Clamping isn’t just about holding pieces together; it’s about applying even pressure to ensure a strong glue bond. Use enough clamps and ensure the pressure is distributed evenly. Protect your wood with cauls.
- Consider Wood Movement: Wood naturally expands and contracts with changes in humidity. For solid wood tabletops, avoid methods that rigidly fix the entire leg surface to the tabletop, as this can lead to splitting. For example, when using blocks, allow for slight movement if screwing directly through the tabletop. The methods discussed here largely account for this by either creating small, strong joints or using hardware that allows for slight tolerance. For more on wood movement, check out resources from the USDA Forest Products Laboratory.
- Pilot Holes are Your Friend: Always drill pilot holes for screws. This prevents splitting, especially in hardwoods, and ensures screws drive straight and hold securely.
- Check for Squareness: Use a reliable square throughout the process to ensure your legs are attached at a perfect 90-degree angle to the tabletop. A slightly off-square leg will make your table wobbly.
- Level the Table: Once assembled, place your table on a flat surface and check for wobbles. If necessary, use adjustable feet or carefully sand the bottom of the longest leg to achieve perfect stability.
Common Mistakes to Avoid When Attaching Table Legs Without An Apron
Even experienced woodworkers make mistakes, but knowing the common pitfalls can help you avoid them.
- Using Insufficient Hardware: Trying to attach heavy table legs with small, flimsy brackets or short screws is a recipe for disaster. Always match your hardware to the weight and size of your table.
- Skipping Pilot Holes: As mentioned, this can lead to cracked wood, stripped screws, or weak connections. Always pre-drill!
- Not Using Glue (for Joinery): For mortise and tenon or dowel joints, glue isn’t optional; it’s essential for structural integrity. The glue bond is often stronger than the wood itself.
- Inaccurate Marking and Drilling: Misaligned holes or joints will result in a wobbly table or legs that splay out. Take your time with measurements and use jigs when possible.
- Overtightening Screws/Bolts: This can strip threads, compress wood fibers, or even crack the wood, weakening the connection. Tighten until snug, then a quarter turn more.
- Ignoring Tabletop Thickness: A thin tabletop might not provide enough material for deep pilot holes or strong joinery. Always consider your tabletop’s dimensions when choosing a method.
- Rushing the Glue Curing Time: Wood glue needs time to fully cure and reach its maximum strength. Don’t remove clamps or put stress on the joints prematurely. Follow the manufacturer’s recommendations.

FAQ: Attaching Legs To A Table Without An Apron
Q1: How thick does my tabletop need to be to attach legs without an apron?
A: For most methods, a solid wood tabletop of at least 1 inch (2.5 cm) thick is recommended. For hardware like leg plates, 3/4 inch (1.9 cm) can work if the screws are appropriate and don’t penetrate the top surface. Thicker tabletops offer more material for stronger connections.
Q2: Can I just screw the legs directly into the tabletop?
A: Generally, no. Screwing directly into the end grain of a leg or the edge grain of a tabletop provides very little holding power and will likely result in a wobbly table. Always use specialized hardware or joinery methods designed for strong, stable connections.
Q3: What’s the strongest method for attaching legs without an apron?
A: The mortise and tenon joint is widely considered the strongest and most durable method, creating a highly stable, integrated connection. Dowel joinery is also very strong when executed precisely.
Q4: Do I need special tools for these methods?
A: For leg mounting plates or wood blocks, a drill, screwdriver, and basic measuring tools are usually sufficient. For mortise and tenon or dowel joints, tools like a router, mortising machine, or a doweling jig will greatly improve accuracy and strength, though hand tools can also be used with skill.
Q5: How can I ensure my table won’t wobble?
A: Precision is key! Ensure all cuts are square, joints are tight, and fasteners are secure. Use good quality wood glue for joinery. Dry fit everything before final assembly. Once assembled, check for levelness and add felt pads or adjustable feet if needed.
Q6: Can I make the legs removable for storage or transport?
A: Yes! Methods using heavy-duty leg plates, threaded inserts with hanger bolts, or T-nuts with bolts are excellent for creating strong, yet removable, leg connections. The wood block/cleat method can also be made removable by bolting the legs to the blocks.
Q7: Is it safe to build a table without an apron?
A: Absolutely, as long as you use appropriate, robust attachment methods and high-quality materials. The key is to ensure the connections are strong enough to support the table’s intended use and weight. Always prioritize safety in your workshop by wearing protective gear and using tools correctly.
Conclusion: Build With Confidence!
Attaching legs to a table without an apron might seem daunting at first, but as you’ve seen, there are several reliable and effective methods available to you. Whether you choose the beginner-friendly leg mounting plates or delve into the robust world of mortise and tenon joinery, the principles of precision, strength, and careful execution remain the same.
Remember to always prioritize safety, take your time with measurements and dry fits, and don’t shy away from using quality materials and proper clamping. With these techniques and a bit of patience, you’ll be able to craft a beautiful, stable, and durable table that will serve you well for years to come. You’ve got this!