Easy Wood Carving: Simple Techniques for Stunning Results
Are you looking for a creative hobby that feels rewarding and relaxing? Easy wood carving might be just what you need.
Imagine turning a simple piece of wood into something beautiful with your own hands. No special skills or expensive tools are required to get started. You’ll discover simple tips and tricks that make wood carving fun and accessible. Stick around, and you’ll find out how to create your first masterpiece step by step.
Ready to unlock your creativity? Let’s dive in!
Choosing The Right Wood
Choosing the right wood is the first step in easy wood carving. The wood type affects how your tools work and the final look. Picking wood that suits your skill level makes carving more fun and less frustrating.
Wood varies in hardness, grain, and texture. These factors impact how easy it is to carve details and shapes. Start with wood that feels comfortable to cut and shape.
Softwoods Vs Hardwoods
Softwoods are easier to carve because they are less dense. Pine, cedar, and basswood are common softwoods. They cut smoothly and need less effort.
Hardwoods are tougher and more durable. Oak, maple, and walnut belong here. These woods give a stronger finish but require sharper tools and more skill.
Beginners usually choose softwoods to practice and build confidence. Hardwoods work well for advanced projects with fine details.
Best Woods For Beginners
Basswood is the top choice for beginners. It is soft with a fine grain, making cuts clean and easy. It also holds detail well.
Pine is another good option. It is soft and widely available. But it can have knots that slow carving.
Cedar is light and soft but has a strong smell. It is good for simple projects and outdoor carvings.
Wood Preparation Tips
Start by checking the wood for cracks or knots. These can make carving harder or cause breaks.
Sand the wood surface lightly to remove rough spots. This helps tools glide smoothly.
Keep the wood dry and store it in a cool place. Moisture can warp or weaken the wood.
Cut wood pieces to a size that fits your project and tools. Smaller pieces are easier to handle.
Essential Tools For Beginners
Starting wood carving is exciting and fun. Having the right tools makes the process easier. Beginners need simple tools to create beautiful carvings. These tools help shape wood safely and with control. Choosing the right tools saves time and reduces frustration.
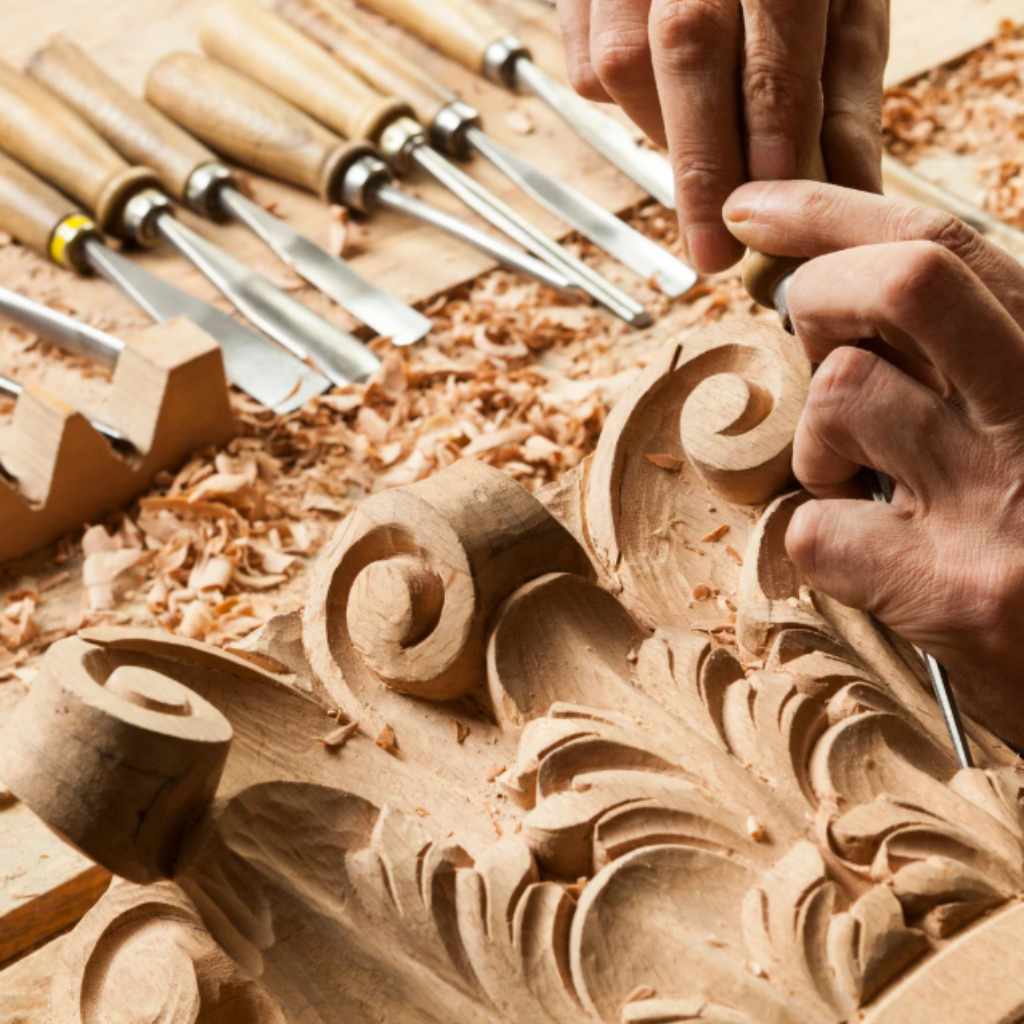
Basic Carving Knives
Carving knives are the core tools for wood carving. They come in many shapes and sizes. A good beginner knife has a comfortable handle and sharp blade. It lets you make precise cuts and smooth shapes. Always pick knives designed for carving, not kitchen knives.
Gouges And Chisels
Gouges and chisels help carve curves and fine details. Gouges have a curved blade for scooping wood. Chisels have a straight edge for flat cuts. Both tools work well with different wood types. Start with a few basic sizes to try various cuts.
Sharpening Tools
Sharp tools cut wood better and safer. Dull blades cause slips and rough cuts. A sharpening stone or strop keeps blades sharp and ready. Regular sharpening extends tool life and improves carving quality. Practice sharpening often to keep your tools in top shape.
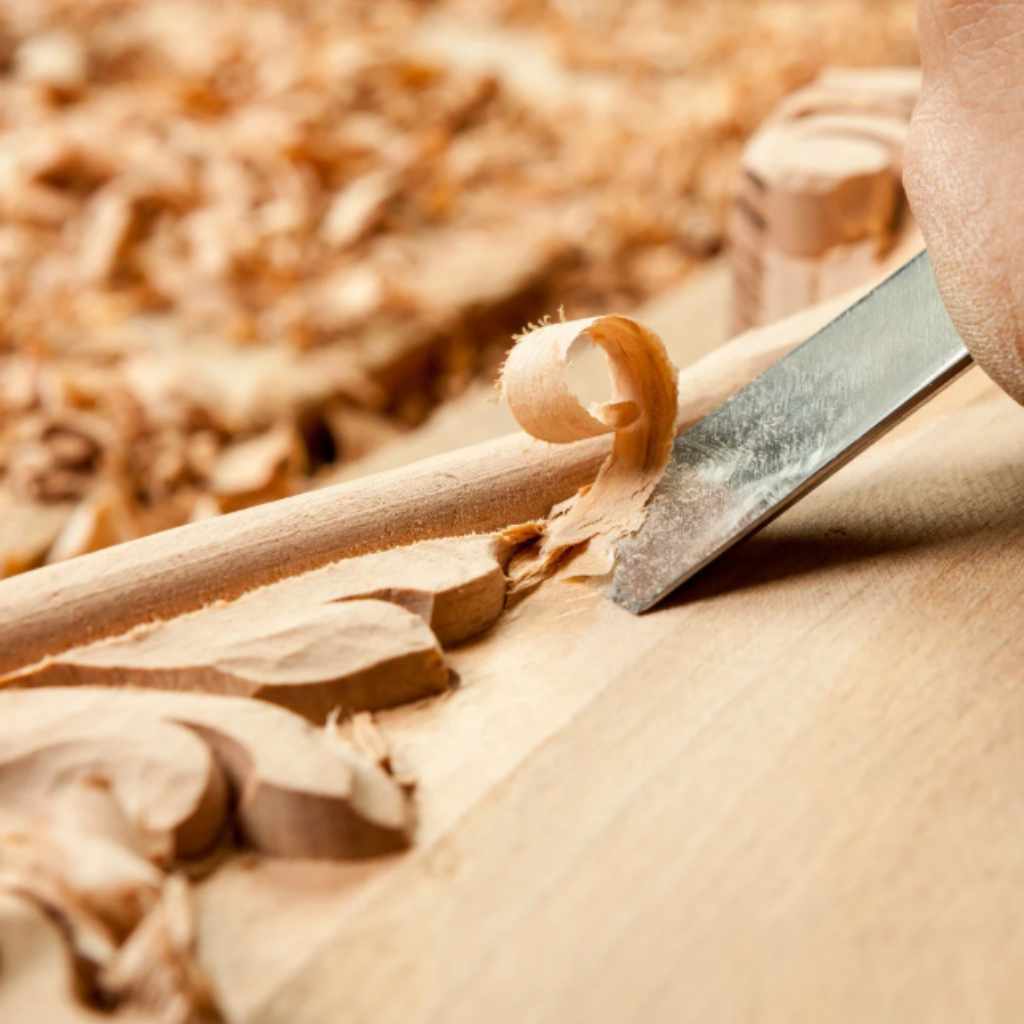
Simple Carving Techniques
Simple carving techniques offer an easy way to start wood carving. These methods use basic tools and clear steps. Beginners can see quick results and build confidence. Each technique has its own style and charm. Learn the basics to enjoy this creative hobby.
Whittling Basics
Whittling is the simplest form of wood carving. Use a small, sharp knife to shave thin slices of wood. Choose soft woods like basswood or pine for easy cutting. Hold the wood firmly and carve away from your body. Small, controlled cuts create smooth shapes. Whittling is great for making small figures and decorations.
Relief Carving
Relief carving creates images that stand out from a flat surface. Carve away the background to make the design pop. Use gouges and chisels for this technique. Start with a simple pattern drawn on the wood. Remove wood around the lines carefully. Relief carving adds depth and texture to your work.
Chip Carving
Chip carving uses small chips removed from the wood surface. This technique creates geometric patterns and shapes. Use a sharp knife with a pointed tip. Mark your design with light pencil lines first. Remove tiny chips by cutting at an angle. Chip carving is perfect for decorating boxes and panels.
Step-by-step Project Ideas
Wood carving can be simple and fun. Starting with easy projects helps build skills fast. Step-by-step guides make carving clear and enjoyable. Try these simple projects to practice your carving skills. Each project uses basic tools and wood pieces. Follow the steps carefully for best results.
Carving A Wooden Spoon
Choose a soft wood block for your spoon. Draw the spoon shape on the wood. Use a carving knife to cut around the outline. Scoop out the bowl part with a gouge tool. Smooth the edges with sandpaper for a nice finish. Finish by applying a safe oil for wood.
Creating A Small Animal Figure
Select a small, soft wood piece. Sketch a simple animal shape, like a bird or turtle. Carve the outline with a small knife. Add details, such as eyes and legs, gently. Use fine sandpaper to smooth rough spots. Paint or leave natural, according to your taste.
Designing A Decorative Plaque
Pick a flat wood piece for the plaque. Draw your design or message lightly on the surface. Use carving tools to etch the design carefully. Remove wood around the design for a raised effect. Sand the plaque to remove splinters. Stain or paint to enhance the look.
Safety Tips For Wood Carving
Wood carving is a fun and creative hobby. Staying safe helps you enjoy it longer. Following simple safety tips protects your hands and eyes. It also keeps your tools in good shape. Below are key safety tips for wood carving.
Proper Hand Positioning
Hold your carving tools firmly but not too tight. Keep your hands behind the cutting edge. This reduces the risk of cutting yourself. Use a carving glove on the hand holding the wood. It adds an extra layer of protection. Always carve away from your body. This keeps the blade moving safely.
Using Protective Gear
Wear safety glasses to protect your eyes from wood chips. Use a dust mask to avoid breathing in sawdust. A carving glove helps protect your hand from slips. Choose gloves that fit well and allow good control. Protect your work surface with a non-slip mat. This stops the wood from moving while you carve.
Maintaining Sharp Tools Safely
Keep your tools sharp for better control and less force. Dull tools can slip and cause injuries. Use a sharpening stone or strop carefully. Always point the blade away from you while sharpening. Store tools in a safe place with blade covers. Check tools regularly to ensure they are in good condition.
Finishing And Preserving Your Work
Finishing and preserving your wood carving is a key step. It brings out the beauty of the wood and protects your work. A smooth finish makes the carving pleasant to touch. Proper preservation keeps your piece safe from damage and decay. This section guides you through simple methods to finish and protect your carvings.
Sanding Techniques
Sanding smooths the wood surface and removes rough spots. Start with coarse sandpaper and move to finer grits. Use gentle, even strokes along the grain. Avoid sanding too hard to keep details sharp. Clean the dust with a soft brush before finishing.
Applying Stains And Finishes
Stains add color and enhance the wood’s natural look. Apply with a cloth or brush in thin layers. Let each coat dry fully before adding the next. Finishes like oil, wax, or varnish protect and shine. Choose one that suits the wood type and use purpose.
Protecting Your Carvings
Protection helps carvings last longer and resist damage. Keep carvings away from direct sunlight and moisture. Use sealants to block water and dirt. Store pieces in a dry place with stable temperature. Regularly check and touch up the finish to maintain beauty.
Troubleshooting Common Issues
Wood carving is rewarding but not without challenges. Small problems can stop your work or damage your piece. Knowing how to fix common issues saves time and keeps your project smooth. Here are simple solutions to frequent troubles in wood carving.
Fixing Splits And Cracks
Splits and cracks appear when wood dries or gets too much pressure. Fill small cracks with wood glue. Press the wood together and wipe off extra glue. For bigger cracks, use wood filler. Sand the area smooth once dry. Avoid carving near cracks to prevent spreading.
Avoiding Tool Slips
Tool slips cause mistakes and can hurt you. Hold your carving tool firmly but relaxed. Keep the blade sharp for better control. Always carve away from your body. Use a carving glove for extra safety. Take breaks to avoid tired hands, which cause slips.
Correcting Design Mistakes
Mistakes in design happen often, even to skilled carvers. Remove small errors by sanding the area gently. For deeper errors, carefully carve around the mistake to reshape the piece. Use wood filler to fill unwanted holes. Plan your design on paper or wood first to reduce errors.
Frequently Asked Questions
What Tools Are Essential For Easy Wood Carving?
Basic tools include carving knives, gouges, and chisels. These help create precise cuts and shapes. Beginners should start with simple, sharp tools for better control and safety. Quality tools improve carving ease and final results.
How Do I Choose The Best Wood For Carving?
Softwoods like basswood and pine are ideal for beginners. They are easier to carve and less likely to splinter. Hardwood is better for advanced projects but requires more skill and sharper tools.
What Safety Tips Should I Follow While Carving Wood?
Always carve away from your body to avoid injuries. Wear protective gloves and eye protection. Keep tools sharp for cleaner cuts and less force. Work in a well-lit, clean area to prevent accidents.
How Can Beginners Improve Their Wood Carving Skills?
Practice simple patterns and shapes regularly. Watch tutorial videos and join carving communities. Use quality tools and maintain them properly. Patience and consistency are key to skill improvement.
Conclusion
Wood carving can be a fun and relaxing hobby. Start with simple tools and soft wood. Practice small projects to build your skills. Enjoy the process, not just the result. Each piece you carve will improve your confidence. Keep your workspace safe and clean.
Remember, patience is key to creating good art. Try different styles to find what you like. Share your work with friends for feedback. Wood carving offers endless chances to create and learn. Give it a try, and see where it takes you.