DIY Fall Wood Crafts: Proven Essential Ideas
DIY fall wood crafts are simple, rewarding projects that bring autumn charm to your home. This guide provides essential, beginner-friendly ideas using basic tools, focusing on achievable results and safety, perfect for adding a personal touch this season.
Hello makers! Md Meraj here. Does the crisp autumn air inspire you to get creative? Many of us love the cozy, warm feeling that fall brings, and what better way to capture that spirit than by crafting beautiful decorations with wood? Sometimes, though, woodworking can seem a bit daunting, especially if you’re just starting out. You might worry about complicated tools or tricky techniques. But I promise you, creating stunning DIY fall wood crafts is entirely achievable!
With a few essential ideas and a little guidance, you can transform simple wood into charming pieces that will make your home feel extra special this season. Let’s dive into some proven, easy-to-follow projects that will boost your confidence and fill your home with autumnal beauty.
Why Fall Wood Crafts? The Magic of Autumnal DIY
Fall is a season of transformation. The leaves turn vibrant shades, the air gets cooler, and there’s a natural inclination to gather indoors and create a warm, inviting atmosphere. Wood, with its natural textures and earthy tones, is the perfect medium to reflect this season’s beauty. DIY fall wood crafts offer a wonderful opportunity to:
- Add a Personal Touch: Unlike store-bought decor, handmade items carry your unique style and effort.
- Enjoy a Rewarding Hobby: Completing a project, no matter how simple, brings immense satisfaction.
- Save Money: Crafting your own decor is often morebudget-friendly than buying new items.
- Connect with the Season: Working with natural materials and creating fall-themed items deepens your appreciation for autumn.
- Build Skills: Each project is a chance to learn new techniques and become more comfortable with tools.
This guide is designed for you, the beginner woodworker or DIY enthusiast. We’ll focus on projects that are fun, safe, and deliver gorgeous results without needing a professional workshop. You’ll learn how to select materials, use basic tools effectively, and create beautiful pieces that celebrate the spirit of fall.
Essential Tools for Your DIY Fall Wood Crafts Journey
Don’t let a lack of tools stop you! For most beginner fall wood crafts, you only need a few basic items. Having the right tools makes the process smoother and safer. Here’s a list of essentials that will get you started:
- Measuring Tape: Crucial for accurate cuts and assembly.
- Pencil: For marking your cuts and designs.
- Hand Saw or Jigsaw: A hand saw is basic and costs less, while a jigsaw offers more versatility for curves. For safety, always use a jigsaw with a steady hand or follow guides. Learn more about jigsaw safety here from the Occupational Safety and Health Administration (OSHA).
- Sandpaper (various grits, e.g., 120 and 220): To smooth edges and surfaces.
- Wood Glue: For strong bonds between pieces.
- Clamps: Essential for holding pieces together while the glue dries. Small C-clamps or bar clamps work well.
- Screwdriver and Screws (or Hammer and Nails): For more robust connections.
- Safety Glasses: Non-negotiable for eye protection!
- Work Gloves: Protect your hands from splinters and rough edges.
- Optional: Paintbrushes, wood stain, acrylic paints: For finishing and decorating.
Remember, safety is paramount. Always wear your safety glasses, work in a well-lit and ventilated area, and read any tool manuals before use. Taking these precautions ensures your crafting experience is enjoyable and accident-free.
Proven Essential DIY Fall Wood Crafts Ideas
Now for the fun part! These projects are designed with beginners in mind. They use simple techniques and common materials, allowing you to achieve beautiful fall decor without the stress.
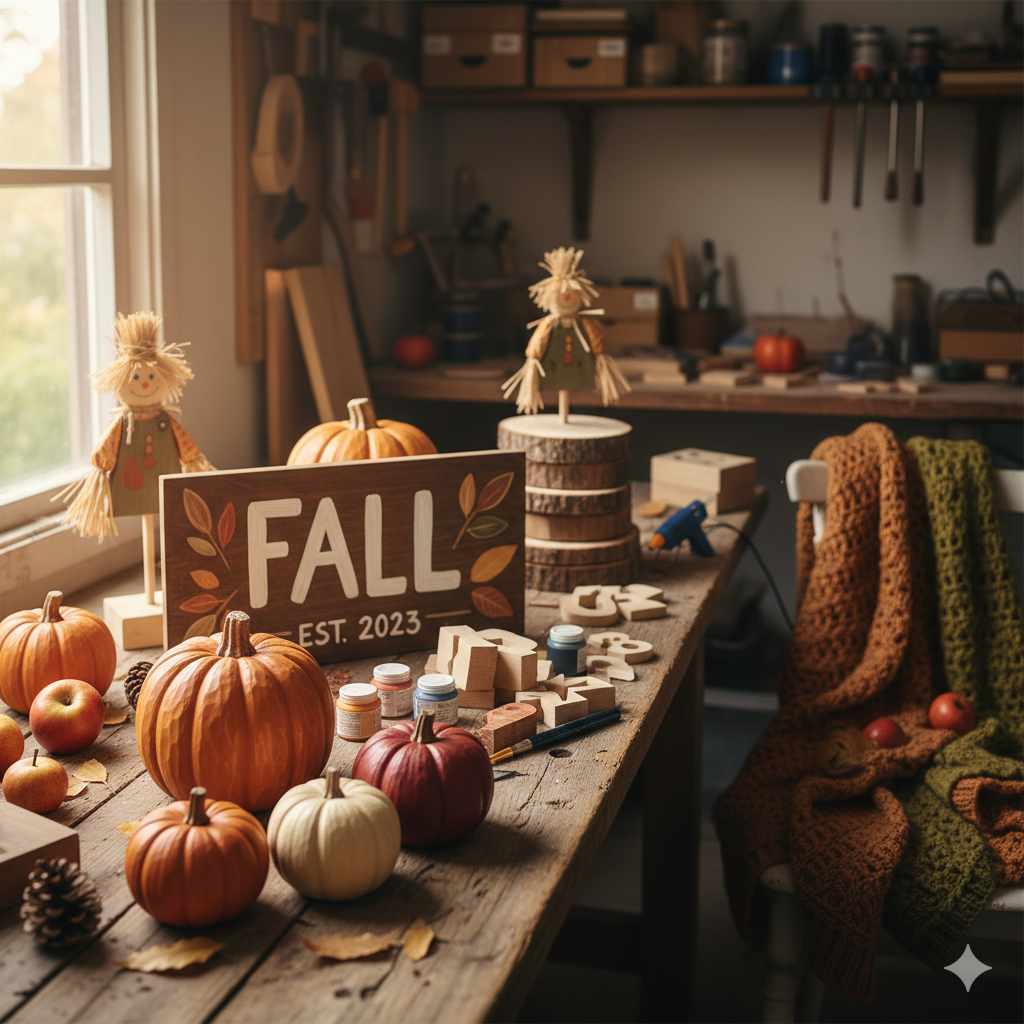
1. Rustic Wooden Pumpkins
These adorable pumpkins bring instant fall cheer to any shelf or mantel. They’re incredibly simple to make and can be customized to your heart’s content.
Materials:
- Scrap wood pieces (e.g., 1×4 or 2×4 lumber cut into varying heights)
- Small wooden dowel or twig for the stem
- Wood glue
- Sandpaper
- Paint (orange, brown, and any accent colors) or wood stain
- Paintbrush
- Optional: Twine or ribbon for a bow
Steps:
- Cut Your Wood: Cut several pieces of scrap wood to different heights to mimic various pumpkin sizes. For example, a 5-inch piece, a 7-inch piece, and a 9-inch piece. You can make them all the same height if you prefer.
- Shape (Optional): If you desire a slightly rounded top, you can carefully round off the top edges with sandpaper or a rasp if you have one. For simpler pumpkins, skip this step.
- Sand Smooth: Lightly sand all the cut edges and surfaces to remove splinters and create a smooth finish.
- Paint or Stain: Paint each pumpkin piece in a nice shade of orange. Alternatively, use a wood stain for a more natural look. Let them dry completely.
- Add the Stem: Cut a small piece of wooden dowel or use a natural twig for the pumpkin’s stem. Apply wood glue to the top center of your pumpkin piece and attach the stem. Hold it in place for a minute or two until it feels secure.
- Add Details (Optional): Once the glue is dry, you can paint a small brown circle on the pumpkin where the stem meets it. You can also tie a piece of twine or ribbon around the stem for extra charm.
- Assemble: Arrange your wooden pumpkins together on a shelf or tabletop. You can glue them together in a cluster for a more impactful display, or leave them separate to arrange as you like.
2. Cozy Wooden Acorn Garland
This charming garland adds a whimsical touch of nature to your autumn decor. It’s a great project for using up small wood scraps.
Materials:
- Small wood scraps (e.g., scraps from a 1×2 or dowels)
- Drill with a small drill bit (slightly larger than your twine)
- Twine or jute string
- Sandpaper
- Wood stain (brown tones) or acrylic paints (brown, tan, cream)
- Paintbrush
- Optional: Hot glue gun and glue sticks
Steps:
- Cut Acorn Shapes: Cut your wood scraps into acorn shapes. This can be as simple as cutting small cylinders (about 1-2 inches long) for the acorn body and smaller caps. You can also experiment with slightly more defined shapes. Make as many as you desire for your garland length.
- Sand Everything: Thoroughly sand all the acorn pieces to make them smooth and splinter-free.
- Drill Holes: Drill a small hole through the top of each acorn “body” piece. This is where you’ll thread your twine.
- Stain or Paint: Apply wood stain or paint to the acorn bodies and caps. You can use various shades of brown, tan, or cream for a natural, varied look. Let them dry completely.
- Assemble Acorns: Once dry, attach the “caps” to the “bodies.” A small dab of wood glue or a touch of hot glue will work perfectly.
- String the Garland: Cut a length of twine or jute string to your desired garland length. Thread the twine through the drilled holes in the acorn bodies. You can tie a small knot on either side of each acorn to keep them spaced evenly, or simply slide them close together for a denser look.
- Hang and Enjoy: Drape your adorable acorn garland over a mantel, shelf, or window.
3. Simple Wooden Leaf Cutouts
Capture the iconic shapes of fall leaves with these easy-to-cut wooden decorations. They can be painted, stained, or left natural.
Materials:
- Thin plywood (e.g., 1/4 inch or 1/2 inch) or thin craft wood sheets
- Paper and pencil (to draw leaf shapes)
- Jigsaw or coping saw
- Sandpaper
- Paint, wood stain, or clear sealant
- Optional: Eye hooks and wire for hanging
Steps:
- Design Your Leaves: Draw several different fall leaf shapes (maple, oak, etc.) onto paper. Aim for shapes that are not overly intricate, especially as a beginner.
- Cut Out Patterns: Cut out your paper leaf patterns.
- Trace onto Wood: Trace your leaf patterns onto the thin plywood or craft wood.
- Cut the Leaves: Carefully cut out the leaf shapes using a jigsaw or coping saw. Take your time and follow the traced lines. If using a jigsaw, ensure the wood is securely clamped down. Always cut away from yourself. For detailed cutting tips, consult guides from tool manufacturers like DeWalt.
- Sand Edges: Sand all the cut edges and surfaces smooth. Pay attention to any rough spots from the saw blade.
- Finish: You can paint your leaves in traditional fall colors, use wood stain for a natural look, or seal them with a clear coat to preserve the wood grain.
- Add Hanger (Optional): For hanging decorations, screw small eye hooks into the top of each leaf and attach wire or twine. You can also use these as part of a larger wreath or display.
Choosing Your Wood and Finishes
The type of wood and finishes you choose can significantly impact the look and feel of your DIY fall wood crafts. Here’s a quick guide:
| Wood Type | Pros for Beginners | Cons | Ideal For |
|---|---|---|---|
| Pine | Affordable, widely available, soft and easy to cut/sand. | Dents and scratches easily. | Most beginner projects, painted items. |
| Poplar | Slightly harder than pine, good for painting, relatively inexpensive. | Can be prone to blotching with stain. | Painted crafts, smaller decorative items. |
| Plywood (Baltic Birch) | Stable, strong, edges can look nice when finished. | Can splinter if not cut carefully, edges need sealing. | Cutouts, signs, larger structures. |
| Scrap Wood | Cost-effective, great for small projects, eco-friendly. | Varying hardness and sizes, may require more prep. | Pumpkins, acorns, small accents. |
When it comes to finishes, consider your desired aesthetic:
- Wood Stains: Enhance the natural grain of the wood. Available in many fall-appropriate colors like walnut, oak, or even reds and golds.
- Acrylic Paints: Offer a vast color palette for bold, custom designs. Easy to clean up with water.
- Chalk Paint: Creates a lovely matte, distressed, or vintage look that’s perfect for rustic fall decor.
- Clear Sealant (Polyurethane, Lacquer): Protects the wood and finish, especially if the item will see a lot of handling or is placed outdoors.
For a quick, easy finish for painted items, consider using pre-made stencils. You can find fall-themed stencils online or at craft stores to add intricate designs without freehand painting.
Safety First: Working Wood with Confidence
As your woodworking mentor, I always stress safety. It’s not about being scared; it’s about being smart and prepared. These simple steps will help you work with confidence:
- Always wear eye protection. Sawdust, wood chips, and even small pieces of hardware can fly unexpectedly. Safety glasses are your best friend.
- Wear gloves to protect your hands from splinters, sharp edges, and irritants in wood or finishes.
- Work in a well-ventilated area, especially when sanding or using stains and paints.
- Keep your workspace clean and organized. Clutter leads to accidents.
- Understand your tools. Read the manuals and watch tutorials if you’re unsure about a tool’s operation. For instance, a hand saw seems simple, but proper technique improves safety and results.
- Secure your work. Use clamps to hold wood pieces firmly when cutting, drilling, or gluing.
- Disconnect power tools when changing blades or bits, or when not in use.
- Never force a tool. Let the tool do the work. If it’s struggling, you might need a different bit, a sharper blade, or a different approach.
By incorporating these safety practices, you can enjoy the rewarding process of creating DIY fall wood crafts without worry.
FAQ: Your Beginner Woodworking Questions Answered
Q1: What kind of wood is best for beginners?
For beginners, softwoods like pine are excellent choices. They are affordable, readily available at hardware stores, and easy to cut, sand, and drill without requiring a lot of effort or specialized tools. Plywood is also a good option for cutouts.
Q2: Do I need a lot of expensive tools to make these crafts?
Absolutely not! The projects shared here focus on very basic hand tools like a hand saw, measuring tape, pencil, sandpaper, wood glue, and clamps. A jigsaw can be helpful for more complex shapes, but it’s not strictly necessary for these essential ideas.
Q3: How do I get a smooth finish on my wood crafts?
The key is thorough sanding. Start with a coarser grit sandpaper (like 120) to smooth out rough edges and shapes, then move to a finer grit (like 220) for a silky smooth surface. Always sand in the direction of the wood grain.
Q4: Can I use wood scraps for these projects?
Yes, wood scraps are perfect for many DIY fall wood crafts! Projects like the rustic pumpkins and acorn garlands are ideal for using up leftover pieces from previous projects or small pieces of lumber you might have on hand.
Q5: How should I make my wooden crafts look more “fall-like”?
Embrace fall colors! Think warm oranges, deep reds, muted yellows, browns, and even deep greens. Wood stains in natural tones like oak or walnut also bring out beautiful autumnal textures. Adding elements like twine, burlap, or painted designs (like leaves or acorns) further enhances the seasonal feel.
Q6: Are these crafts suitable for outdoor display?
For outdoor display, it’s crucial to use weather-resistant wood or, more importantly, apply several coats of a good quality exterior sealant (like polyurethane or spar urethane) to protect the wood from moisture and UV rays. Even with sealing, heavily decorated outdoor crafts may not last as long as indoor ones.
Q7: What if my cuts aren’t perfectly straight?
Don’t worry! For rustic crafts, imperfect cuts can add to the charm. If you want a cleaner look, you can sand down any significant wobbles. For more precise cuts, consider using a miter box with your hand saw, which helps guide the blade for straighter lines.
Conclusion: Your Autumnal Creation Awaits!
See? Creating beautiful, cozy fall decor with wood doesn’t require a professional shop or years of experience. By focusing on a few essential, beginner-friendly DIY fall wood crafts, you can transform simple materials into charming pieces that truly capture the spirit of the season. Remember to prioritize safety, take your time, and enjoy the process. Each project is a stepping stone, building your confidence and your collection of handmade treasures.
Whether it’s a set of rustic pumpkins for your mantel, a whimsical acorn garland to brighten a shelf, or simple leaf cutouts adding a touch of nature indoors, your handcrafted decorations will bring a unique warmth and personality to your home. So gather your basic tools, pick a project that sparks your interest, and let the creativity flow. I can’t wait to see what you create this autumn!