Can You Use Acrylic Paint On Wood? Proven Essential
Yes, absolutely! Acrylic paint is a fantastic and versatile choice for wood projects. It’s beginner-friendly, dries fast, and offers vibrant colors for everything from furniture touch-ups to custom art pieces. With proper preparation, you can achieve stunning, durable results on wood.
Have you ever looked at a plain wooden surface and imagined a splash of color, a cool design, or a complete transformation? Perhaps you have a new piece of furniture that feels a bit too… well, wood-y, or an old, beloved item that needs a refresh. If you’re a beginner in the world of DIY and crafts, you might be wondering, “Can I actually use acrylic paint on wood?” It’s a very common question, and the good news is, the answer is a resounding YES!
Acrylic paints are incredibly forgiving, adaptable, and can breathe new life into any wooden surface. You don’t need to be a seasoned pro to get amazing results. We’ll walk you through everything you need to know, step-by-step, so you can start painting with confidence. Get ready to unlock your creativity and make your wood projects truly shine!
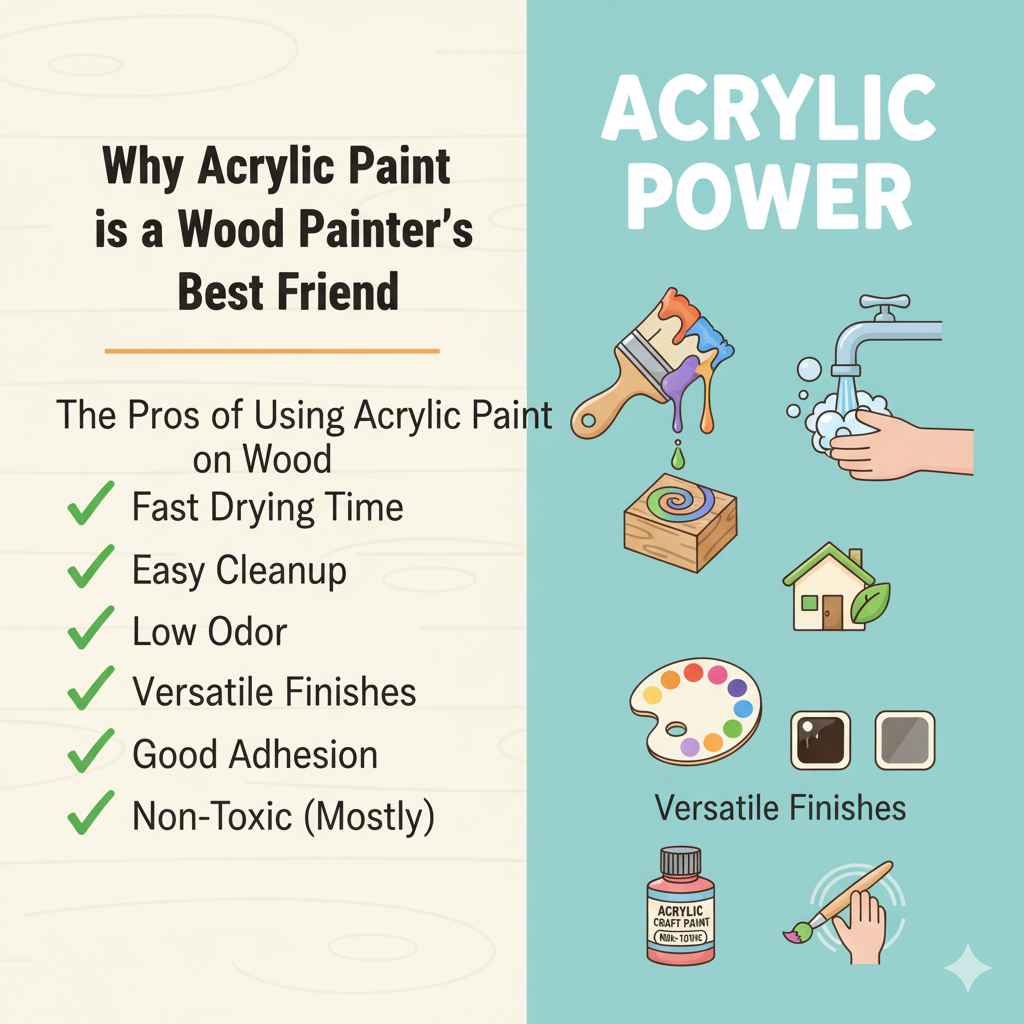
Why Acrylic Paint is a Wood Painter’s Best Friend
Acrylic paints are a go-to for so many hobbyists and DIYers, and for good reason, especially when it comes to wood. Unlike oil-based paints, they dry quickly, meaning less waiting around and more time enjoying your finished piece. They’re also water-based, which makes cleanup a breeze – just soap and water while the paint is still wet. Plus, they come in an amazing spectrum of colors with options for matte, satin, or glossy finishes. This makes them perfect for a huge range of wood projects, from small craft items to larger furniture pieces.
The versatility of acrylics means you can achieve different looks. You can get a smooth, solid color, create distressed or weathered effects, or even use them for detailed artwork. They adhere well to wood, creating a durable finish, especially when sealed properly. This makes them not just pretty, but practical too!
The Pros of Using Acrylic Paint on Wood
- Fast Drying Time: This is a big one for beginners! You can apply multiple coats quickly without long, tedious waits in between.
- Easy Cleanup: Water-based means no harsh solvents needed. Just wash your brushes and tools with soap and water right after you’re done.
- Low Odor: Unlike oil-based paints, acrylics have very little smell, making them great for indoor projects.
- Versatile Finishes: From bold, vibrant hues to subtle pastels, and from high gloss to a natural matte look, acrylics offer a wide range of aesthetic possibilities.
- Good Adhesion: When applied to properly prepared wood, acrylic paint sticks well and provides a durable coating.
- Non-Toxic (Mostly): Most acrylic craft paints are non-toxic, making them safer for use around children and pets. Always check the label to be sure.
- Flexibility: Once dry, acrylic paint forms a flexible layer that can withstand minor expansion and contraction of the wood.
Potential Downsides (and How to Overcome Them)
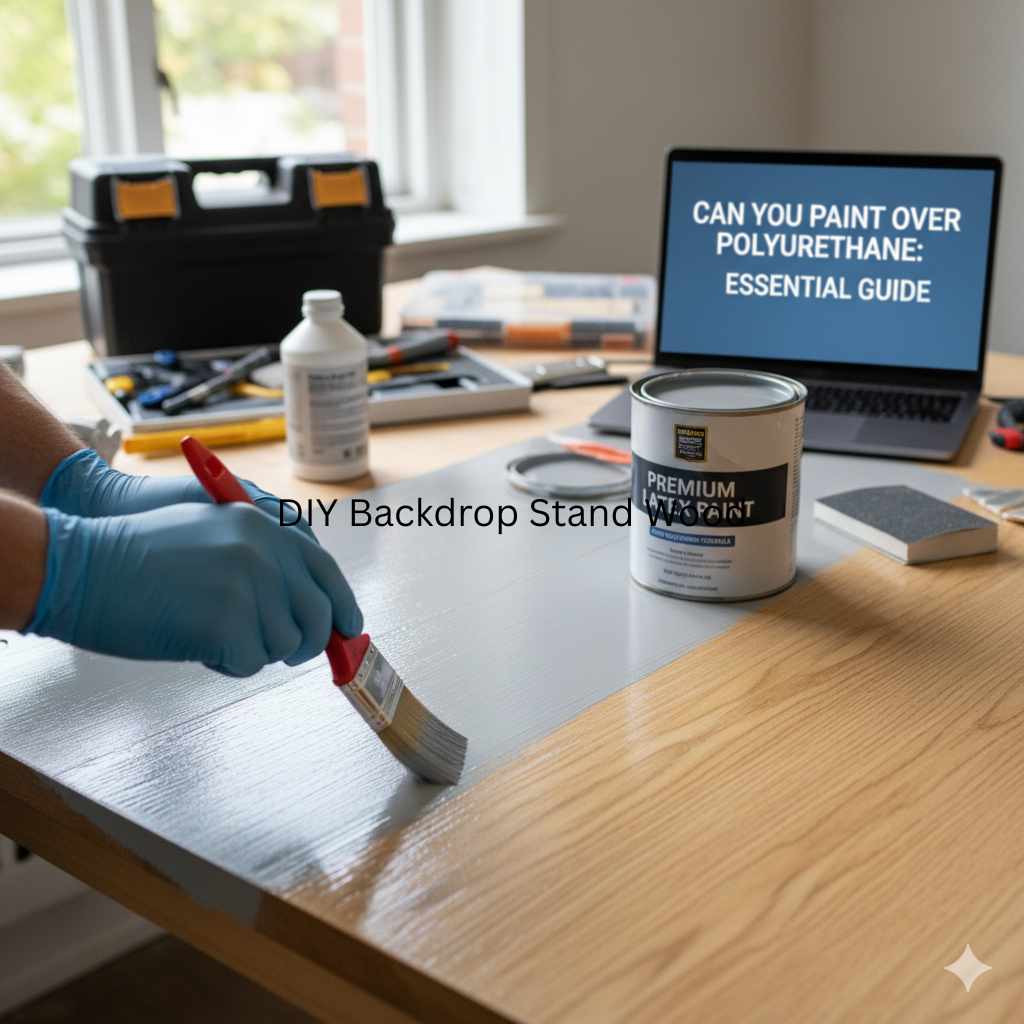
While acrylics are fantastic, there are a couple of things to keep in mind. If you’re working on an outdoor project that will be exposed to harsh weather, you’ll need to use a high-quality outdoor sealant to ensure your paint job lasts. Also, if you desire a super-smooth, furniture-grade finish on something like a tabletop, extra sanding and priming steps might be necessary compared to just using them on a craft project. But don’t let this discourage you; these are easily manageable steps!
Getting Started: What You’ll Need
Before you dive in, gathering the right supplies will make your painting experience much smoother and more enjoyable. Think of this as setting yourself up for success!
Essential Tools and Materials
- Acrylic Paints: Choose artist-grade or craft-grade acrylics. Artist-grade usually has more pigment, while craft-grade is more budget-friendly and perfect for many DIY projects. They come in tubes, jars, and bottles.
- Brushes: A variety of brush sizes and shapes is helpful. Synthetic brushes are excellent for acrylics. You’ll want a larger brush for broad coverage and smaller ones for details.
- Wood Surface: This could be anything from a small wooden plaque, a picture frame, a piece of furniture, or even unfinished wooden craft items.
- Primer (Optional but Recommended): A good primer helps the paint adhere better, provides a uniform base color, and can block wood stains from bleeding through.
- Sandpaper: Fine-grit sandpaper (150-220 grit) for smoothing the wood surface before and sometimes between coats.
- Lint-Free Cloths/Rags: For wiping away dust and applying finishes.
- Water Container: For rinsing your brushes.
- Paint Palette or Plate: To mix your colors on. An old plastic plate works great!
- Protective Sealant/Topcoat: A clear sealant (like polycrylic, polyurethane, or a spray sealant) is crucial for durability, especially for items that will be handled or exposed to moisture.
- Painter’s Tape: For creating clean lines and masking off areas.
- Drop Cloth or Newspaper: To protect your work surface.
Step-by-Step Guide: Painting Your Wood Project
Let’s get painting! These steps are designed for clarity and ease, ensuring you can tackle your project with confidence.
Step 1: Prepare Your Wood Surface
This is arguably the most important step for a long-lasting, beautiful finish. Think of it like preparing a canvas for a painting.
- Clean the Wood: Make sure the wood is free from dust, dirt, grease, or any old finishes. Wipe it down with a slightly damp cloth. If it’s particularly grimy, you might need a mild soap and water solution, followed by a clean water rinse and thorough drying.
- Sand the Surface: Use fine-grit sandpaper (around 150-220 grit) to lightly sand the entire surface you plan to paint. This creates a slightly rough texture, or “tooth,” for the primer and paint to grip onto. Sand in the direction of the wood grain.
- Wipe Away Dust: After sanding, use a dry cloth or a tack cloth to remove all the fine wood dust. This is crucial; any dust left behind will show up in your paint job.
Step 2: Apply Primer (Optional but Highly Recommended)
Primer acts as a bonding agent between the wood and your paint. It helps your colors appear more vibrant and true, and prevents knots or tannins in the wood from “bleeding” through your paint.
- Choose Your Primer: For most projects, a water-based acrylic primer is ideal. Look for one specifically designed for porous surfaces like wood.
- Apply a Thin, Even Coat: Using a clean brush or roller, apply a thin, even layer of primer. Don’t glob it on! Brush strokes should be smooth and consistent.
- Let It Dry: Allow the primer to dry completely according to the manufacturer’s instructions. This usually takes about 30-60 minutes.
- Light Sanding: Once dry, lightly sand the primed surface with very fine-grit sandpaper (220 grit or higher) to create an ultra-smooth base. Wipe away dust with a damp cloth or tack cloth.
Step 3: Apply Your Acrylic Paint
Now for the fun part – adding color!
- Plan Your Design: If you have a specific design in mind, sketch it out lightly with a pencil or use painter’s tape to block off areas.
- Mix Your Colors: If you’re mixing custom shades, do it on your palette before you start painting.
- Apply the First Coat: Dip your brush into the acrylic paint. Don’t overload the brush. Apply the paint in smooth, even strokes, working in the direction of the wood grain. For solid coverage, you might need two coats.
- Let Each Coat Dry: Acrylic paint dries quickly to the touch. Wait until the first coat is completely dry (usually 15-30 minutes, depending on humidity and paint thickness) before applying the next.
- Apply Additional Coats: Continue applying thin, even coats until you achieve the desired coverage and color depth.
- Light Sanding Between Coats (Optional): For a super smooth finish, especially on furniture, you can very lightly sand between coats with extra-fine sandpaper (320 grit or higher) and wipe away dust.
Step 4: Add Details and Effects (If Desired)
This is where you can get creative. You can use smaller brushes for fine details, stencils for patterns, or techniques like dry brushing for a distressed look.
- Dry Brushing: Dip your brush in paint, then wipe most of it off on a paper towel. Lightly brush over the wood to catch the high points, creating a weathered or antique appearance.
- Stenciling: Secure a stencil with painter’s tape and carefully dab paint over it with a stencil brush or sponge.
- Washes: Thin acrylic paint with water to create a translucent “wash” that allows some of the wood grain to show through.
Step 5: Seal Your Masterpiece
This final step is vital for protecting your hard work and ensuring your painted wood lasts.
- Choose Your Sealant: Water-based sealants like polycrylic or water-based polyurethane are excellent choices as they dry clear and don’t yellow over time like some oil-based versions can. For outdoor items, look for a sealant specifically rated for outdoor use that offers UV protection. Spray sealants are also convenient.
- Apply Thin Coats: Using a foam brush, a soft bristle brush, or by spraying, apply one or two thin, even coats of your sealant. Check the product instructions for drying times between coats.
- Allow to Cure: Sealants need time to “cure” (fully harden), which can take several days to a couple of weeks, even after they are dry to the touch. Avoid heavy use of the item during the curing period.
Tips for Different Types of Wood
While acrylic paint works on most wood types, some characteristics of the wood might influence your prep and painting process.
Softwoods vs. Hardwoods
Softwoods: Woods like pine, fir, and cedar are more porous and can sometimes have uneven grain. They might absorb paint more readily, potentially requiring an extra coat of primer or paint for even coverage. Knots in softwoods can also be more prone to bleeding, making a good primer essential.
Hardwoods: Woods like oak, maple, and mahogany are denser and have a tighter grain. They generally take paint very well and offer a smoother surface to start with. However, they are still wood, so proper sanding and cleaning are always necessary.
Plywood and MDF
Plywood and Medium-Density Fiberboard (MDF) are engineered wood products. They are generally very smooth and stable, making them excellent surfaces for painting. MDF, in particular, can be very absorbent, so a good quality primer is highly recommended for best results and to ensure you don’t use excessive amounts of paint.
For more information on wood types and their properties, the Woodworking Project Guide offers a helpful overview of common woods used in projects.
Troubleshooting Common Painting Problems
Even with the best intentions, a few hiccups can happen. Here’s how to handle them.
- Paint is too thick: Add a tiny bit of water (literally a drop or two) to your paint on the palette and mix thoroughly. Be careful not to add too much, or the paint can become watery and lose its opacity.
- Streaky brush marks: Ensure you are using a good quality brush and applying paint in even, consistent strokes, preferably following the wood grain. Applying thinner coats and allowing them to dry fully before the next coat can also help.
- Paint is not covering evenly: This often points back to the preparation stage. Ensure your wood is properly sanded and primed. If a knot is bleeding through, it might need another application of stain-blocking primer.
- Paint chipping after drying: This usually means the paint didn’t adhere properly, or the sealant wasn’t applied or hasn’t fully cured. Make sure the surface was clean and sanded, and that you have used a good quality sealant.
- Bubbles in paint or sealant: This can happen from over-brushing or applying the coat too thickly. Try to use a lighter touch and thinner coats.
Creative Applications for Painted Wood
The possibilities are truly endless when you can confidently paint wood! Here are a few ideas to spark your imagination:
Furniture Makeovers
Transform an old dresser, chair, or side table with a fresh coat of paint. You can go for a bold, solid color, create a two-tone effect, or even paint a decorative pattern on drawers or tabletops. Remember to seal it well for durability.
Home Decor Accents
Wooden picture frames, shelves, decorative boxes, signs, and wall art can all be personalized with acrylic paint. This is a fantastic way to add a handmade touch that perfectly matches your home’s style.
Craft Projects
Wooden ornaments, small toys, birdhouses, and unfinished craft kits are perfect canvases for acrylic paints. They’re great projects for kids and adults alike.
Kids’ Rooms and Play Areas
Paint vibrant murals, animal designs, or educational charts on wooden furniture or wall panels. Just ensure you use non-toxic paints and a durable sealant.
For a wealth of inspiration and project ideas, resources like Popular Mechanics often feature great woodworking and painting projects that can be adapted.

FAQ: Your Acrylic Paint on Wood Questions Answered
Q1: Do I really need to prime wood before painting with acrylics?
While not strictly mandatory for every project, priming is highly recommended. It ensures better paint adhesion, makes colors more vibrant, provides a uniform base, and prevents wood tannins (like from knots) from bleeding through your paint. It really sets you up for a more professional and durable finish.
Q2: How many coats of acrylic paint do I need on wood?
This depends on the paint color, the color of your primer and wood, and the look you’re going for. Lighter colors over a dark base might need 3-4 coats, while darker colors might be fine with 2. Always apply thin coats and let them dry fully between applications until you achieve opaque, even coverage.
Q3: Can I use acrylic paint for outdoor wood projects?
Yes, but with a crucial addition: a high-quality outdoor-rated sealant. Acrylic paint itself isn’t inherently waterproof or UV-resistant enough for outdoor exposure. Apply your paint as usual, and then use an outdoor sealant that offers protection against sun, rain, and temperature changes.
Q4: What kind of brush is best for acrylic paint on wood?
Synthetic bristle brushes are generally best for acrylics because they are durable and hold their shape well. For larger areas, a flat brush is good; for details, a round or filbert brush works well. Don’t use your most expensive brushes, as paint can sometimes be harder to clean out of them than from synthetics.
Q5: How long does acrylic paint take to dry on wood?
Acrylic paint dries very quickly to the touch, usually within 15-30 minutes for a thin coat. However, “dry” to the touch is not “fully cured.” Full curing can take days to weeks, during which the paint hardens completely. This is why it’s important to apply sealant and then allow that sealant to cure fully before putting the item into heavy use.
Q6: Can I paint over an existing finish on wood with acrylics?
Yes, but you should prep the surface first. Clean the wood thoroughly, then lightly sand it to create a dull surface for the primer or paint to adhere to. Then, apply a coat of primer before your acrylic paint for the best results. A smooth, clean, and lightly abraded surface is key.
From Blank Canvas to Beautiful Creation
As you can see, using acrylic paint on wood is not only possible but also a wonderful way to personalize and enhance your projects. With a little preparation, the right materials, and patience for drying times, you can transform simple wood into something truly special.
Don’t be afraid to experiment with colors, techniques, and designs. Remember that every expert was once a beginner, and the most rewarding projects often come from trying something new. Whether you’re touching up a piece of furniture, creating a unique gift, or simply enjoying a creative afternoon, acrylics on wood offer a fantastic solution.