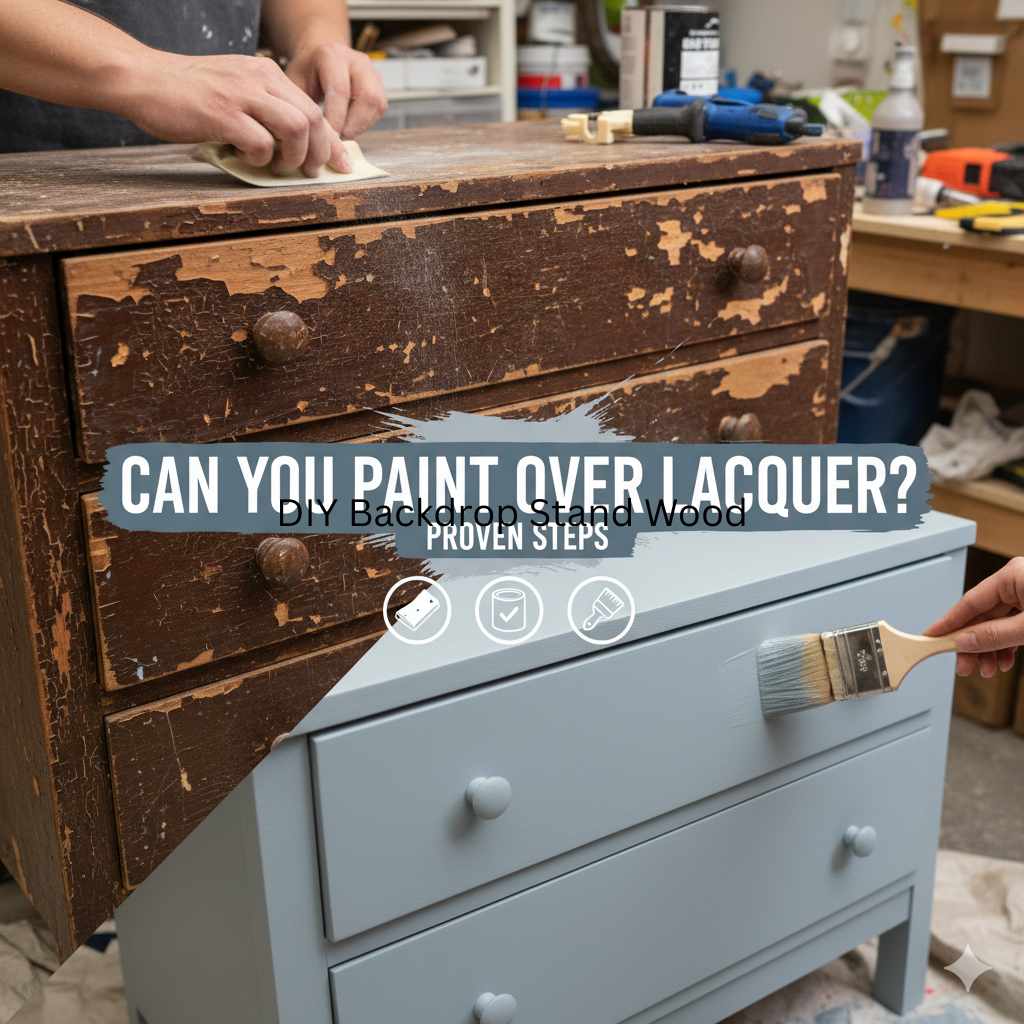
Can You Paint Over Lacquer: Proven Steps
Can you paint over lacquer? Yes, you absolutely can paint over lacquer with the right preparation! This guide provides straightforward, proven steps to help you transform your lacquered furniture or cabinets with a fresh coat of paint, ensuring a beautiful, lasting finish.
Have you ever looked at a piece of furniture with an old, dated lacquer finish and wished you could give it a new lease on life with a fresh coat of paint? You’re not alone! Lacquer finishes are common on wood, and many homeowners wonder if they can simply paint over them without stripping everything down. The good news is, you can! It might seem a bit daunting at first, but with a little patience and the right approach, achieving a smooth, professional-looking painted finish over lacquer is totally doable. This guide will walk you through every step, making it easy for even the newest DIYer to succeed. Get ready to transform your pieces!
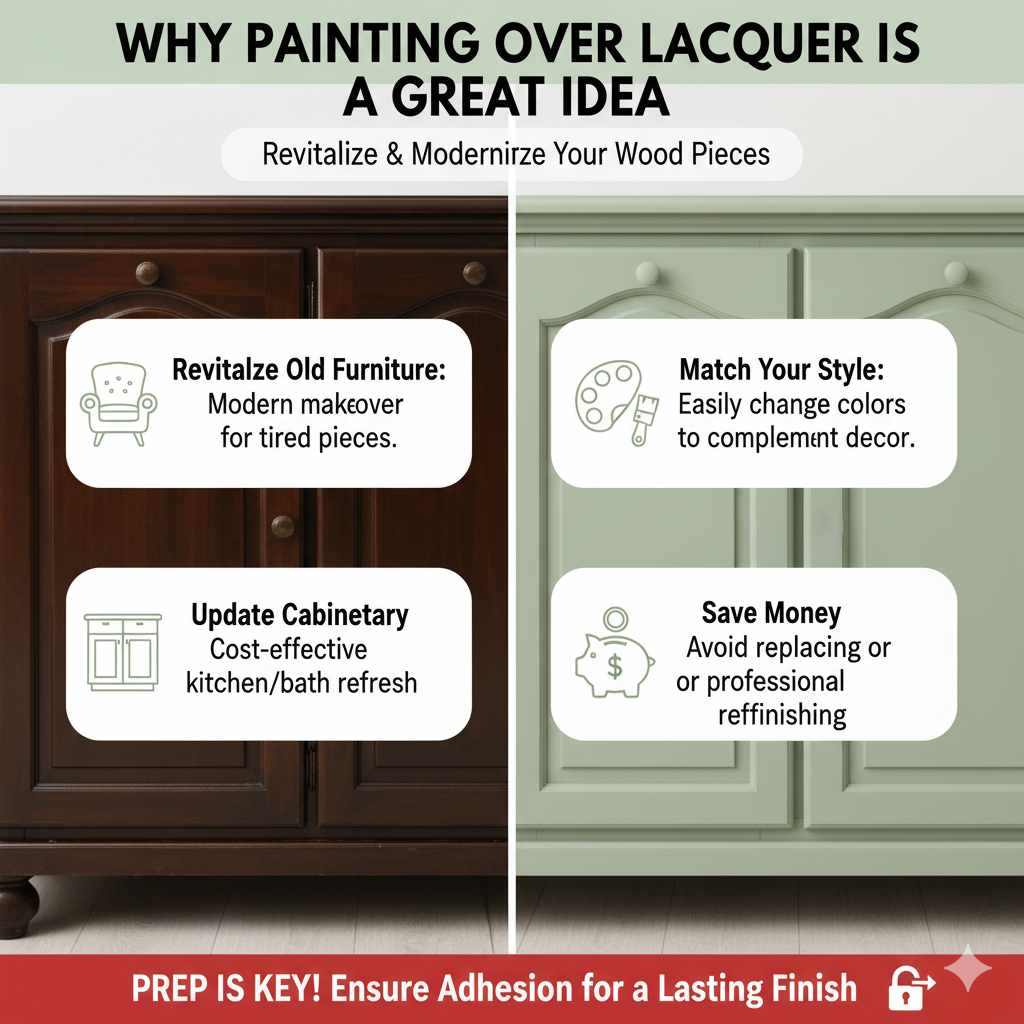
Why Painting Over Lacquer is a Great Idea
Lacquered furniture and cabinets, while beautiful, can sometimes feel a bit dated or just not match your current home decor. Instead of buying brand new pieces, painting over the existing lacquer offers a fantastic way to:
Revitalize Old Furniture: Give your beloved but tired pieces a modern makeover.
Update Cabinetry: A cost-effective way to refresh your kitchen or bathroom cabinets.
Match Your Style: Easily change colors to perfectly complement your interior design.
Save Money: Avoid the expense of replacing items or the cost of professional refinishing.
This process is all about preparation. Lacquer is a durable finish, so we need to ensure our new paint has something to grip onto.
Understanding Lacquer and Why Preparation is Key
Before we dive into the painting, let’s quickly touch on what lacquer is. Lacquer is a type of finish that dries quickly through evaporation, not oxidation or chemical reaction. This means it forms a hard, protective layer on the wood’s surface. Because it’s a relatively smooth and sometimes glossy finish, paint might not adhere well to it directly. If you try to paint directly over a glossy lacquer without any prep, you’ll likely end up with peeling, chipping, or an uneven finish down the line.
The key to painting over lacquer successfully lies in creating a surface that the new paint can bond to. This involves cleaning, deglossing, and priming.
Tools and Materials You’ll Need
Gathering your supplies before you start will make the whole process smoother. Here’s a helpful list:
Cleaning Supplies:
Mild dish soap
Clean cloths or rags (microfiber works well)
Bucket
Deglossing/Sanding Supplies:
Fine-grit sandpaper (180-220 grit) OR
Sanding sponges (same grit as sandpaper) OR
Liquid deglosser (also called liquid sandpaper)
Tack cloth
Priming Supplies:
High-quality primer specifically designed for glossy surfaces or for use on furniture (oil-based or shellac-based primers are often recommended for their adhesion, but water-based primers formulated for difficult surfaces can also work well. Consult the primer can for compatibility.)
Paint tray
Nylon/polyester paint brushes or foam rollers (appropriate for your primer type)
Painting Supplies:
Your chosen paint (e.g., latex, acrylic, oil-based enamel – be sure it’s suitable for furniture/cabinets)
Clean paint tray
Nylon/polyester paint brushes or foam rollers
Safety Gear:
Gloves
Safety glasses
Dust mask or respirator (especially for sanding)
Proven Steps to Paint Over Lacquer
Let’s get to it! Follow these straightforward steps for a fantastic paint finish over your lacquered items.
Step 1: Clean the Surface Thoroughly
This is the first and a very crucial step. Any dirt, grease, or grime will prevent your primer and paint from adhering properly.
1. Mix a Cleaning Solution: Fill a bucket with warm water and a small amount of mild dish soap.
2. Wipe Down: Dip a clean cloth into the soapy water, wring it out well so it’s damp, not dripping wet.
3. Clean the Item: Gently wipe down the entire surface of the lacquered item. Pay attention to any nooks or crannies.
4. Rinse: Use another clean cloth dampened with plain water to wipe away any soap residue.
5. Dry Completely: Use a dry cloth to thoroughly dry the surface. Allow it to air dry completely before proceeding. This might take a few hours.
Step 2: Degloss the Surface
Lacquer is often glossy, and paint needs a slightly rough surface to stick to. We need to “degloss” or scuff up the finish. You have a few options here:
Option A: Sanding (Recommended for Best Adhesion)
1. Choose Your Grit: Use fine-grit sandpaper (180-220 grit) or a sanding sponge. The goal is to dull the shine, not to remove the lacquer.
2. Sand Gently: Lightly sand the entire surface in the direction of the wood grain. You don’t need to press hard; just aim to remove the sheen. You’ll see a fine dust – this is good! It means you’re creating the necessary “tooth” for the primer.
3. Clean Up Dust: After sanding, use a vacuum with a brush attachment or a dry cloth to remove as much of the dust as possible. Then, wipe everything down with a tack cloth to pick up any remaining fine particles. A tack cloth is a sticky cloth designed specifically for this purpose and is invaluable for a clean finish.
Option B: Liquid Deglosser
1. Wear Protection: Ensure you have good ventilation, wear gloves and safety glasses. Liquid deglosser can be a chemical.
2. Apply Deglosser: Dampen a clean cloth with the liquid deglosser (follow product instructions carefully).
3. Wipe Down: Wipe down the lacquered surface. The deglosser will subtly etch and dull the finish.
4. Wipe Off Residue: Use a clean, dry cloth to wipe away any excess deglosser.
5. Allow to Dry: Let the surface dry completely according to the product’s recommendations.
Pro Tip: Sanding generally provides a more reliable surface for adhesion than liquid deglossing, especially on very glossy or thick lacquer finishes.
Step 3: Prime the Lacquered Surface
Now that your surface is clean and dulled, it’s time for primer. Primer acts as a bridge between the old lacquer finish and your new paint, ensuring good adhesion and a uniform color.
1. Choose the Right Primer: Select a high-quality primer. For painted lacquer, a stain-blocking primer, an oil-based primer, or a shellac-based primer is often ideal because they offer excellent adhesion to slick surfaces. Look for primers specifically formulated for cabinets, furniture, or difficult-to-paint surfaces.
Oil-based/Shellac Primers: Excellent adhesion, great for blocking stains and tannins. They typically require mineral spirits for cleanup.
Water-based (Latex/Acrylic) Primers: Easier cleanup with water, faster drying. Some advanced formulas are designed for superior adhesion on slick surfaces.
Important: Always read the primer manufacturer’s recommendations to ensure it’s suitable for use over existing finishes. You can find more information on primer types from resources like This Old House’s Guide to Priming.
2. Apply the First Coat: Using a good quality brush or roller, apply a thin, even coat of primer. Don’t try to cover everything perfectly in one go; the goal is even coverage. Work in the direction of the wood grain.
3. Let it Dry: Allow the primer to dry completely according to the manufacturer’s instructions. This is critical – don’t rush this step! Drying times can vary significantly.
4. Lightly Sand (Optional but Recommended): Once the primer is dry, you can very lightly sand with a 220-grit or higher sandpaper (or a fine sanding sponge) and wipe with a tack cloth. This will knock down any minor imperfections and create an even smoother base for your paint.
5. Apply a Second Coat (If Needed): For very dark lacquer, a dark wood, or if you want extra assurance of coverage and adhesion, apply a second thin coat of primer after light sanding and tack-cloth wiping. Let it dry completely.
Step 4: Apply Your Paint
With a properly primed surface, your paint will adhere beautifully.
1. Choose Your Paint: Select a quality paint suitable for furniture or cabinets. Options like interior latex-based paint (acrylic enamel), oil-based enamel, or chalk paint are popular choices. Acrylic enamels offer good durability and easy cleanup.
2. Stir Your Paint: Stir your paint thoroughly, but avoid vigorous shaking, which can introduce air bubbles.
3. Apply the First Coat: Apply a thin, even coat of your chosen paint. Use the same technique as with the primer – work in the direction of the wood grain. Avoid applying it too thickly, as this can lead to drips and an uneven finish.
4. Allow to Dry: Let the first coat dry completely. Check the paint can for recommended drying and recoating times.
5. Lightly Sand (Optional): For an ultra-smooth finish, you can very lightly sand between coats with very fine-grit sandpaper (220-320 grit) or a fine sanding sponge, then wipe with a tack cloth. This is especially helpful if you notice any minor imperfections.
6. Apply Subsequent Coats: Apply additional thin coats of paint as needed, allowing each coat to dry thoroughly between applications. Most projects will require at least two, often three, thin coats for full coverage and durability.
7. Allow for Full Curing: This is perhaps the most important step after painting. Paint needs time to “cure” – a process where the paint fully hardens. While it might feel dry to the touch within hours, it can take days or even weeks (for some paints) to reach its maximum hardness. During the curing period, treat the painted surface gently. Avoid heavy use, harsh cleaning, or placing heavy objects on it. This helps ensure a durable, long-lasting finish.
Table: Choosing the Right Primer for Lacquer
| Primer Type | Best For | Pros | Cons |
|---|---|---|---|
| Oil-Based Primer | High-sheen finishes, stain blocking, wood tannins | Excellent adhesion, superior stain blocking, very durable finish | Strong odor, requires mineral spirits for cleanup, longer drying time |
| Shellac-Based Primer | Extremely slick surfaces, knots, stains, odors | Exceptional adhesion, ultra-fast drying, blocks stains and odors effectively | Strong odor, limited availability, may require careful topcoat compatibility |
| Water-Based (Latex/Acrylic) Primer | General use, drywall, light stains, previously painted surfaces | Low odor, easy water cleanup, fast drying, eco-friendly | Less effective for heavy stains or tannins, weaker adhesion on glossy surfaces |
Always refer to the specific product’s instructions and compatibility charts.
Tips for a Flawless Finish
Work in a Well-Ventilated Area: This is crucial for safety and to help the finishes dry properly.
Use Quality Tools: Good brushes and rollers make a significant difference in the smoothness of your finish.
Thin Coats are Best: Resist the urge to apply thick coats to finish faster. Thin, even coats build up to a much more professional and durable finish.
Inspect Your Work: Frequently check for drips, runs, or missed spots, especially in the primer stage. It’s much easier to fix them then.
Be Patient: Woodworking and painting projects are often about patience. Rushing steps will lead to a less desirable outcome.
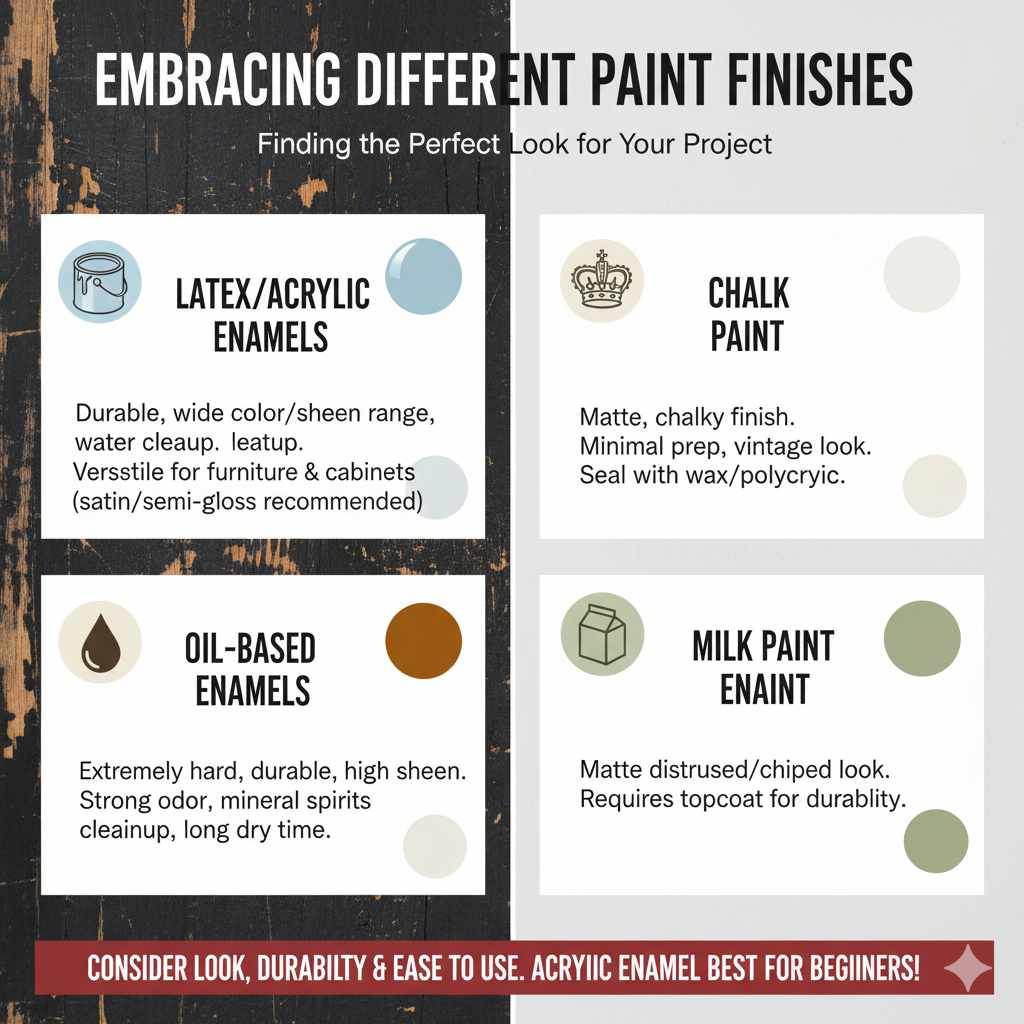
Embracing Different Paint Finishes
Once your primer is down and you’re ready to paint, you have a world of options!
Latex/Acrylic Enamels: These are very popular for furniture and cabinets. They provide a durable finish, come in a wide range of colors and sheens (matte, satin, semi-gloss, gloss), and clean up easily with water. Satin or semi-gloss are often preferred for cabinets and furniture as they offer a good balance of cleanability and less shine than gloss.
Chalk Paint: Known for its matte, chalky finish, it often requires minimal prep and can give a lovely vintage or French country look. It’s typically sealed with wax or a polycrylic topcoat.
Oil-Based Enamels: These offer an extremely hard and durable finish, often with a beautiful sheen. However, they have a strong odor, require mineral spirits for cleanup, and have longer drying times.
Milk Paint: Similar to chalk paint, it produces a matte, sometimes chipped or distressed look. It usually requires a topcoat for durability.
When selecting your paint, consider the look you want, the durability needed for the item, and your comfort level with application and cleanup. For beginners, a good quality water-based acrylic enamel is often the easiest to work with.
Frequently Asked Questions About Painting Over Lacquer
Q1: Do I really need to sand lacquer? Can’t I just paint over it?
You can technically paint over lacquer without sanding, but it’s highly NOT recommended. Lacquer creates a smooth, often glossy surface. Without scuffing up this surface (sanding or using a deglosser), the new paint will have nothing to adhere to, leading to peeling and chipping very quickly. Proper preparation is key for a lasting finish.
Q2: What’s the difference between cleaning and deglossing?
Cleaning removes dirt, grease, and grime so your primer and paint can stick. Deglossing (sanding or using a liquid deglosser) creates a slightly rough, dull surface that paint can actually grip onto. Both are essential steps when painting over a slick finish like lacquer.
Q3: Can I use a spray can primer for this?
Yes, you can use spray can primers, especially if they are specifically designed for adhesion to challenging surfaces like glossy finishes. Look for terms like “bonding primer” or “all-surface primer.” You’ll still need to clean and degloss the surface first. Apply in thin, even coats and allow proper drying time between coats.
Q4: What if my lacquer is really old and cracked?
If the lacquer is significantly cracked, peeling, or damaged, it might be best to remove it first. You can use a chemical stripper designed for finishes (follow all safety instructions carefully and work in a well-ventilated area). Once the old lacquer is removed, you can prep the raw wood according to typical woodworking finishing guidelines, which might involve sanding the wood itself and then priming and painting.
Q5: How many coats of paint do I need?
This depends on the color of your original lacquer, the color of your new paint, and the opacity of the paint itself. Typically, you’ll need at least two coats of paint for good coverage. For lighter colors over dark lacquer, or if you’re using a paint that’s less opaque, you might need three or even more thin coats. Always apply thin coats and let them dry completely between applications.
Q6: How long does it take for the paint to be fully cured and durable?
Paint feels dry to the touch within hours, but it takes much longer to cure and reach its maximum hardness. This curing time can range from 7 to 30 days or even longer, depending on the type of paint and environmental conditions (temperature, humidity). During this curing period, be extra gentle with the painted surface to avoid damage. For more information on paint curing, check out resources from paint manufacturers like Sherwin-Williams on Paint Drying and Curing Times.
Conclusion: Your Refreshed Piece Awaits!
See? Painting over lacquer is entirely achievable for the DIY enthusiast. By diligently cleaning, preparing the surface to create adhesion, applying a quality primer, and then laying down your chosen paint in thin, even coats, you can successfully transform any lacquered item. Remember that patience is your best tool throughout this process, especially during drying and curing times.
With these proven steps, you’re well on your way to giving your furniture or cabinets a beautiful, durable, and updated look without the need for extensive stripping or the cost of replacement. Enjoy your newly painted, refreshed pieces – you earned it!