Are Lawn Mower Blade Bolts Reverse Thread? Essential Guide
To determine if your lawn mower blade bolts are reverse threaded, a quick check often reveals they are NOT; standard right-hand threads are typical. However, some specific models might use reverse threads, so always verify by attempting to loosen the bolt counter-clockwise. If it tightens, it’s reverse threaded. This guide provides a clear, safe, and simple way to check and proceed.
Hello there! As a fellow DIY enthusiast and someone who loves a well-maintained lawn, I know the frustration that can come with simple, yet sometimes tricky, home maintenance tasks. One of those common headaches? Figuring out if those stubborn lawn mower blade bolts are going to loosen the normal way, or if you’re dealing with a reverse thread. It’s a question that pops up for many of us when it’s time to sharpen or replace our mower blades.
Getting this wrong can lead to stripped bolts or even injury. But don’t you worry! We’re going to walk through this together, step-by-step, so you can confidently tackle this task. We’ll make sure you know exactly how to check, and what to do next, ensuring your mower is ready to tackle that grass safely and efficiently.
Why This Question Matters: Safety and Efficiency
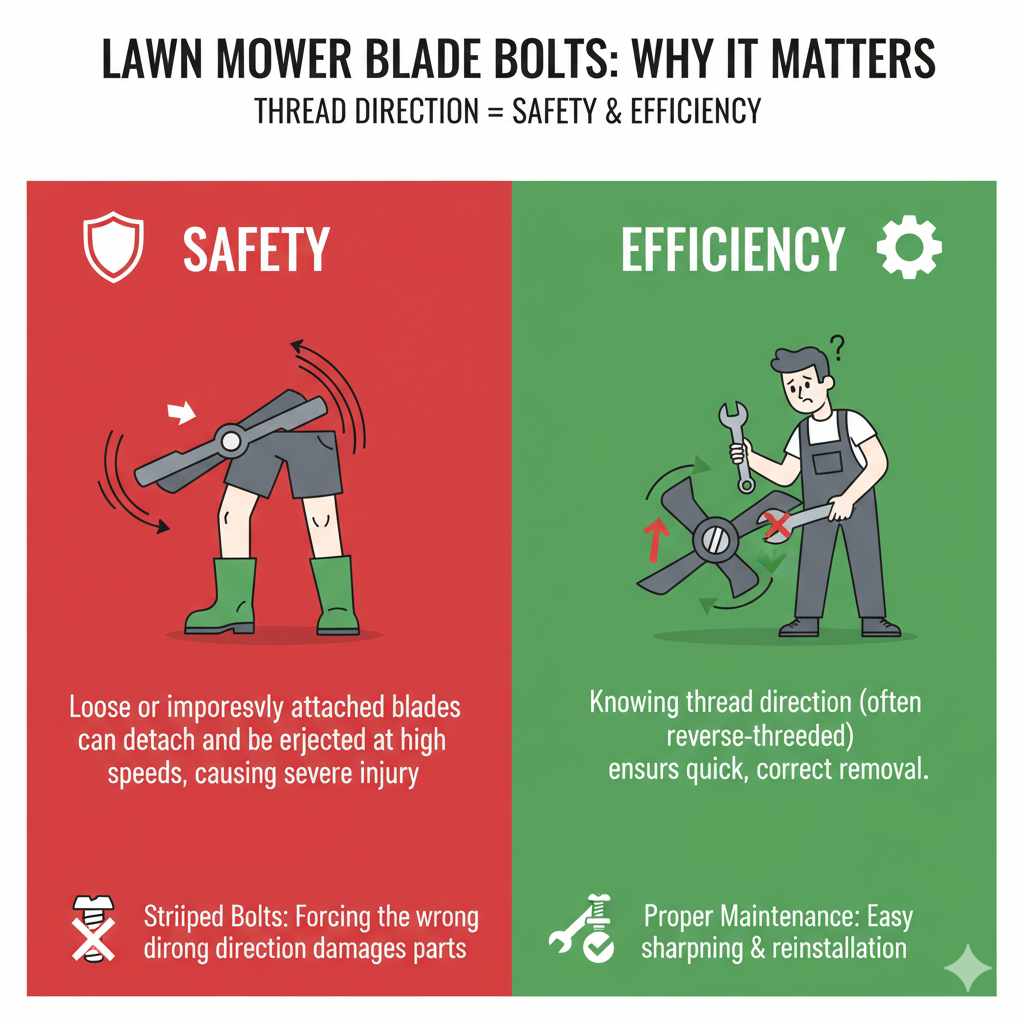
Understanding whether your lawn mower blade bolts are reverse threaded is more than just a technical detail; it’s crucial for both your safety and the efficiency of your mower maintenance. Imagine you’re ready to give your lawn mower blade that much-needed sharpening. You grab your wrench, apply what you think is the correct force in the usual loosening direction (counter-clockwise), and instead of coming free, the bolt seems to get tighter. This is where the confusion and potential for error arise.
If you continue to force the bolt in the wrong direction, you risk stripping the bolt head, which can turn a quick job into a salvage operation. Worse, improperly tightened or loose blades are a serious safety hazard. A blade that detaches while the mower is running can cause significant damage to the mower itself and, more importantly, can be ejected with dangerous velocity, posing a severe risk to anyone nearby. Knowing the thread direction ensures you can safely remove and reinstall your blade correctly, keeping your mower in optimal working order and protecting yourself and others.
Understanding Thread Types: A Clear Distinction
Before we dive into checking your specific mower, let’s get a good grasp on what standard and reverse threads are. This is fundamental to many mechanical tasks, not just mower maintenance.
Standard (Right-Hand) Threads
This is what you’ll encounter most of the time. Standard threads, also known as right-hand threads, follow the common “righty-tighty, lefty-loosey” rule. When you turn a bolt with standard threads counter-clockwise, it loosens. When you turn it clockwise, it tightens. Think of most screws you use in woodworking or common nuts and bolts you use around the house; they all work this way. This is designed for intuitive use and is the default for most applications.
Reverse (Left-Hand) Threads
Reverse threads, or left-hand threads, operate in the opposite manner. To loosen a bolt with reverse threads, you must turn it clockwise. To tighten it, you turn it counter-clockwise. This might seem counter-intuitive at first, but it’s often used in specific applications where rotation might otherwise loosen a standard bolt. For example, on a bicycle pedal, the non-drive side pedal has reverse threads to prevent it from loosening when pedaling.
How to Determine if Your Lawn Mower Blade Bolts are Reverse Threaded
Now, let’s get hands-on and figure out your mower’s specific situation. The good news is, this process is straightforward and requires minimal tools. Safety first, as always!
Step 1: Safety First! Disconnect Power and Secure the Mower
This is the absolute most critical first step. Never attempt to remove a mower blade while the engine is connected or the spark plug is in place.
- Disconnect the Spark Plug: Locate the spark plug wire connected to the engine and pull it off firmly. This prevents the engine from accidentally starting.
- Secure the Mower: You need to prevent the blade from spinning freely while you try to loosen the bolt. There are a few ways to do this:
- Wooden Block: The simplest method is to wedge a thick piece of wood (like a 2×4 or a scrap of lumber) between the mower deck and the blade, on the side opposite where you’ll be applying force. Make sure it’s wedged securely.
- Blade Stop Tool: Some manufacturers offer specialized blade stop tools. These are designed to hold the blade securely while you work.
- Block of Wood Under Deck: For some mowers, especially walk-behinds, you might be able to rest the deck securely on a sturdy block of wood, allowing the wheels to bear the weight and keeping the deck stable.
- Tilt the Mower (Carefully): If you need better access, you might need to tilt the mower. For most walk-behind mowers, tilt it so the carburetor and air filter are facing upwards. This prevents oil or fuel from leaking into the wrong places. If you have a riding mower, consult your owner’s manual for the correct procedure. Ensure it’s stable on its side or tilted position.
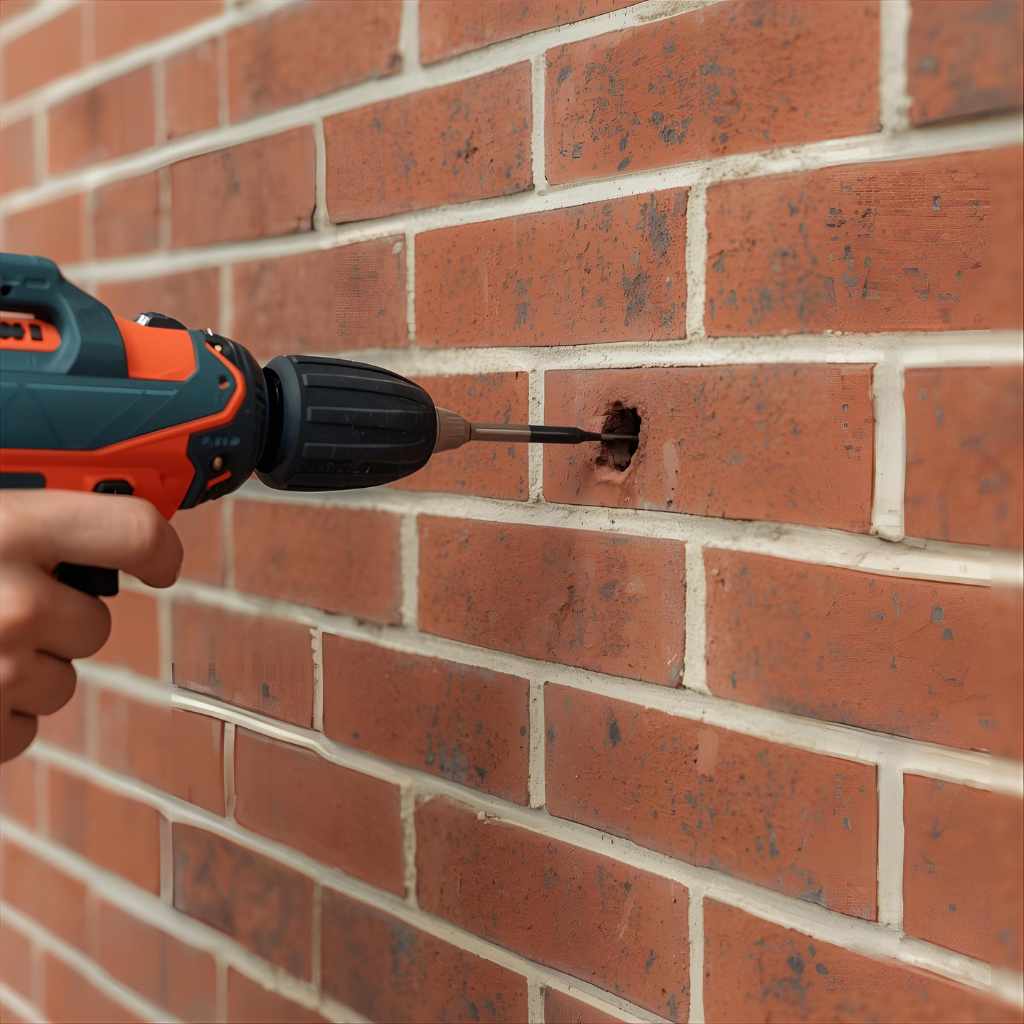
Step 2: Identify the Blade Bolt
Look directly under the mower deck. You’ll see the blade attached to the crankshaft by a central bolt. This is what we need to address.
Step 3: The “Test and See” Method – The Most Reliable Way
This is the most direct and accurate way to find out. Don’t rely on assumptions or what a friend said about their mower. Each one can be different.
- Gather Your Tools: You might need a socket wrench or an adjustable wrench. The bolt head will likely be hexagonal. Ensure the wrench fits snuggly to avoid stripping the head.
- Position Your Wrench: Place the wrench onto the bolt head.
- Apply Gentle Pressure (Counter-Clockwise First): Try turning the bolt gently counter-clockwise. This is the standard direction for loosening.
- If it Loosens: Congratulations! It’s a standard thread. Keep going until the blade is free.
- If it TIGHTENS or Doesn’t Budge Easily: This is your cue to suspect a reverse thread.
- Stop immediately. Do not force it further in this direction.
- Gently try turning it clockwise. This is the direction for loosening a reverse thread.
Step 4: Confirm and Remove the Blade
Once you’ve identified the correct direction:
- Loosen Completely: Continuing in the correct direction, loosen the bolt the rest of the way. Keep track of any washers or lock plates that come off with the bolt.
- Remove Blade: Once the bolt is out, you can carefully pull the blade away from the mower deck. Note the orientation of the blade (which side is up/down) for proper reinstallation.
Why Are Some Mower Bolts Reverse Threaded?
The primary reason behind using reverse threads on lawn mower blades, though less common than standard threads, is to prevent the bolt from loosening due to the rotational forces of the blade during operation. A blade spins very rapidly, and this constant motion generates significant force. On a standard thread, the direction of rotation can, over time, work the bolt loose. A reverse thread is designed so that the blade’s rotational force actually helps to tighten the bolt, making it more secure.
This is a clever engineering solution to ensure blade security. However, it’s important to reiterate that most manufacturers still opt for standard threads, perhaps balancing security with ease of maintenance. The best practice is always to check your specific model.
Common Lawn Mower Blade Bolt Sizes and Types
While there’s no single universal size, many lawn mower blade bolts are fairly standard. Knowing these can help you have the right tools ready. Manufacturers use specific bolts to ensure the blade is attached securely to the mower’s spindle.
| Common Bolt Size (Diameter x Length) | Common Thread Pitch | Typical Tool Size (Hex Socket) | Thread Direction |
|---|---|---|---|
| 5/16″ x 1-1/2″ | 18 TPI (Threads Per Inch) | 1/2″ or 13mm | Standard (Most Common) |
| 3/8″ x 1-1/2″ | 16 TPI | 9/16″ or 14mm | Standard (Common) |
| M8 x 40mm | Metric (e.g., 1.25mm pitch) | 13mm or 15mm | Standard (Common on some global models) |
| 1/2″ x 2″ | 13 TPI | 3/4″ or 19mm | Standard (Often on larger/commercial mowers) |
| Varies (Manufacturer Specific) | Varies | Varies | Occasional Reverse Thread |
Note: TPI stands for Threads Per Inch. This table provides common examples. Always confirm the exact size and type for your specific model, as variations exist across brands like John Deere, Toro, Craftsman, and Honda.
Tools You’ll Need for Blade Maintenance
Having the right tools on hand makes any DIY job smoother. For changing or sharpening your lawn mower blade, here’s a basic but effective toolkit:
- Safety Glasses: Absolutely essential to protect your eyes from debris.
- Work Gloves: Protect your hands from sharp edges and grime.
- Wrench or Socket Set: You’ll need the correct size to fit the blade bolt. Common sizes are in the 1/2-inch, 9/16-inch, 5/8-inch range, or metric equivalents. A socket wrench with an extension can be very helpful.
- Torque Wrench: Crucial for reinstalling the blade bolt to the manufacturer’s specified tightness. Over-tightening can damage the spindle, while under-tightening is a safety risk. You can find specifications in your owner’s manual.
- Blade Sharpening Tool: This could be a file, a bench grinder, or a dedicated blade sharpener.
- Balancing Tool: After sharpening, it’s vital to balance the blade to prevent mower vibration. A simple blade balancer is inexpensive and effective.
- Sturdy Block of Wood: As mentioned, for holding the blade still while loosening/tightening.
- Owner’s Manual: Your best friend for specific torque values and procedures.
Reinstalling the Blade: Crucial Steps for Safety
Putting the blade back on requires just as much care as taking it off. Proper installation ensures your mower works correctly and safely.
- Clean the Mower Deck: While you have the blade off, scrape away any grass and debris from the underside of the mower deck. This helps with airflow and prevents build-up.
- Install the Blade Correctly: Note the “grass side” of the blade (often indicated by a part number or slight curve). The sharpened edge should face AWAY from the deck, towards the ground. The “cup” or “domed” side of the blade should face UP towards the mower deck.
- Secure with Bolt and Washers: Place the blade back onto the spindle. Reinstall any washers or anti-rotation plates in the correct order. Then, thread the blade bolt back in.
- Tighten by Hand: Start by threading the bolt in by hand to ensure it’s not cross-threaded.
- Loosen the Blade Stop: Remove the wooden block or blade stop tool.
- Torque the Bolt: This is where the torque wrench comes in. Consult your owner’s manual or a reliable online resource for the specific torque specification for your mower model. For example, many residential walk-behind mowers require around 50-100 foot-pounds of torque (ft-lbs). Riding mowers might differ significantly. Tighten the bolt to the specified torque. Remember:
- If the bolt is reverse threaded, you will be turning it counter-clockwise to tighten.
- If it’s standard threaded, you will be turning it clockwise to tighten.
- Final Check: Once torqued, give the blade a good wiggle to ensure it’s firmly seated and secure.
- Reconnect Spark Plug: Reattach the spark plug wire.
Troubleshooting Common Blade Bolt Issues
Even with the best intentions, you might run into a few snags. Here are some common problems and how to solve them:
Stubborn Bolt
If a bolt is exceptionally tight and difficult to loosen, even after confirming thread direction:
- Ensure your wooden block is securely in place.
- Try using a longer-handled wrench or a breaker bar for more leverage.
- Apply a penetrating oil (like WD-40 or PB Blaster) to the bolt threads. Let it sit for 15-30 minutes (or longer for severely rusted bolts) and try again.
- If it still won’t budge, consider using an impact wrench if you have one, but be cautious not to overtighten upon reassembly.
Stripped Bolt Head
If the wrench slips and starts to round off the bolt head:
- Stop immediately.
- Try using a bolt extractor socket, which has internal flutes designed to grip rounded-off heads.
- If all else fails, you might need to use a Dremel or hacksaw to cut a new slot for a flathead screwdriver, or even resort to drilling out the bolt. It’s often worth seeking professional help at this stage.
Blade Wobble After Installation
If the blade still feels loose or wobbly after tightening:
- Double-check that all washers and mounting hardware are in place and oriented correctly.
- Ensure you are using the correct torque specification for your model.
- The spindle itself might be damaged, which would require professional assessment.
When to Call a Professional
While many mower repairs and maintenance tasks are perfectly doable for the DIY homeowner, some situations are best left to the experts. If you:
- Are unsure about any step, especially regarding safety.
- Encounter a stripped bolt that you can’t remove.
- Suspect damage to the spindle or other internal components.
- Don’t have the right tools (especially a torque wrench).
- Are simply not comfortable performing the task.
It’s always better to err on the side of caution. A local service center can handle these issues quickly and safely. For instance, you can often find qualified mower repair services through resources like your local hardware store or even online searches for “[your city] lawn mower repair”. Reputable manufacturers like Briggs & Stratton and Honda also maintain lists of authorized service centers on their websites.

Frequently Asked Questions (FAQ)
Q1: Do all lawn mower blade bolts have reverse threads?
No, most lawn mower blade bolts use standard right-hand threads. However, some specific models or manufacturers might use reverse threads to help keep the bolt from loosening under the stress of the blade’s rotation. It’s always best to check your specific mower.
Q2: How can I tell if a bolt is reverse threaded without trying to loosen it?
Visually, it’s very difficult to tell if a bolt is reverse threaded. The most reliable method is the “test and see” approach: try to loosen it (counter-clockwise). If it tightens, it’s reverse threaded. If it loosens, it’s standard. You can also look for markings on the bolt or spindle, but this isn’t always present or clear.
Q3: What happens if I try to unscrew a reverse thread bolt the normal way?
If you try to unscrew a reverse thread bolt counter-clockwise, it will tighten further into its seat. If you apply too much force, you risk stripping the head of the bolt, making it much harder to remove, or potentially damaging the threads on the spindle.
Q4: What if the blade bolt is rusted and won’t budge at all?
If a bolt is rusted, first ensure you have the correct tool and are turning in the correct direction. Apply a penetrating oil and let it soak in for a good amount of time (hours, or even overnight if possible).