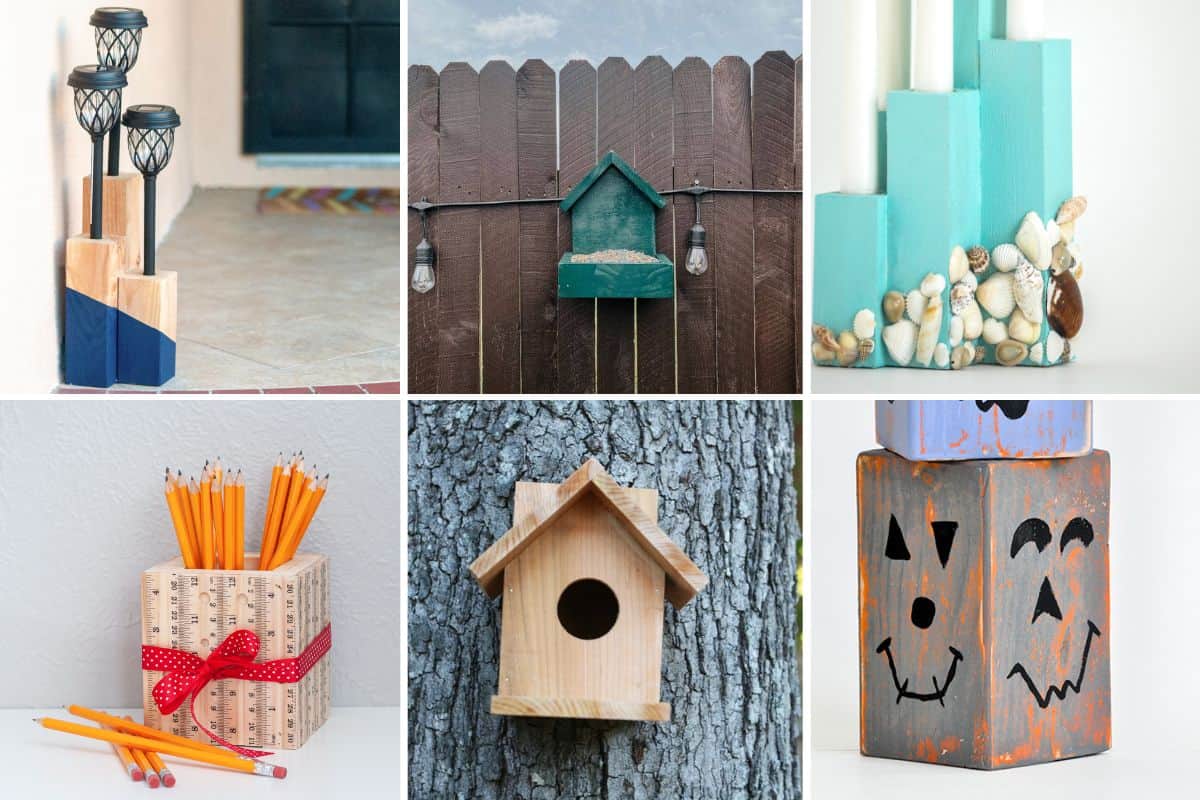
10 Creative DIY Projects Using Cedar Scrap Wood
Cedar scrap wood can be a treasure trove for DIY enthusiasts. This versatile wood offers endless possibilities for creative projects.
Cedar is known for its durability, pleasant aroma, and natural beauty. Even small pieces of cedar scrap can be transformed into functional or decorative items. Whether you’re a seasoned woodworker or a beginner, these projects can add charm to your home or garden.
With a little creativity and some basic tools, you can turn cedar scraps into unique pieces that reflect your style. These projects not only help you make the most of leftover wood but also contribute to sustainable practices by reducing waste. Ready to get started on some inspiring DIY ideas? Let’s explore ten creative ways to use cedar scrap wood.
Introduction To Cedar Scrap Wood
Cedar scrap wood is great for DIY projects. It is durable and beautiful. It also has a nice smell. You can find cedar scrap wood from many places. Builders often have extra pieces. Sometimes, you can get it for free.
Benefits Of Using Cedar
Cedar wood is resistant to bugs. It does not rot easily. This makes it perfect for outdoor projects. Cedar is also lightweight. You can move and cut it easily. It is great for beginners.
Sources Of Cedar Scrap Wood
Check with local builders. They often have leftover wood. Lumber yards may also have scraps. You can buy small pieces there. Another option is old furniture. Sometimes, people throw away cedar furniture. You can use these pieces for your projects.

Credit: evreka.co
Cedar Planters
Start with measuring your space. Pick a size that fits well. Remember, cedar planters can be any size. Small ones are great for herbs. Bigger ones are good for flowers and shrubs. Think about the plants you want to grow. Larger plants need more room. Make sure the planter can hold enough soil. This helps plants grow strong. Don’t forget to leave space for roots. Planters should have enough depth. This ensures proper growth. A good size makes a happy plant.
Gather your cedar scrap wood. Cut the pieces to your desired size. Make sure all pieces are even. Sand the edges for smoothness. Assemble the base first. Use nails or screws to join pieces. Attach the sides to the base. Ensure they are secure. Add the remaining sides. Check for stability. Drill holes in the bottom. This allows water to drain. Fill with soil. Plant your favorite seeds or plants. Water them regularly. Enjoy your new cedar planter.
Birdhouses
Cedar scrap wood is perfect for birdhouses. It lasts long outdoors. You can create simple box shapes. Or make them fancy with small details. Paint them bright colors. Birds will love them. Add a perch for the birds to rest.
Measure your wood pieces carefully. Use a saw for straight cuts. Sand the edges to make them smooth. Drill small holes for nails. Use wood glue for extra strength. Make sure the roof can lift off. This makes cleaning easy. Attach the birdhouse to a pole or tree. Use screws to secure it well.
Cedar Coasters
Cedar coasters can be made in many shapes. You can cut them into squares, circles, or even hexagons. Simple shapes make the project easy. They are perfect for beginners. Use a saw to cut the wood. Sand the edges to make them smooth.
Apply a coat of varnish to protect the wood. This also makes the coasters shine. You can also add felt pads to the bottom. This helps to prevent scratches on your table. Personalize the coasters by burning designs into the wood. Use a wood-burning tool for this step. Your coasters will be unique.
Picture Frames
Use a sharp saw for clean cuts. Measure twice, cut once. Ensure pieces are evenly sized. Sand edges to prevent splinters. Trim corners for a neat look. Practice on spare wood first.
Align pieces carefully. Use wood glue for strong bonds. Clamp until dry. Add nails for extra support. Ensure frame is square. Attach backing securely. Paint or stain for a finished look.
Credit: www.anikasdiylife.com
Shelving Units
Start by measuring your wall space. Use a tape measure for accuracy. Write down the measurements. Next, mark your cedar scrap wood. Use a pencil for marking. Cut the wood to size using a saw. Be careful while cutting. Safety first!
Choose mounting brackets for your shelves. Use metal brackets for strength. Wooden brackets can add a rustic look. Measure the spacing for the brackets. Use a level to ensure even placement. Drill holes for the brackets. Screw the brackets into the wall. Place your cut wood on the brackets. Secure it in place. Enjoy your new shelves!
Garden Trellis
Think about your garden space first. How big is the area? Cedar wood is a great choice because it’s durable. It also looks nice. Decide on the height and width of the trellis. Make sure it’s strong enough for your plants. Climbing plants need good support. Choose a simple design for easy building. Use measurements that fit your garden best. Always plan before you start cutting wood. Cedar wood is easy to work with. It’s good for outdoor projects.
First, gather all your tools. You will need a saw, hammer, and nails. Measure and cut the cedar wood. Make sure each piece is the right size. Next, create the frame of the trellis. Nail the pieces together carefully. Check that the frame is sturdy. Then, add the crossbars. These will help the plants climb. Space the crossbars evenly. Finally, sand the edges to smooth them. Your garden trellis is ready to use.
Credit: www.youtube.com
Cedar Signs
Cedar scrap wood can make beautiful signs. Try using pieces with unique shapes. They add charm. Paint simple messages or words. “Welcome” or “Home Sweet Home” look great. You can also use stencils for neat letters. Consider adding small hooks for keys. This makes the sign useful too.
Engraving on cedar wood looks stylish. Use simple tools to carve letters. Start with easy designs. Hearts or stars are good choices. Sand the wood before engraving. This gives a smooth surface. After carving, paint the letters. Use bright colors for a fun look. Protect your work with a clear sealant.
Cedar Herb Markers
Cedar herb markers are great for your garden. They help keep your herbs organized. Cedar wood is durable and lasts long. Write the herb names on the markers. Place them next to each plant. This makes it easy to know which herb is which. Cedar wood is naturally resistant to bugs. This keeps your garden safe and clean.
Cedar herb markers can be decorative too. Paint them in bright colors. Use stencils for fun designs. Add little drawings next to the herb names. Make them look pretty. This adds a nice touch to your garden. You can even use varnish for a shiny finish. Create unique and beautiful markers for your herbs.
Cedar Wall Art
Create unique patterns with cedar pieces. Try geometric shapes or abstract designs. These can add a special touch to any room. Mix different shades of cedar for a stunning effect. Small pieces can be arranged into mosaic designs. Let your imagination run wild.
Use strong adhesive to attach cedar art to walls. Nails or screws offer a more secure hold. Picture hangers can be used for easy removal. Command strips are an option for renters. Make sure the wall is clean and dry before mounting. This ensures the best adhesion.
Conclusion
Cedar scrap wood offers endless creative possibilities for DIY enthusiasts. Transform ordinary pieces into unique home decor. Craft stunning garden planters or rustic shelves. Experience the joy of making something special. Cedar’s natural beauty enhances every project. Simple tasks become rewarding creations.
Get inspired and start crafting today. Share your cedar projects with friends and family. Your creativity can inspire others. Enjoy the satisfaction of handmade works. Dive into the world of cedar DIY. Keep experimenting and discovering new ideas. Happy crafting with cedar scrap wood!